Counto Help & Support Center
Access guided demos and step-by-step walkthroughs across every Counto platform. Learn how to manage your ACRA compliance, IRAS tax, payroll, and daily operations.

Invoices
Create, send, and track customer invoices
Creating Invoices
How do I create Invoices?
The invoicing tool is integrated with your product catalogue and customer list to make billing seamless. Follow these steps to generate a professional invoice.
1
Initiate
Navigate to the Invoices tab and click the blue + New Invoice button. A side panel will slide out to capture the invoice details.
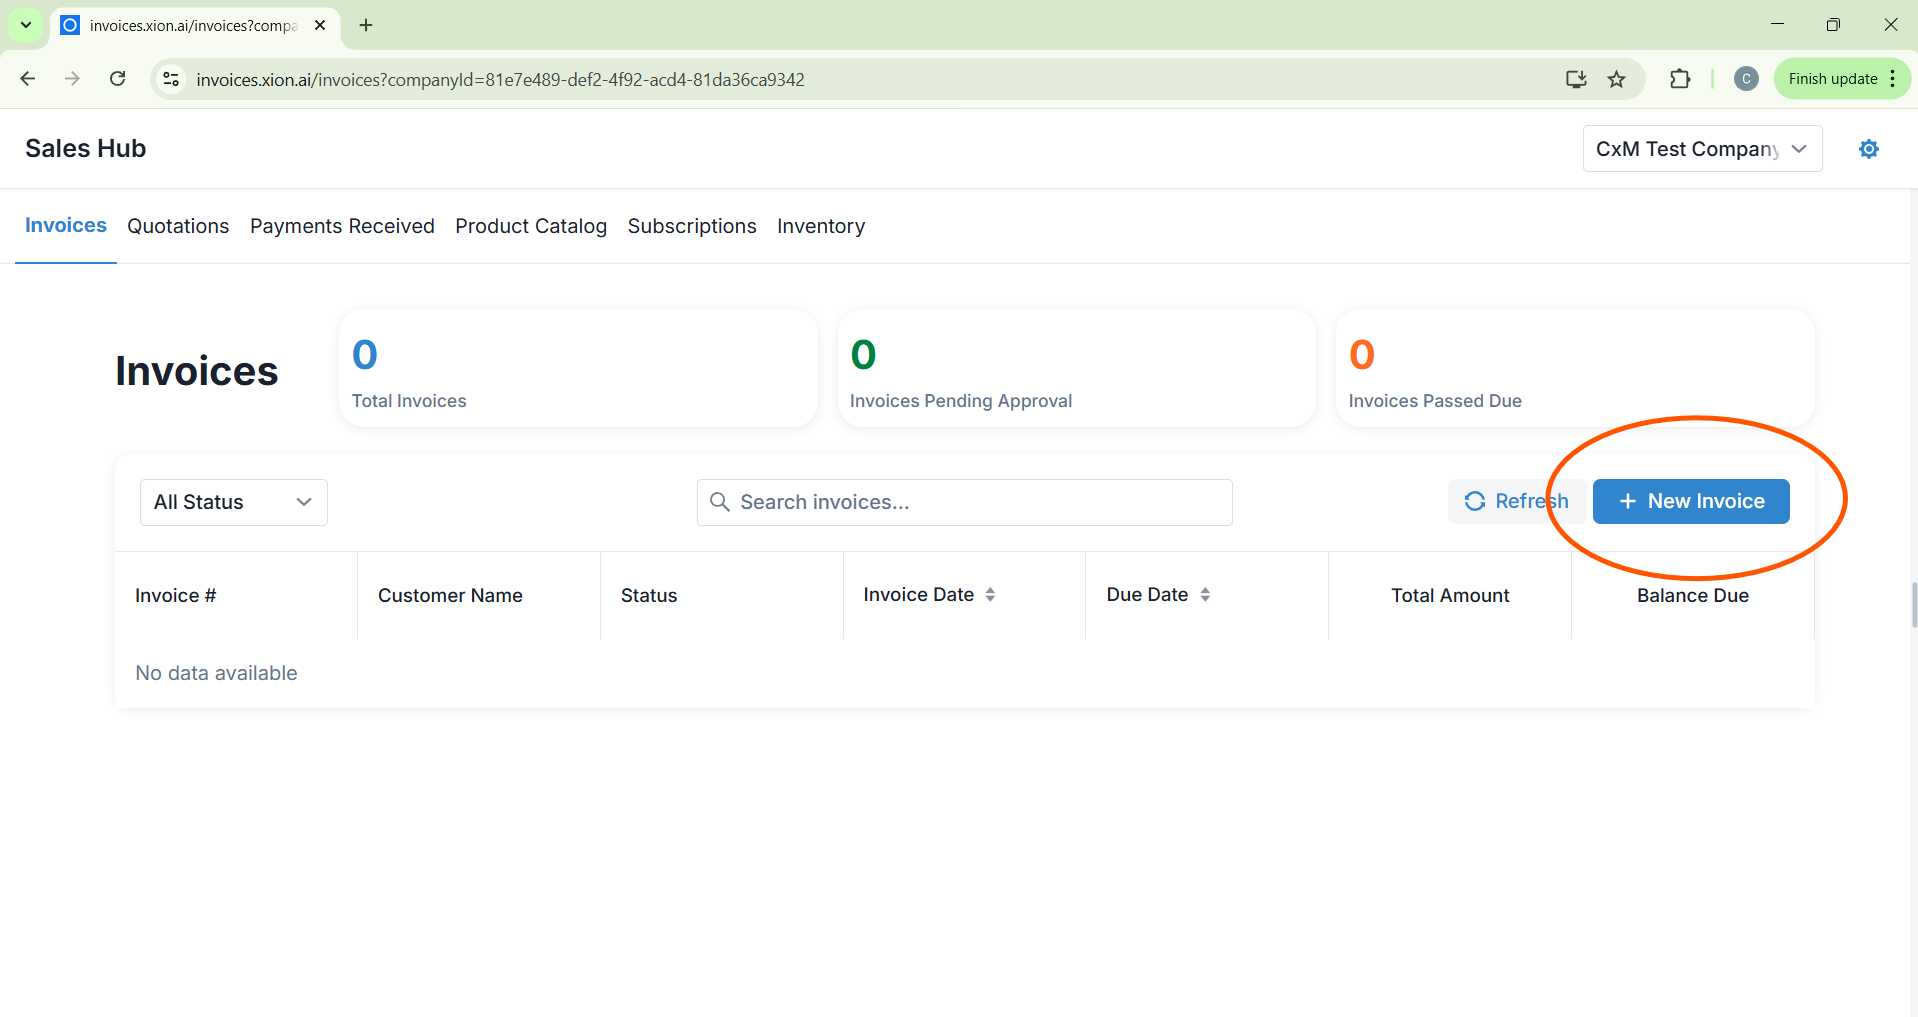
Navigate to the Invoices tab and click the blue + New Invoice button. A side panel will slide out to capture the invoice details.
2
Select Customer
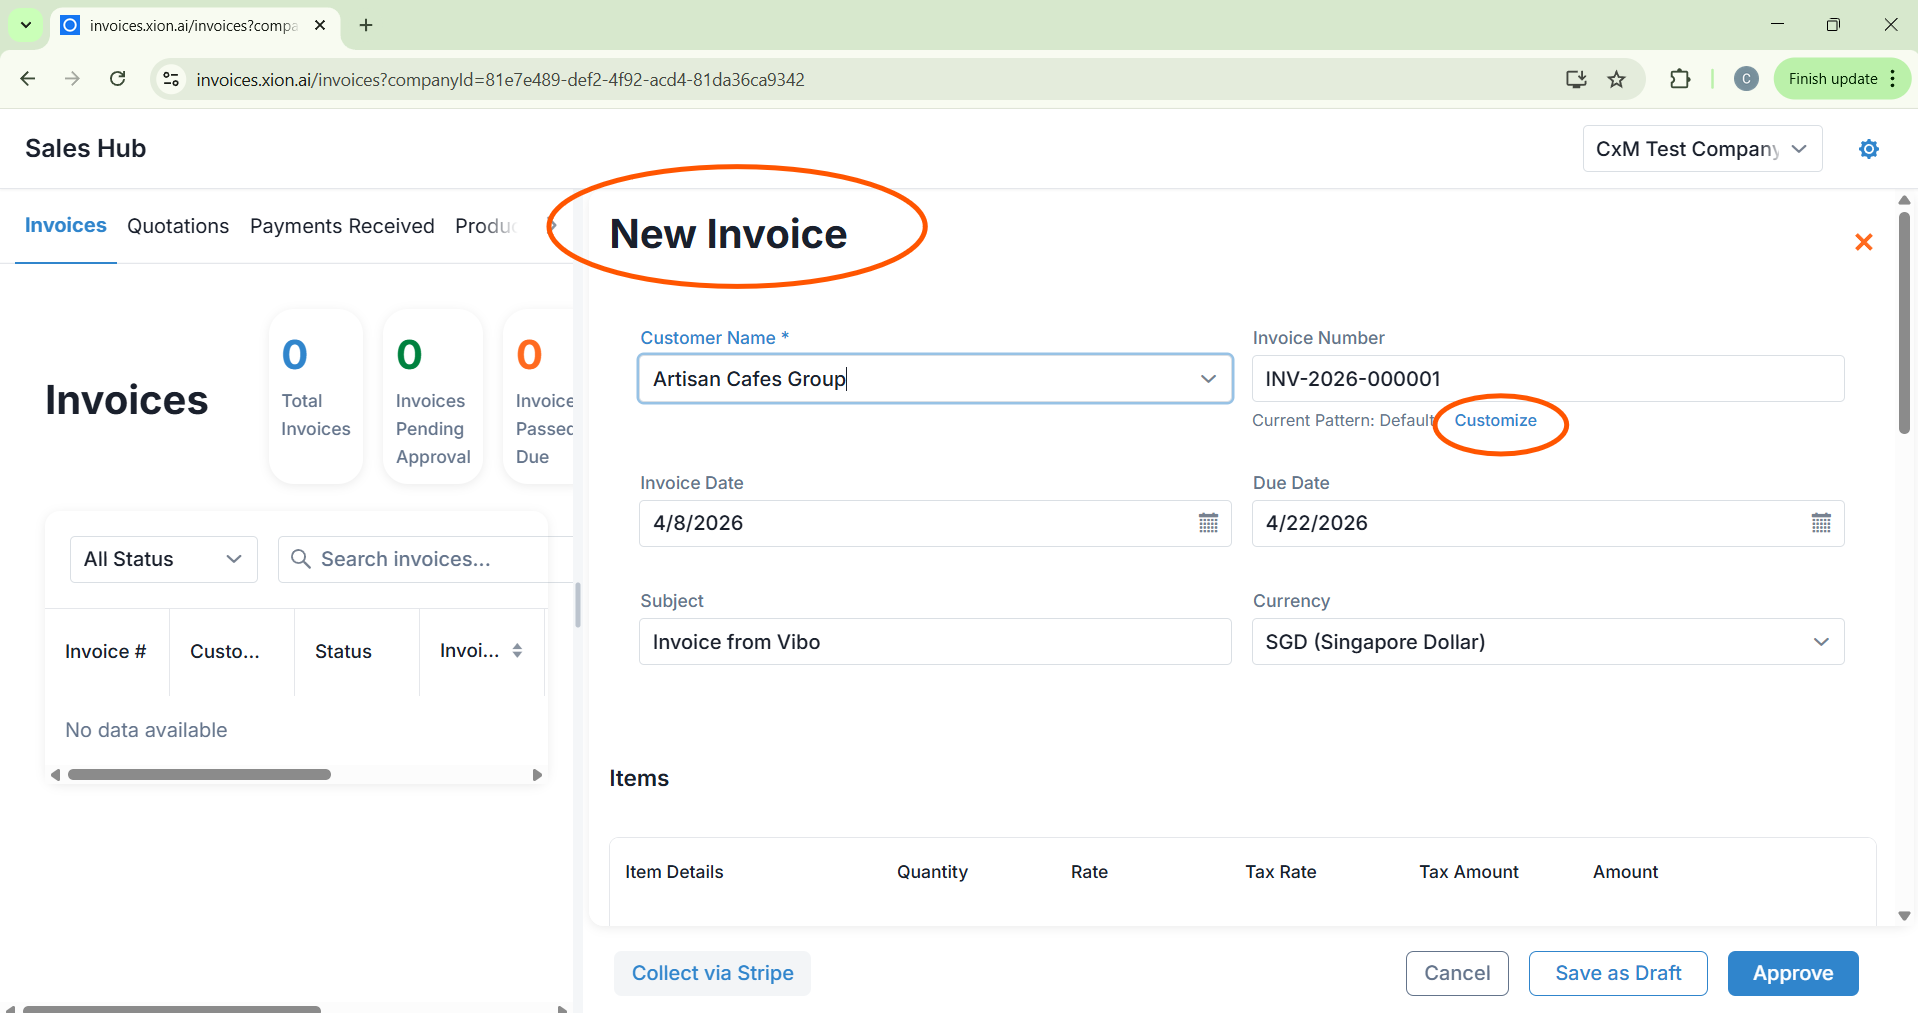
Choose your client from the Customer Name dropdown menu. The system will automatically link this invoice to their historical record.
Choose your client from the Customer Name dropdown menu. The system will automatically link this invoice to their historical record.
3
Numbering, Dates & Subject
- Invoice Number: Use the default or click Customise to define a pattern using placeholders like {YEAR} and {NUMBER}.
- Timing: Input the Invoice Date and Due Date.
- Subject: Add a descriptive title to help the client identify the bill at a glance.

4
Add Items
Click + Add New Row to select items from your Product Catalogue. You can adjust quantities or remove items using the trash icon.
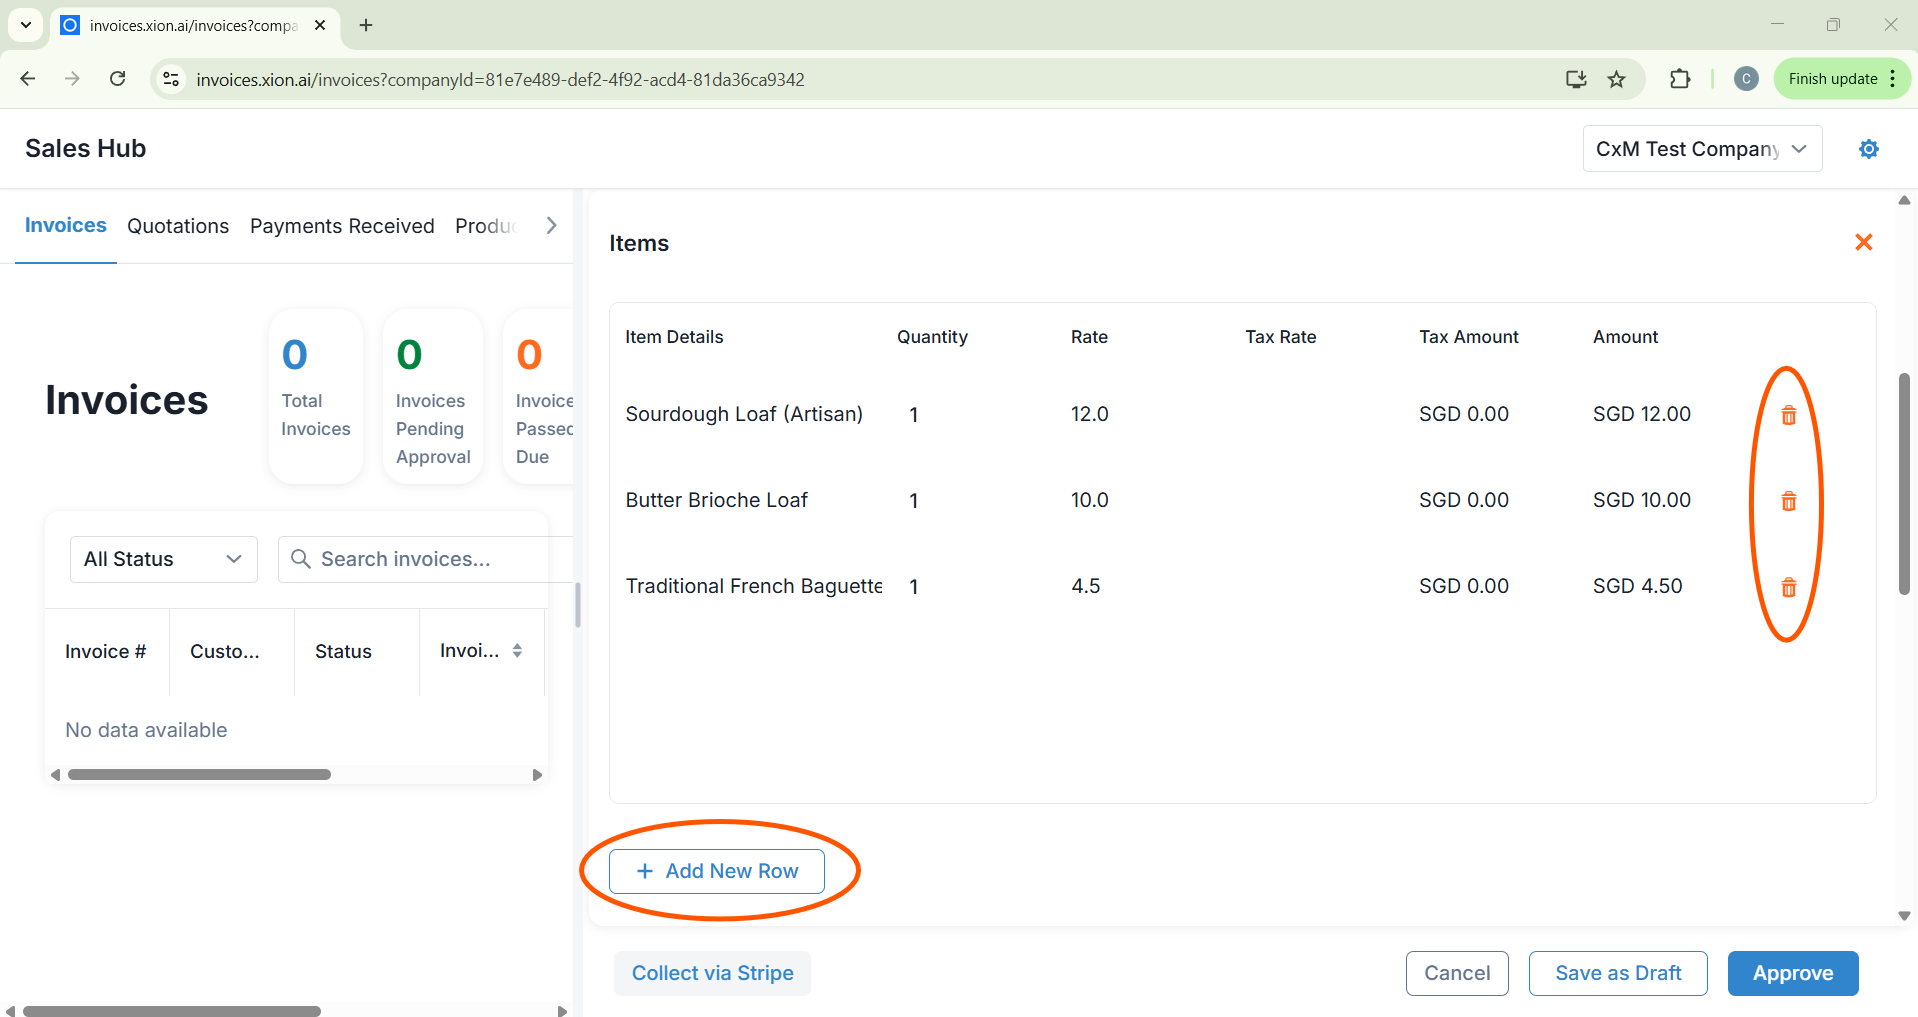
Click + Add New Row to select items from your Product Catalogue. You can adjust quantities or remove items using the trash icon.
5
Finalise Details
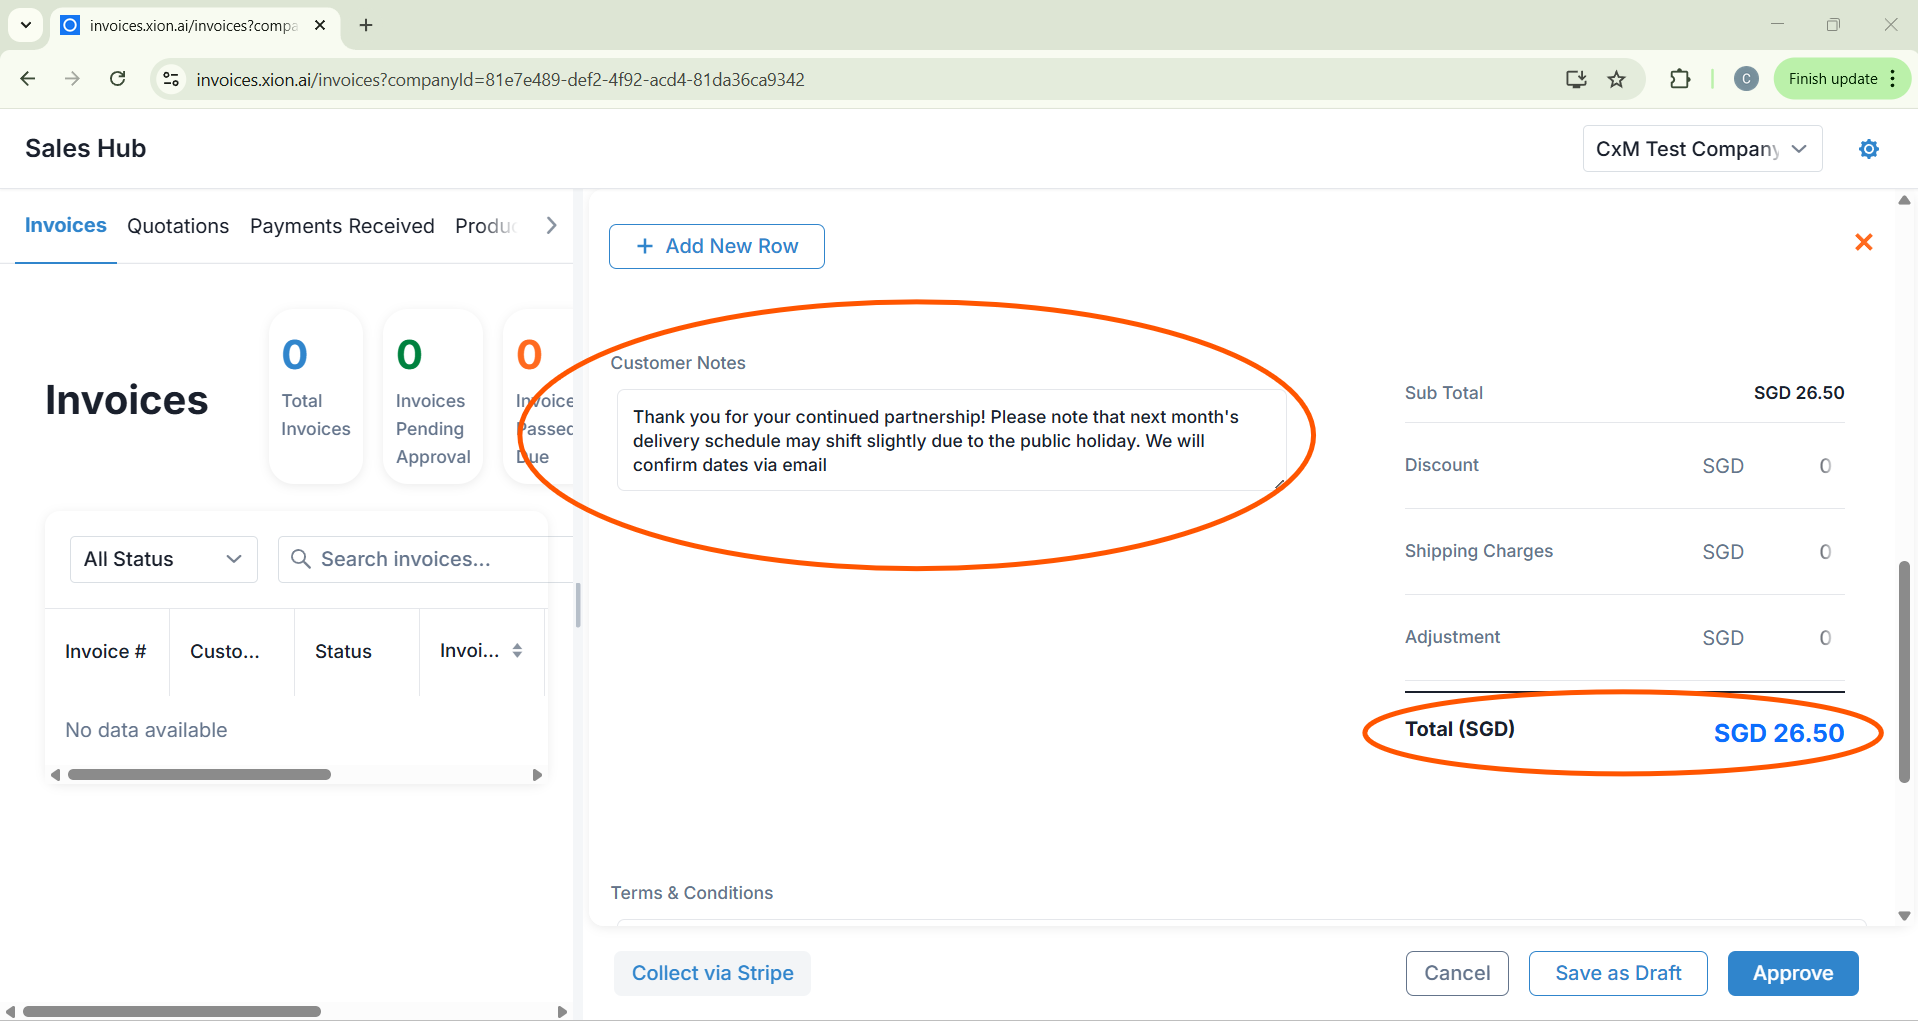
- Notes: Add messages or updates in Customer Notes.
- Adjustments: The system automatically calculates the Sub Total. You can manually enter Discounts, Shipping, or Adjustments.
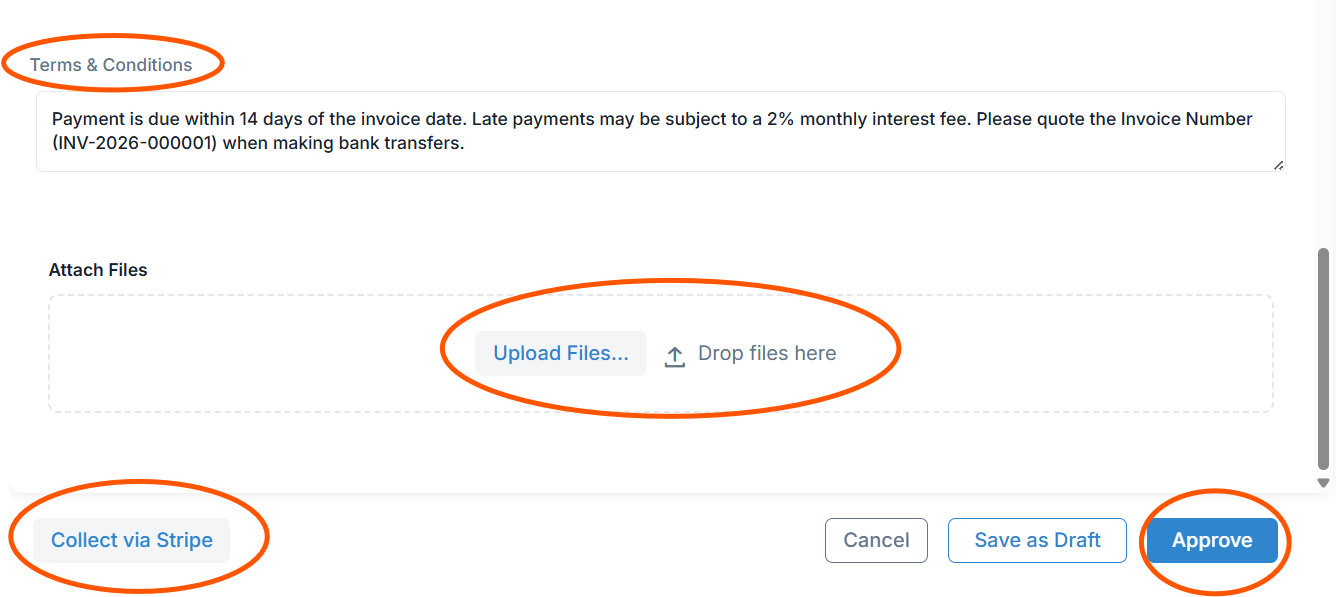
- T&Cs: Insert specific payment terms in the provided text area.
- Attachments: Drag and drop or upload supporting documents directly to the invoice.
6
Submit & Verify
Choose Collect via Stripe for instant payment or click Approve. A success notification will confirm the creation, and the ledger will refresh.

Choose Collect via Stripe for instant payment or click Approve. A success notification will confirm the creation, and the ledger will refresh.