Counto Help & Support Center
Access guided demos and step-by-step walkthroughs across every Counto platform. Learn how to manage your ACRA compliance, IRAS tax, payroll, and daily operations.

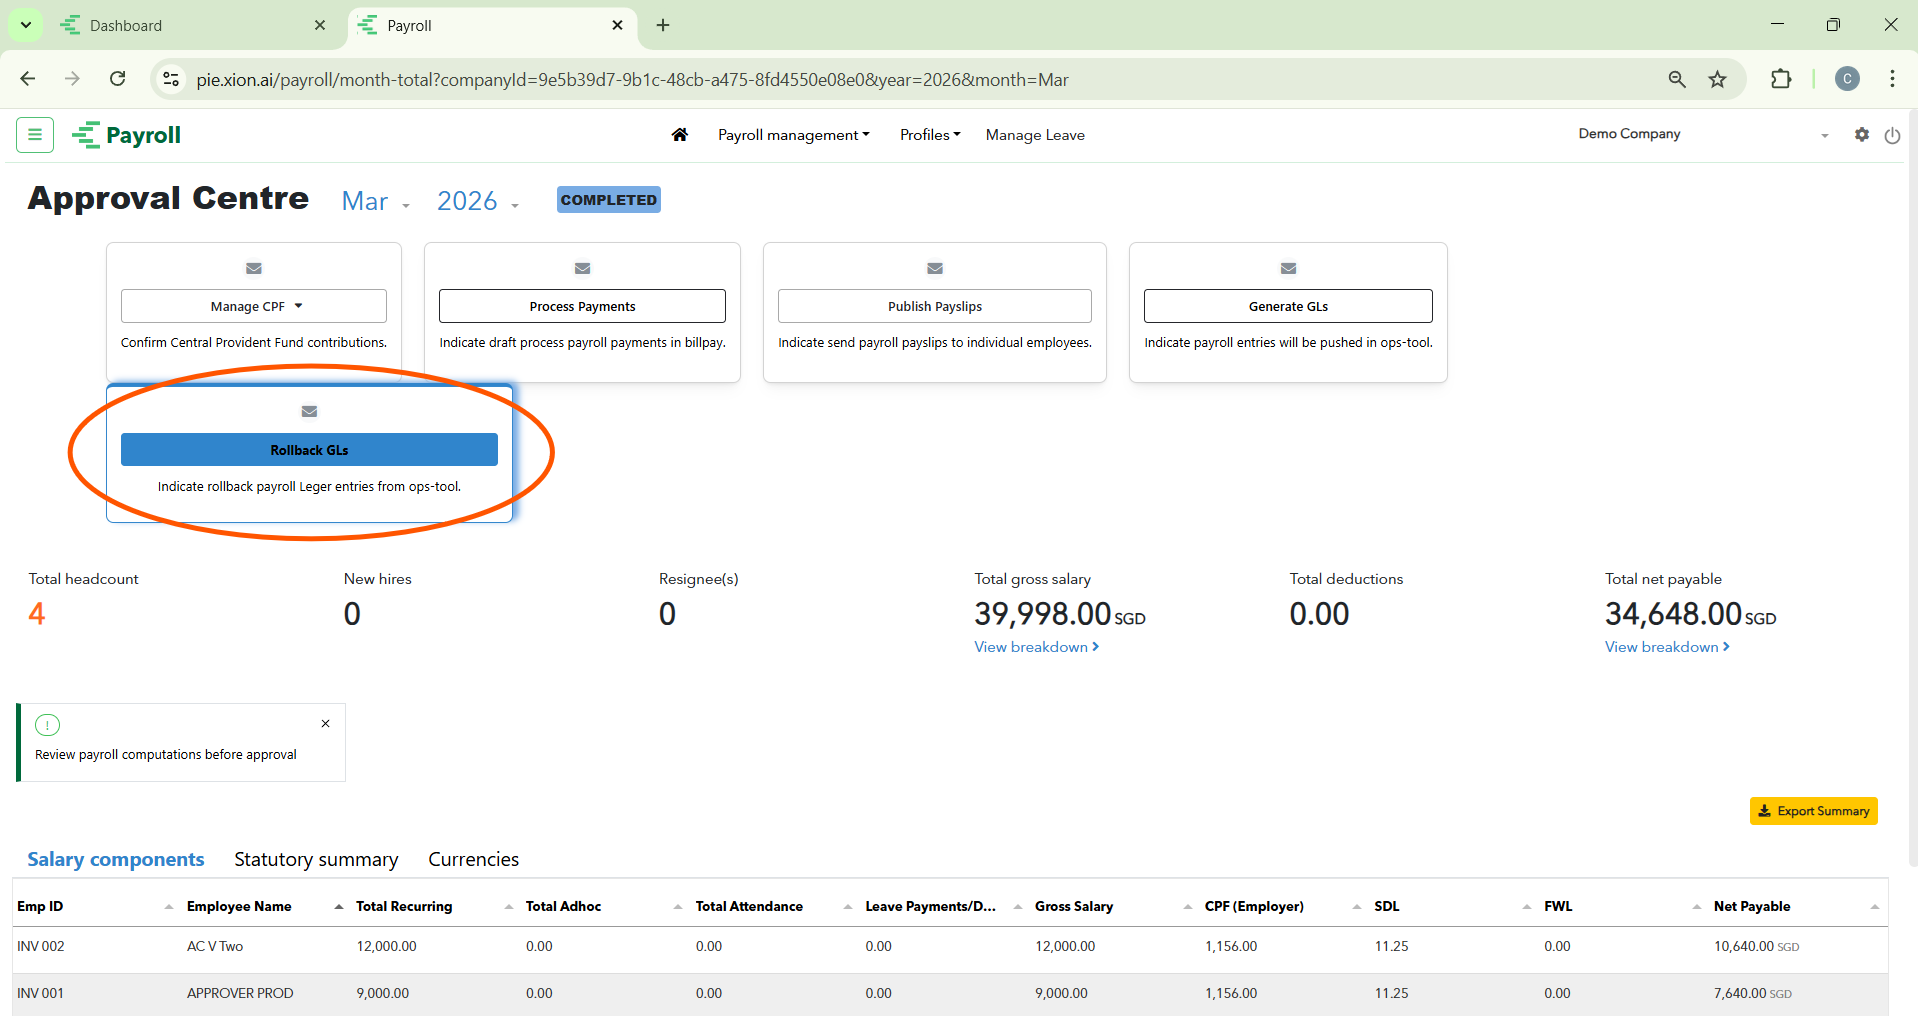
Post-Approval Actions
What happens after the payroll is approved?
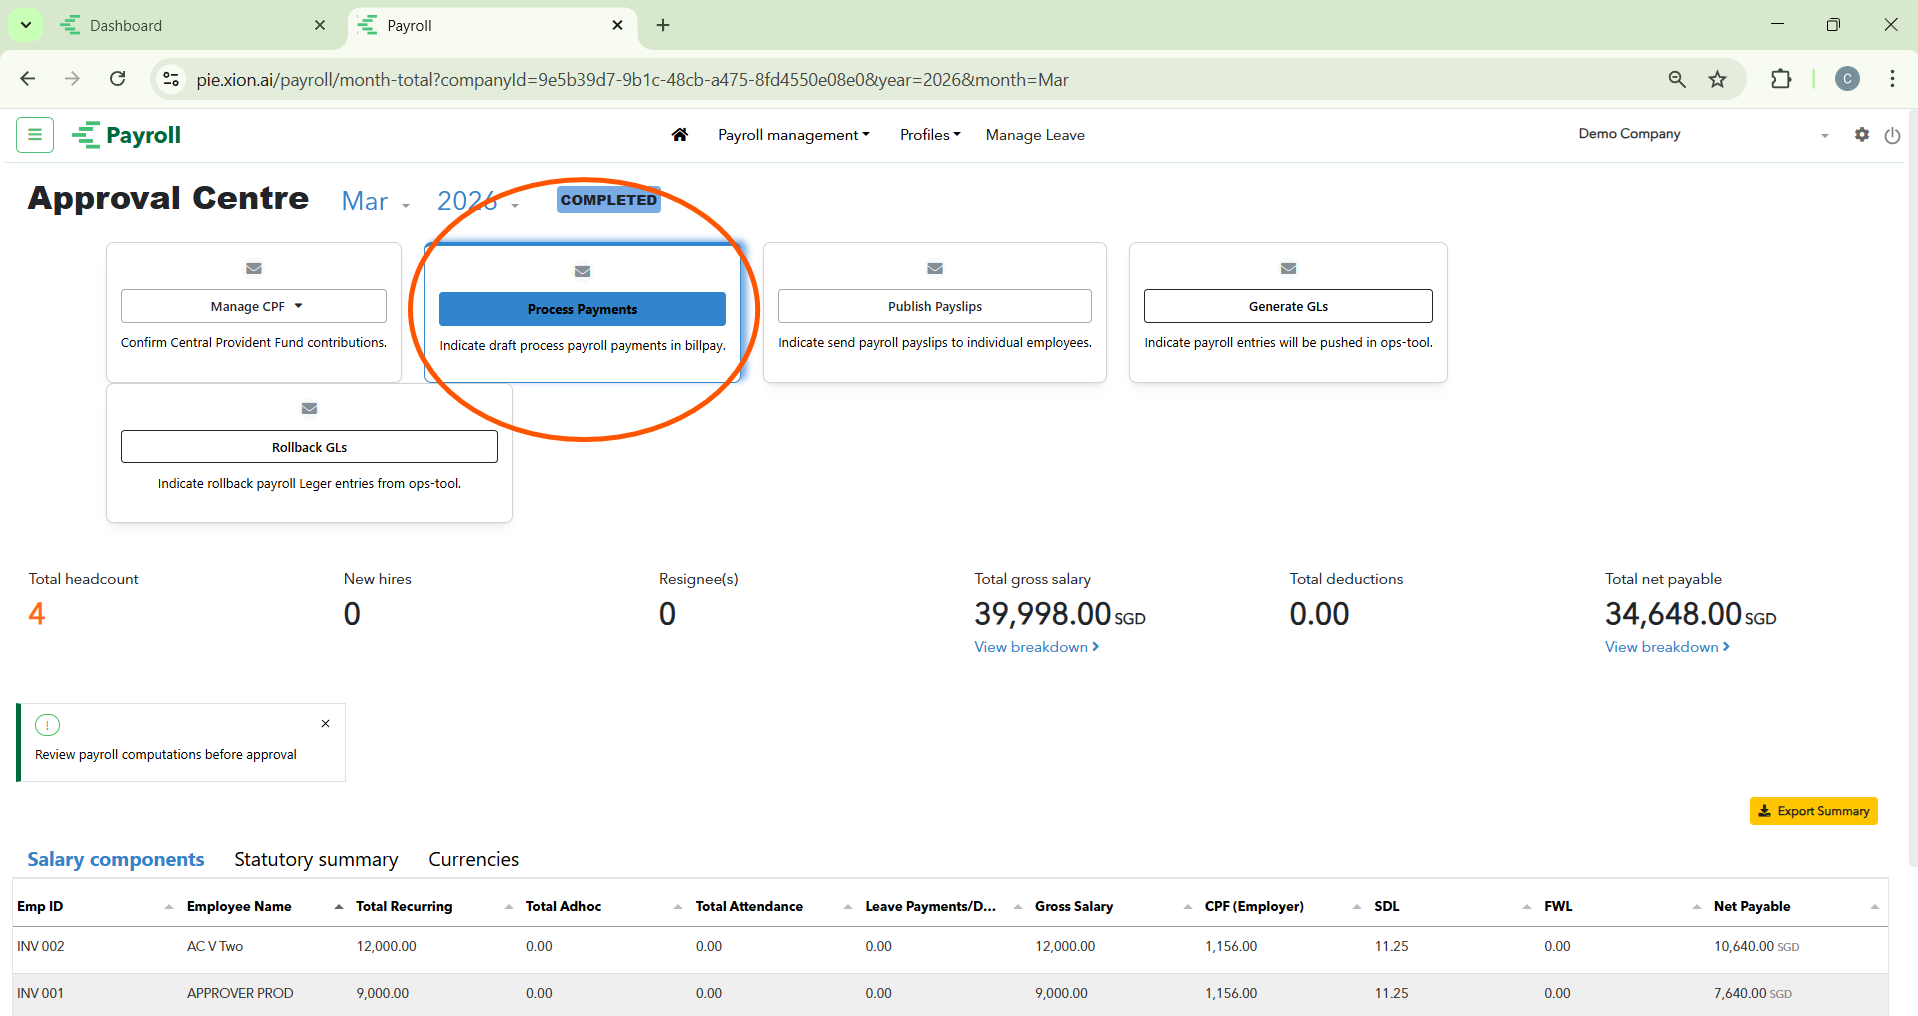
Once the approval workflow is finished, the payroll status shifts from “In-progress” to COMPLETED (marked by a blue tag). This transition unlocks a specific set of technical and financial fulfilment tasks in the Approval Centre.
In this state, you will no longer see approval buttons. Instead, the dashboard provides a suite of tools to handle CPF, Billpay, Payslips, and General Ledger (GL) entries.
Step 1: Processing Salary Payments (Billpay)
How do I initiate the actual transfer of funds?
This step manages the outward flow of funds to employee bank accounts through the Billpay integration.
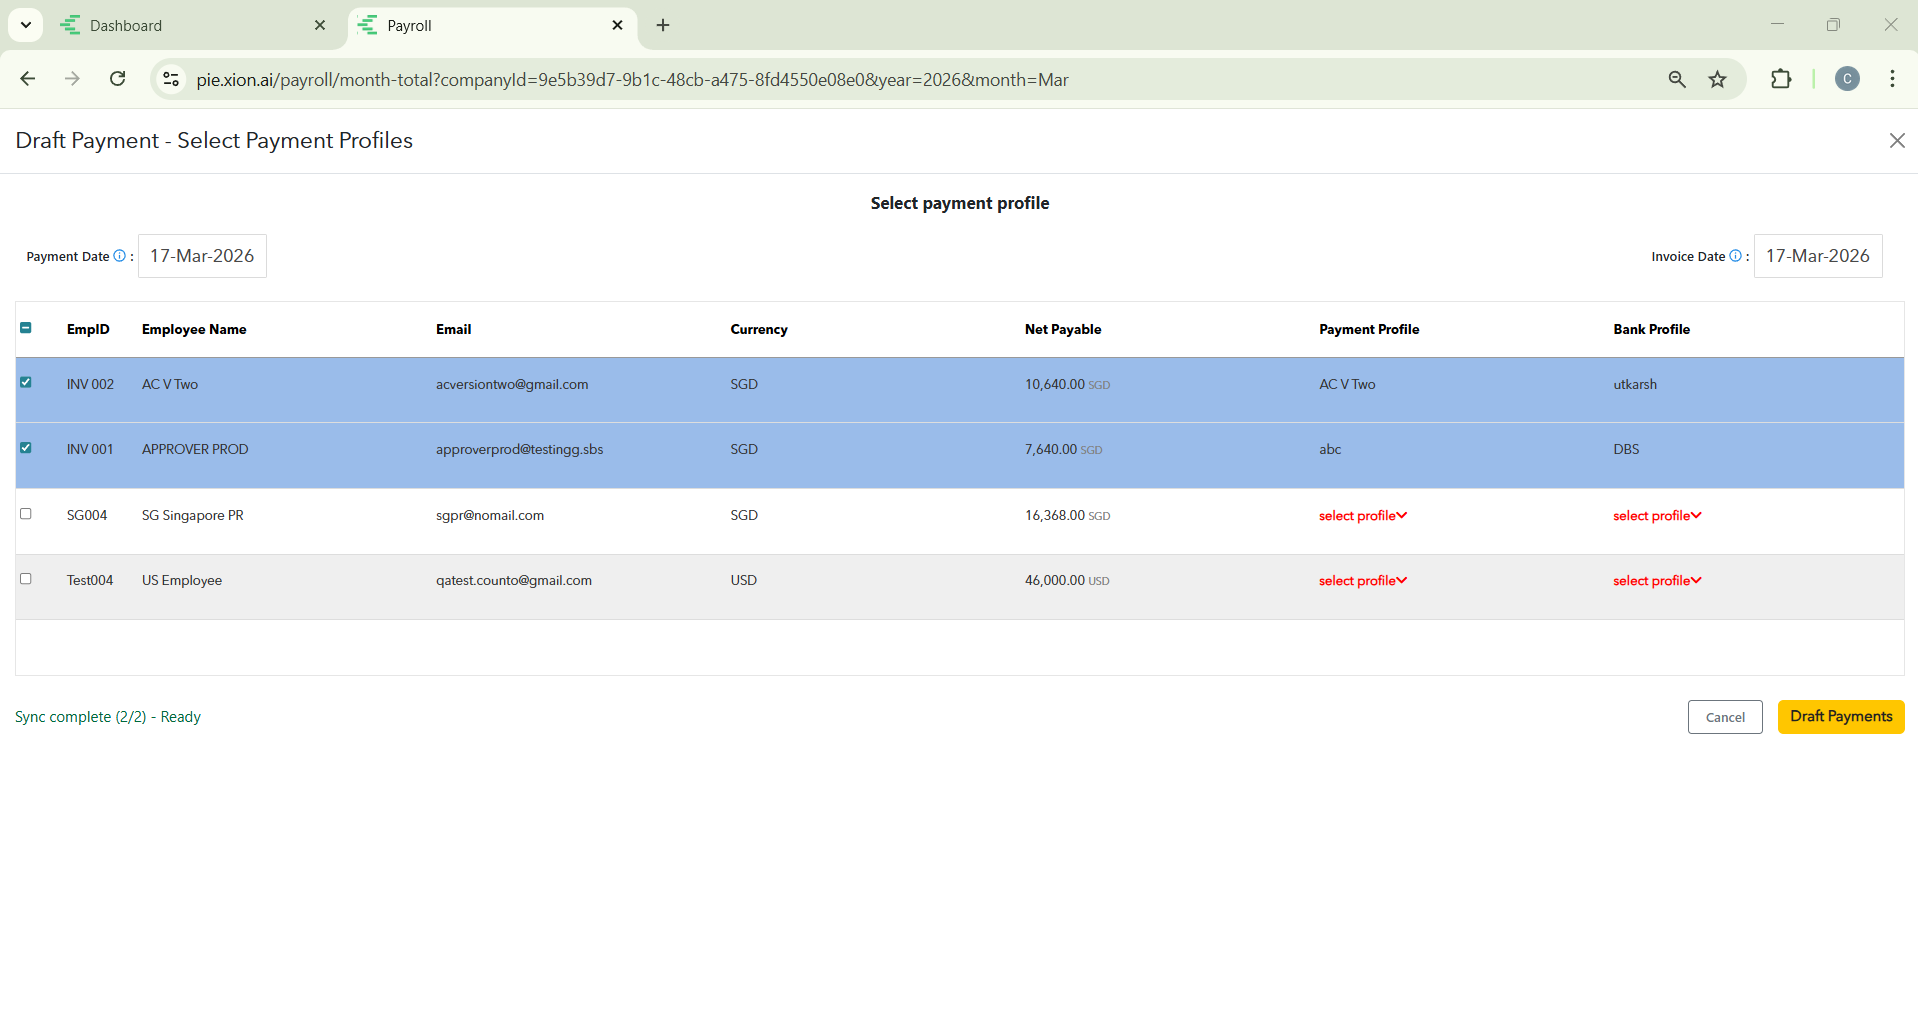
1. Drafting Payments
Clicking Process Payments within the Month Summary opens the Draft Payment interface.

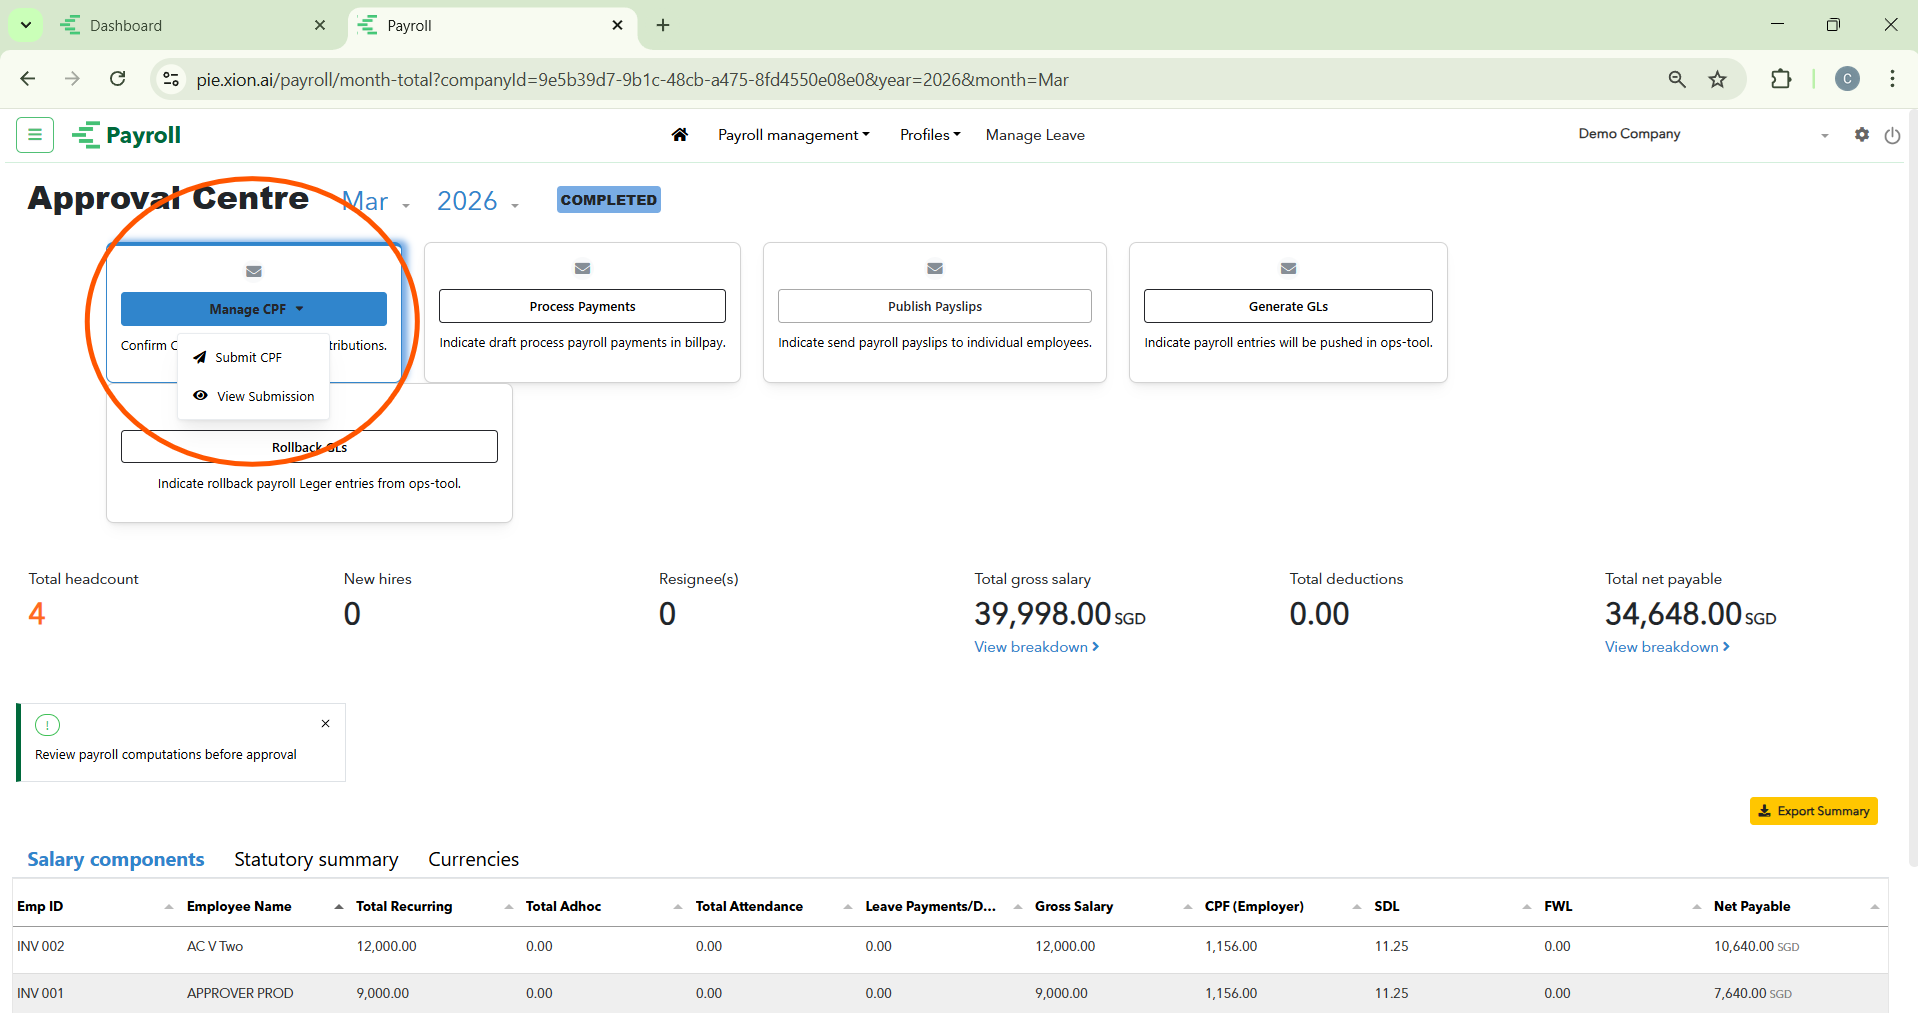
Step 2: Managing CPF Submissions
How do I handle statutory filings?
The Manage CPF dropdown is used to handle Central Provident Fund reporting for the period.
- Submit CPF: Select this option to open the submission modal.
- Direct Filing: The system is directly linked to the CPF Portal. Review the submission details for the company.
- Finalise: Click the yellow Submit CPF button to file the contributions electronically.
- Audit: Use the View Submission option in the dropdown to audit records that have already been sent.
Step 3: Publishing Payslips
How do I notify employees of their salary details?
Publishing payslips is the final employee-facing step in the cycle.
Select the Publish Payslips card from the Month Summary.
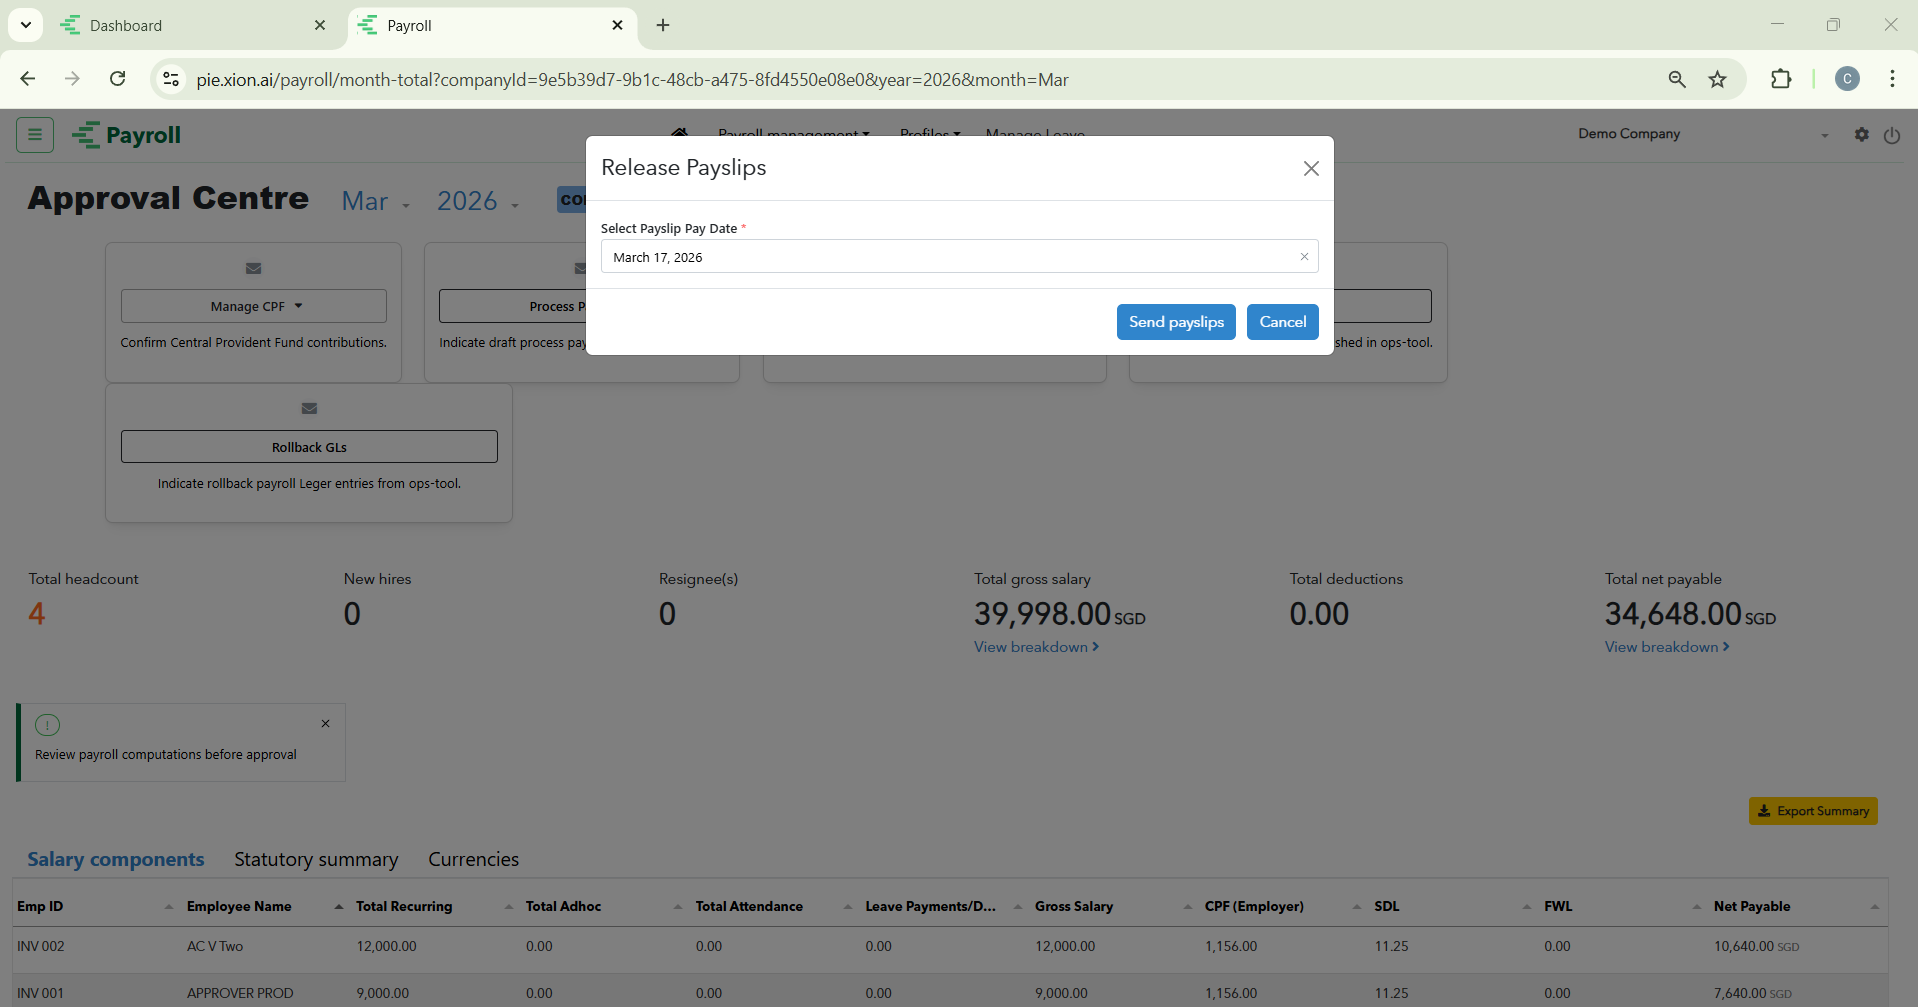
Confirmation Modal: A prompt will specify the company and period (e.g., Demo Company – March 2026).
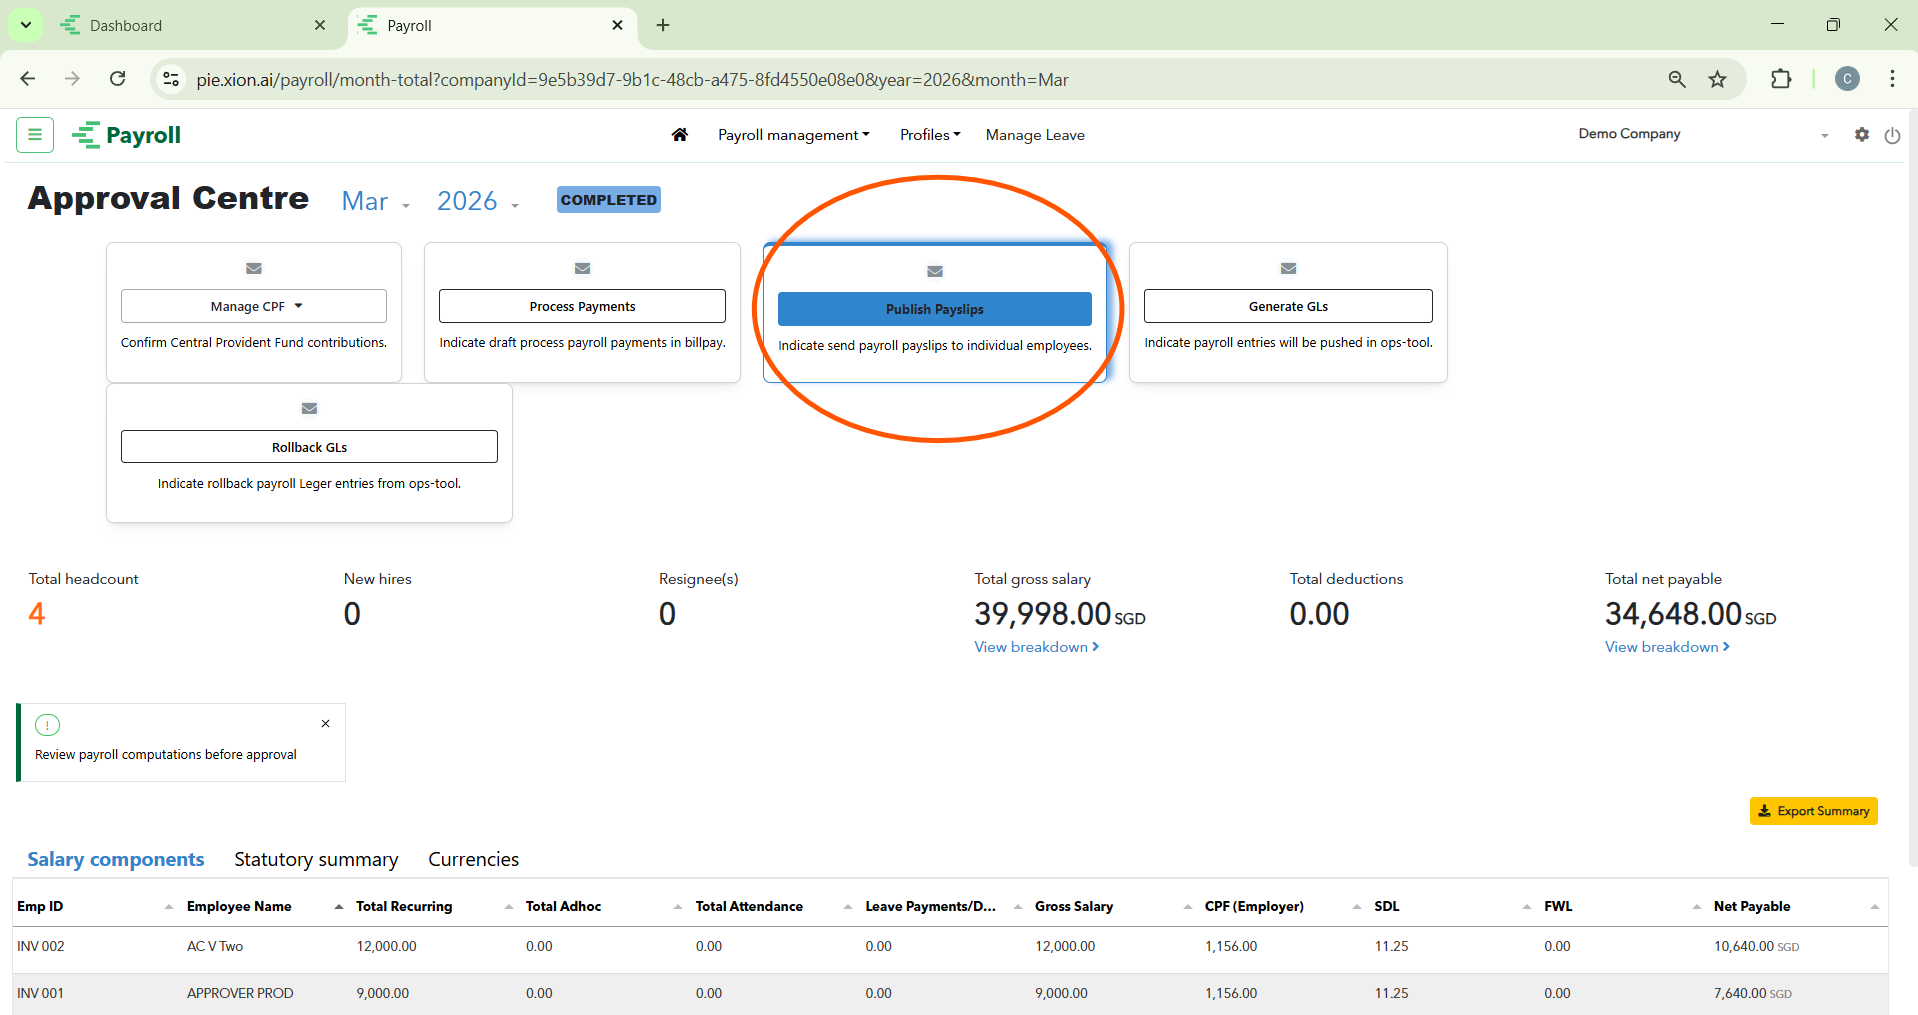
Automated Notification: Once you click the yellow Publish button, the system automatically notifies employees via email that their payslips are available for viewing in their individual portals.
Step 4: Generating General Ledger (GL) Entries
How do I synchronise payroll with my accounting software?
This step ensures that your financial records reflect the gross payroll expenditure by pushing data to your internal systems.
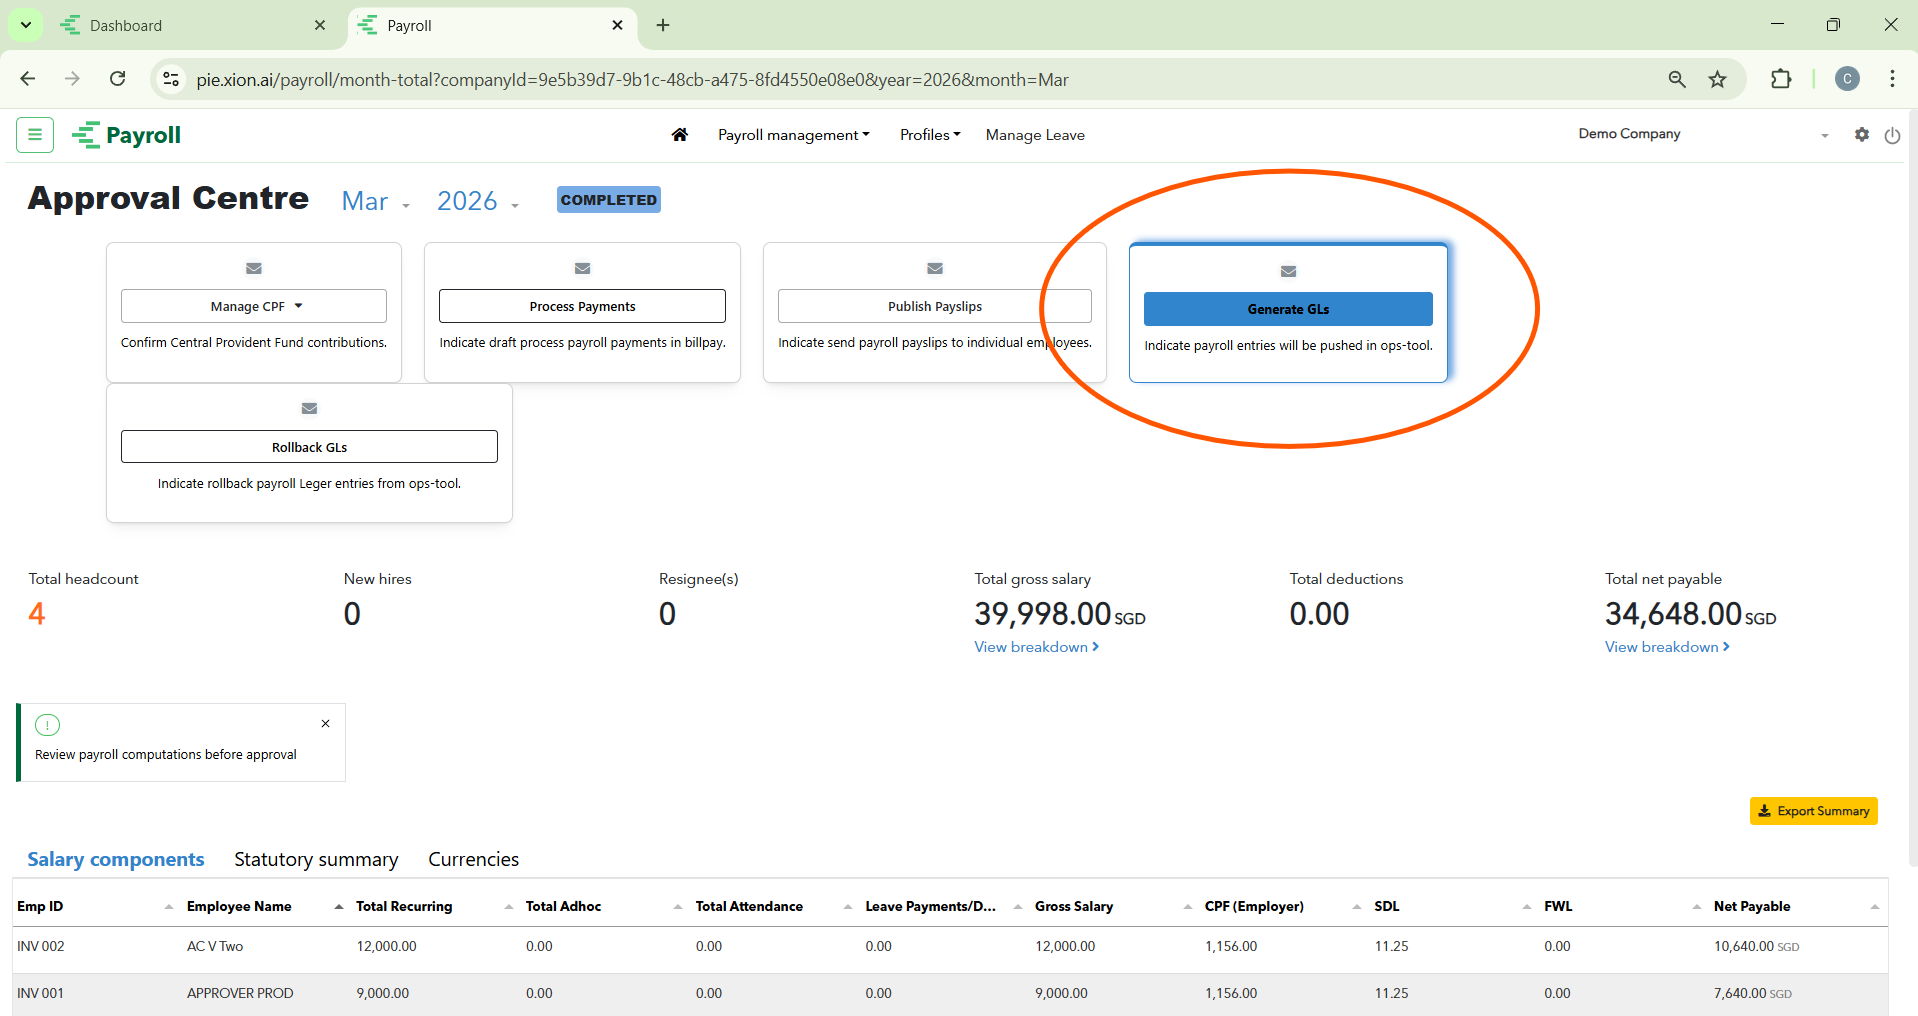
Initiating the Push: Select the Generate GLs card. This action pushes the journal entries (e.g., Total Gross Salary of 39,998.00 SGD) into the internal “ops-tool” or ERP software.
Audit Trail: This process ensures every dollar is correctly categorised (Basic Salary, Employer CPF, SDL, etc.) within the company books.
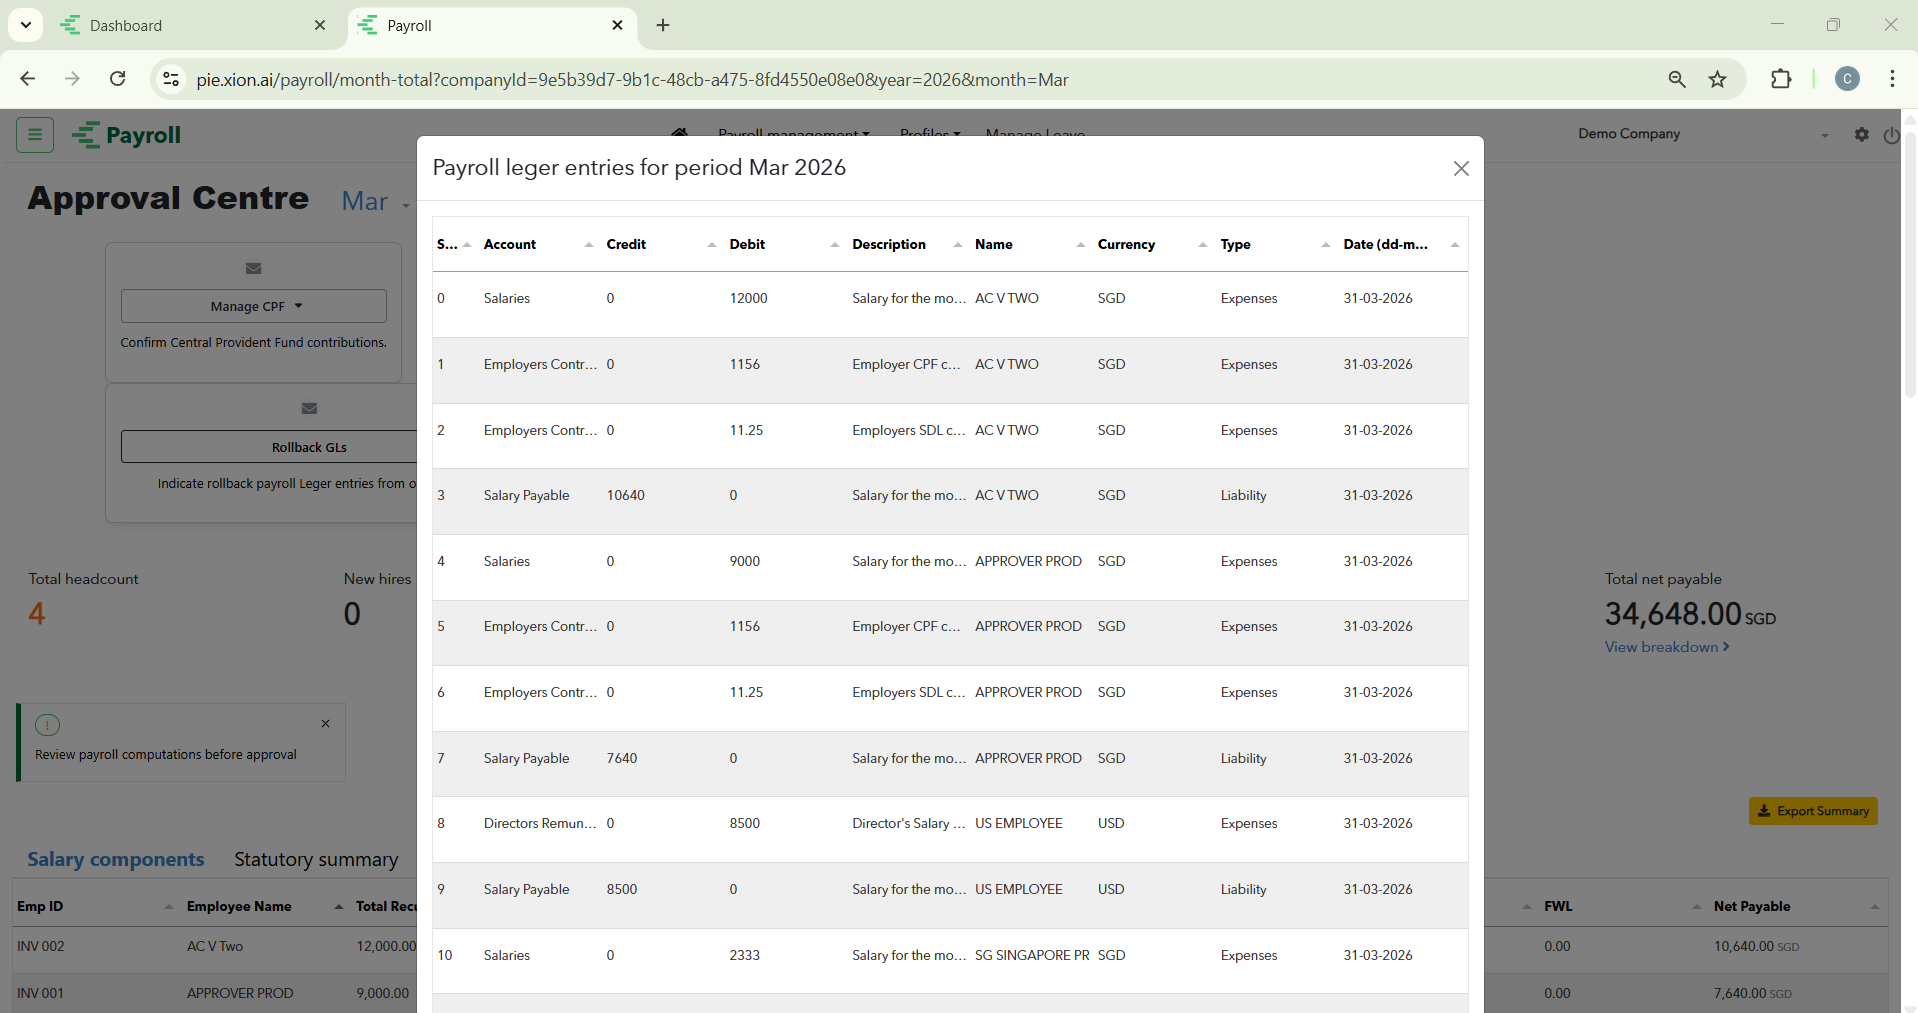
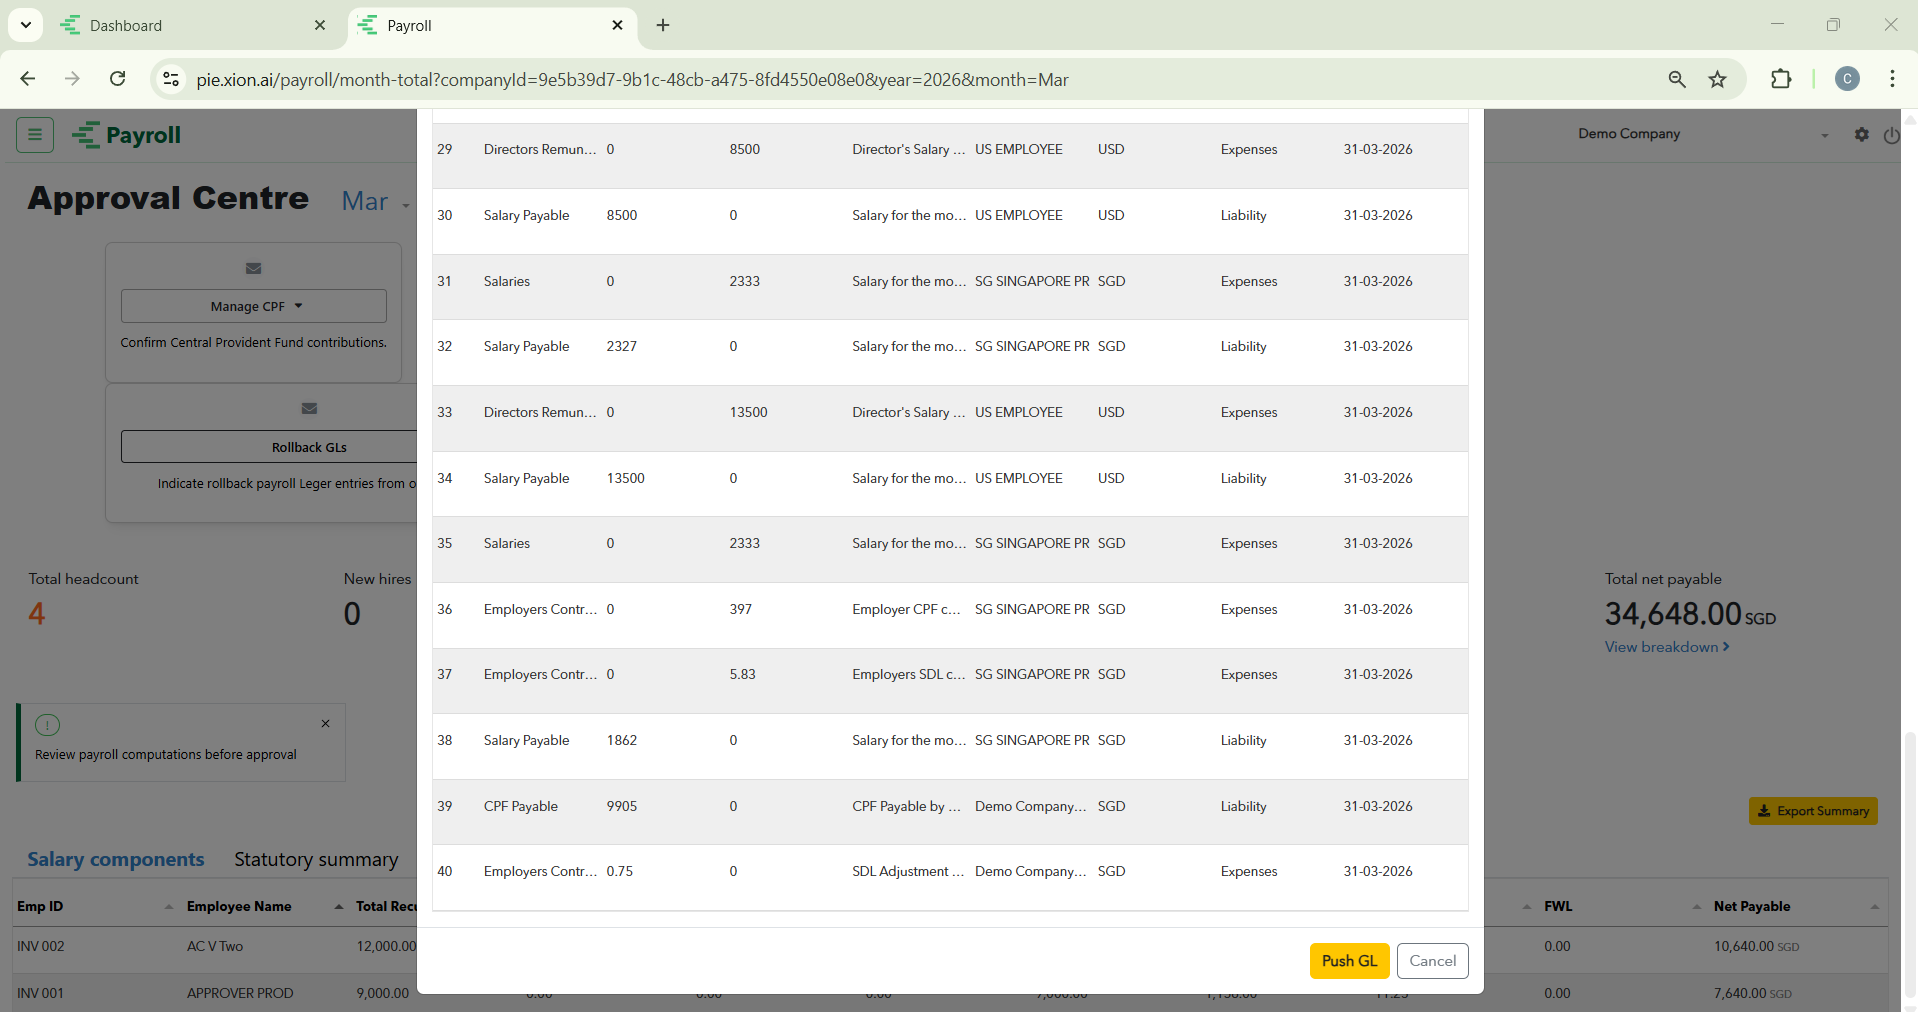
Rolling Back Ledger Entries: If a discrepancy is found after synchronisation, use the Rollback GLs feature. Selecting this triggers a command to the ops-tool to reverse the specific entries, allowing for corrections.
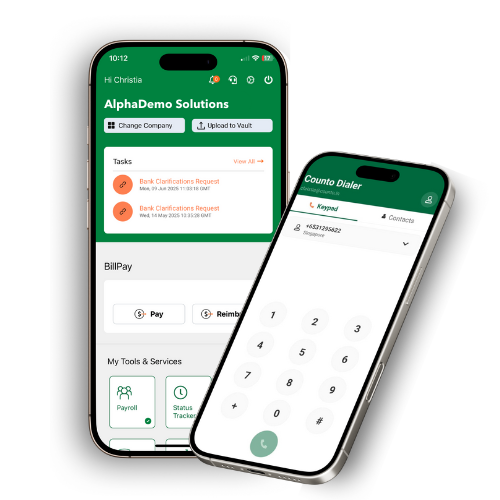
Employee Self-Service (ESS) Portal
What do my employees see after payroll is published?
When an employee logs in, they have access to a secondary navigation bar containing four primary tabs: Payslips, Tax, My Profile, and Leave.
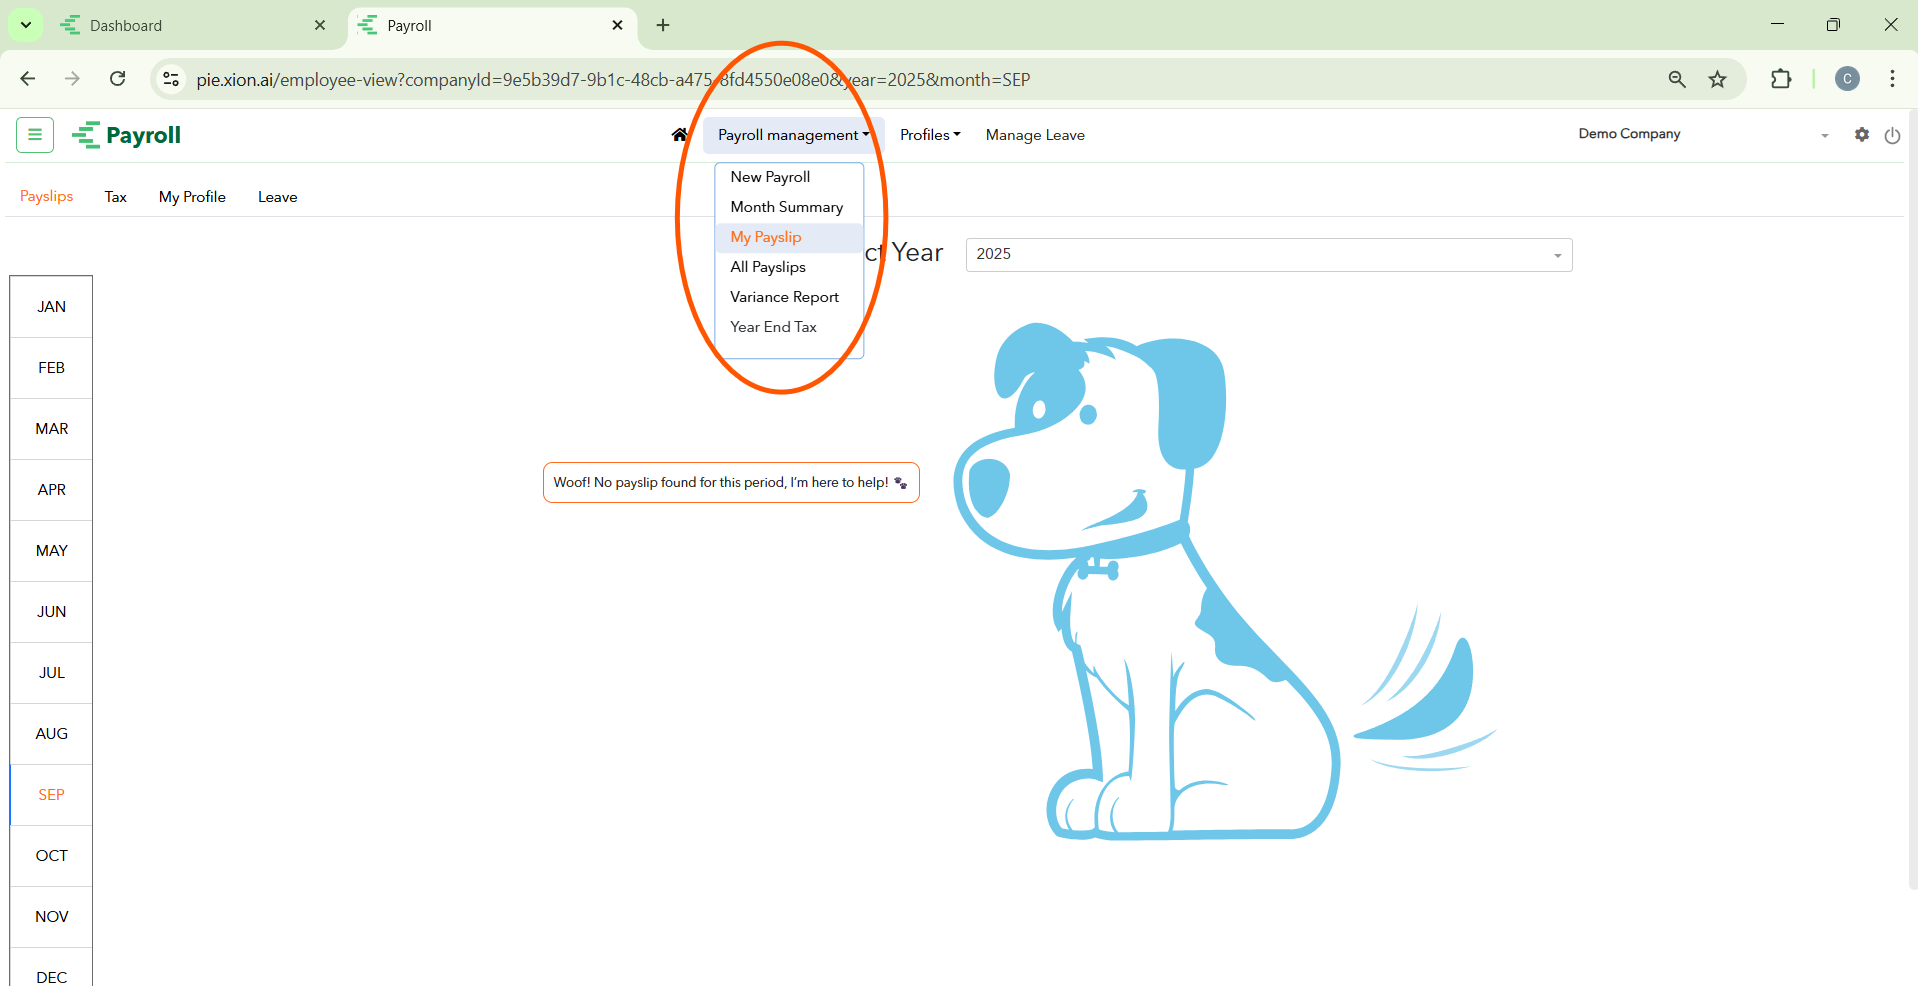
1. Payslips View
Employees can access historical salary data via Payroll management > My Payslip.
Navigation: The Payslips tab is highlighted in orange.
Historical Access: A vertical list of months allows toggling between periods. If a payslip is not yet published, a cartoon dog mascot will indicate that no records are found.
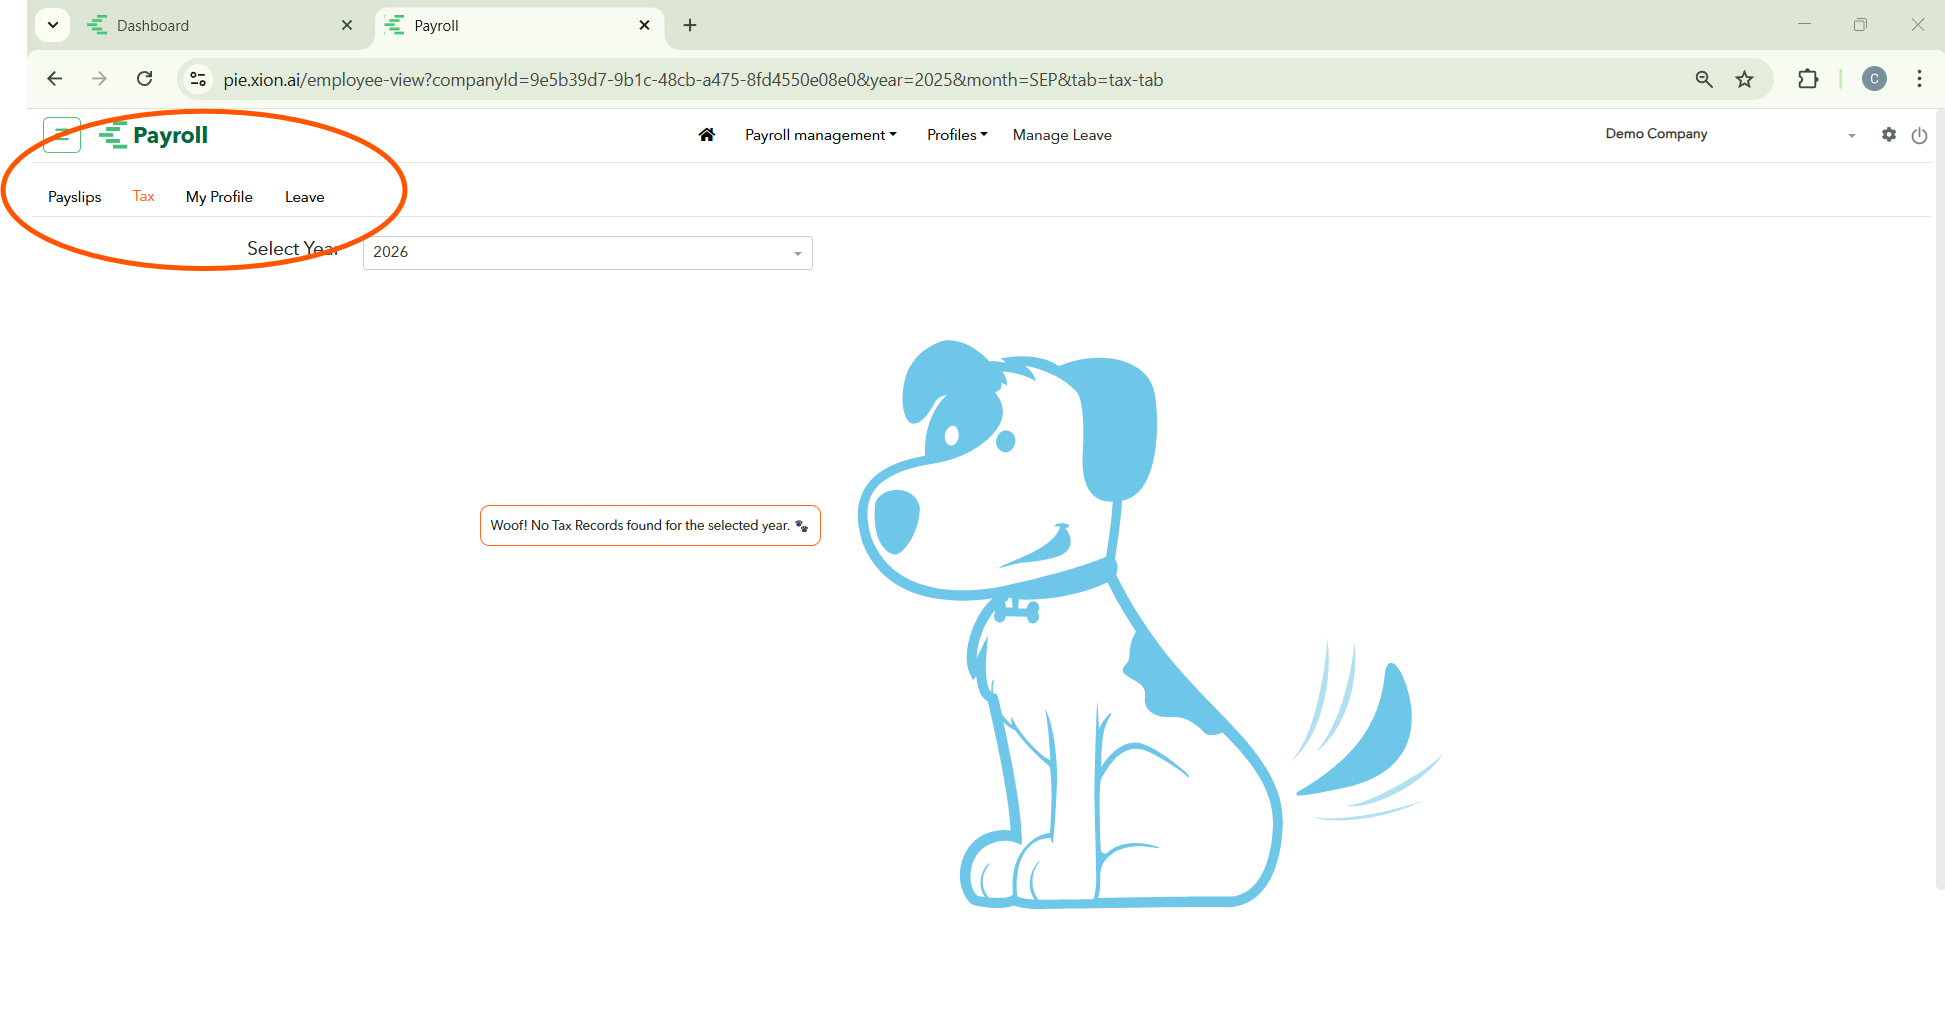
2. Tax Records View
Navigation: The Tax tab is used to view compliance records for selected years.
Context: Records are only visible once formally generated and released by the administrator.
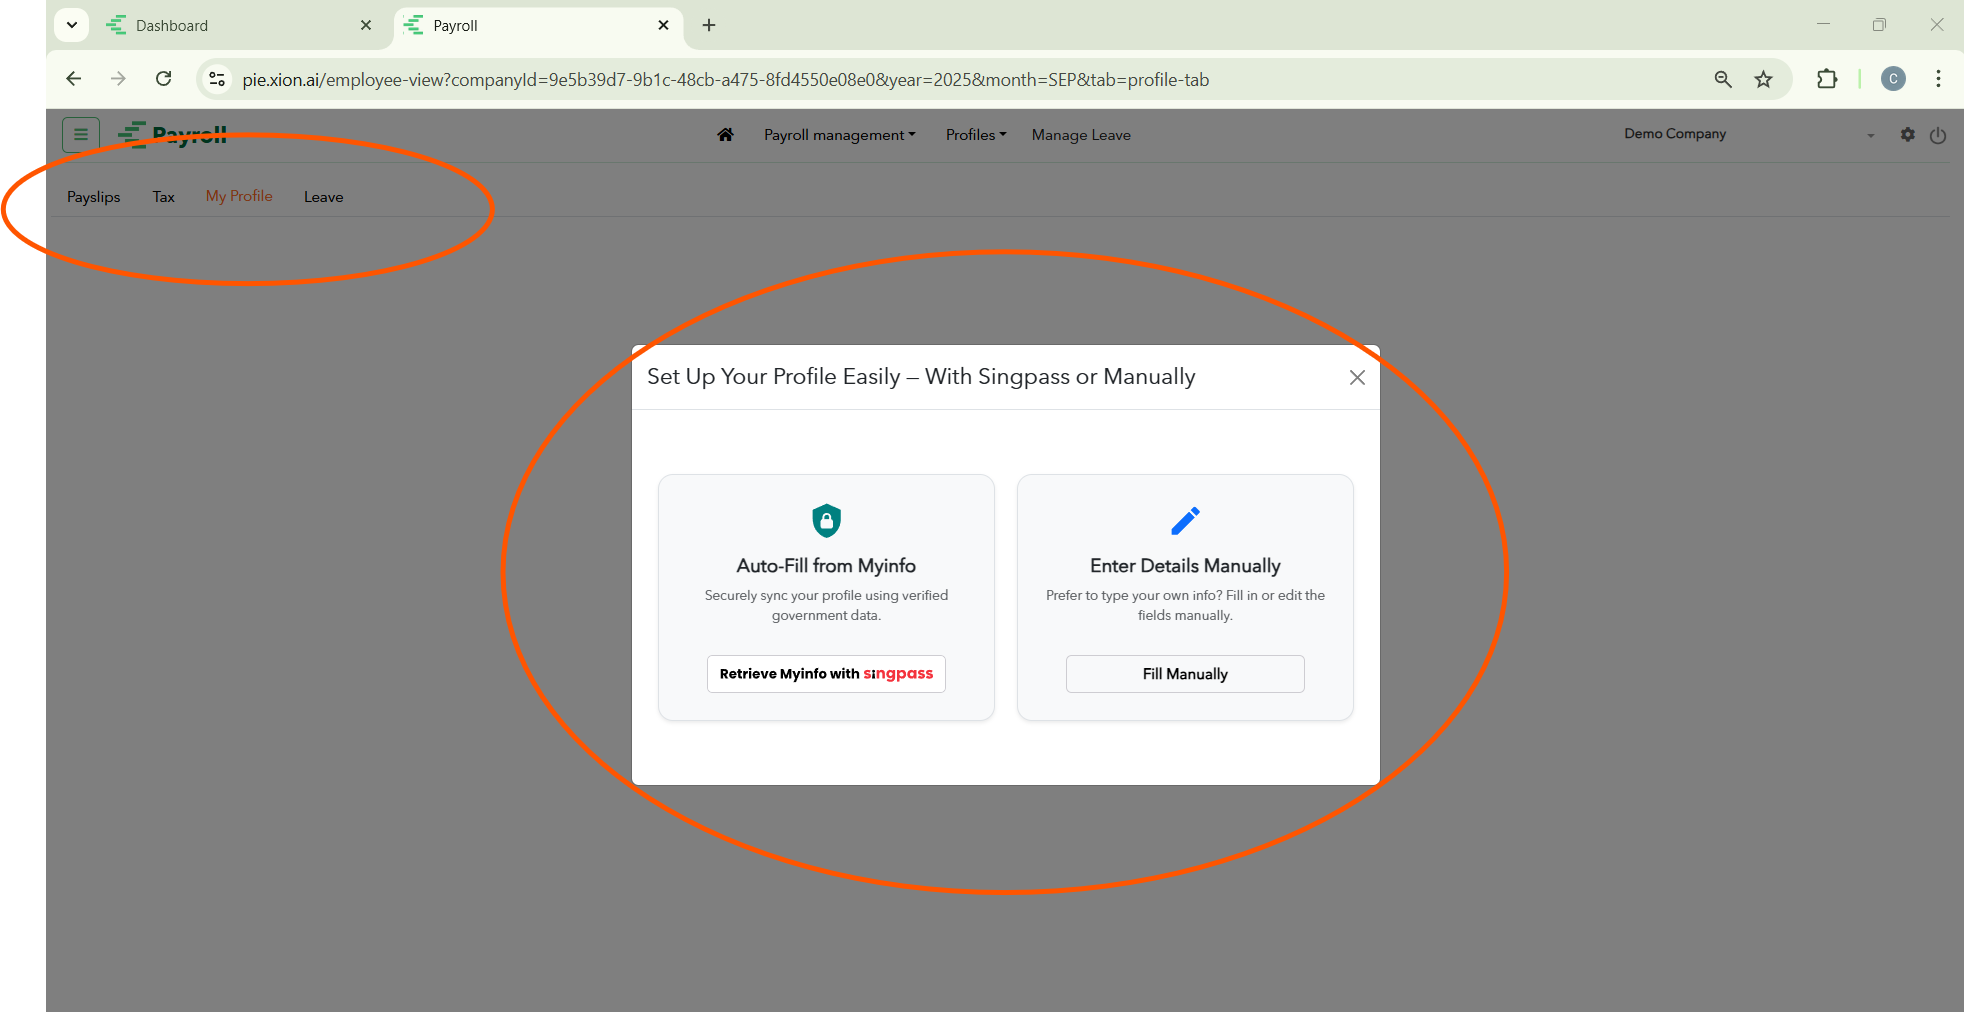
3. My Profile & Singpass Setup
Singpass Integration: Employees can select “Auto-Fill from Myinfo” to sync official data using Singpass.
Manual Setup: Alternatively, choose “Enter Details Manually” to input identification and personal information.
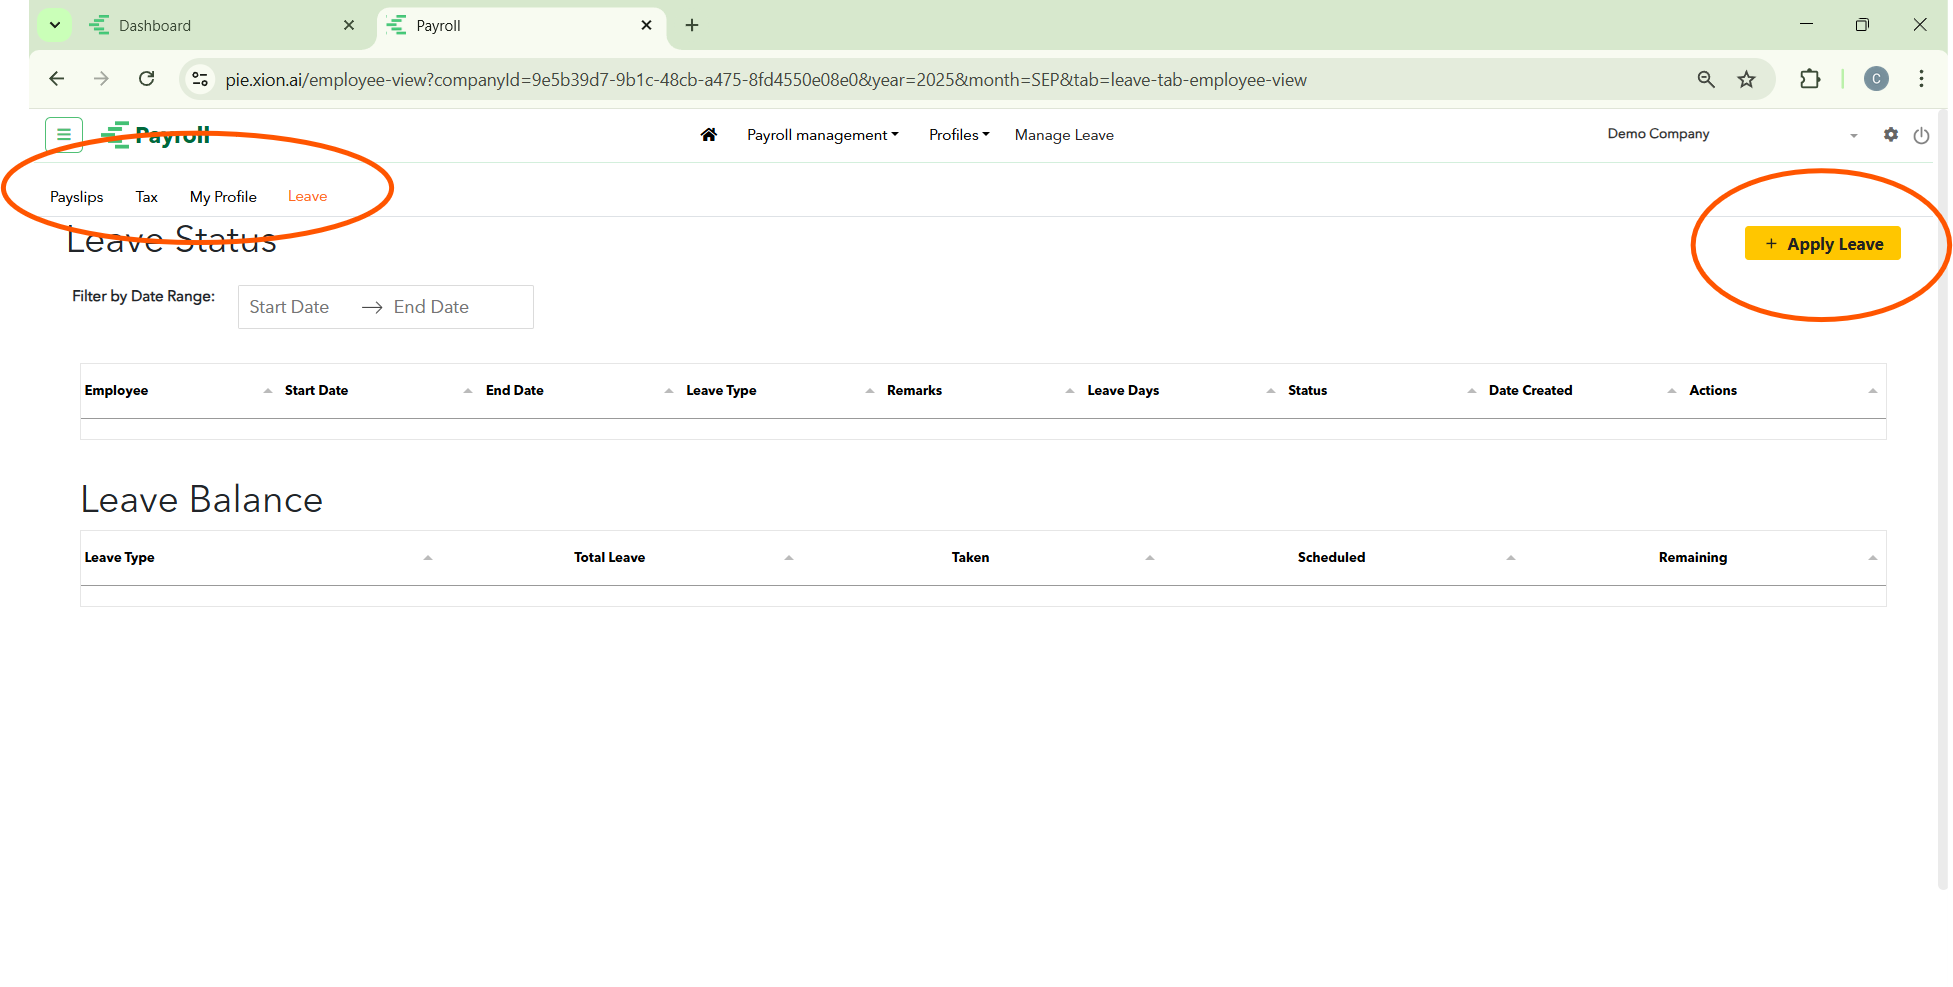
4. Leave Management
Applying for Leave: Click the yellow “+ Apply Leave” button to submit a request.
Leave Status & Balance: Displays a real-time table of Leave Status and a Leave Balance table (Total, Taken, Scheduled, Remaining).
Monitoring & Reporting
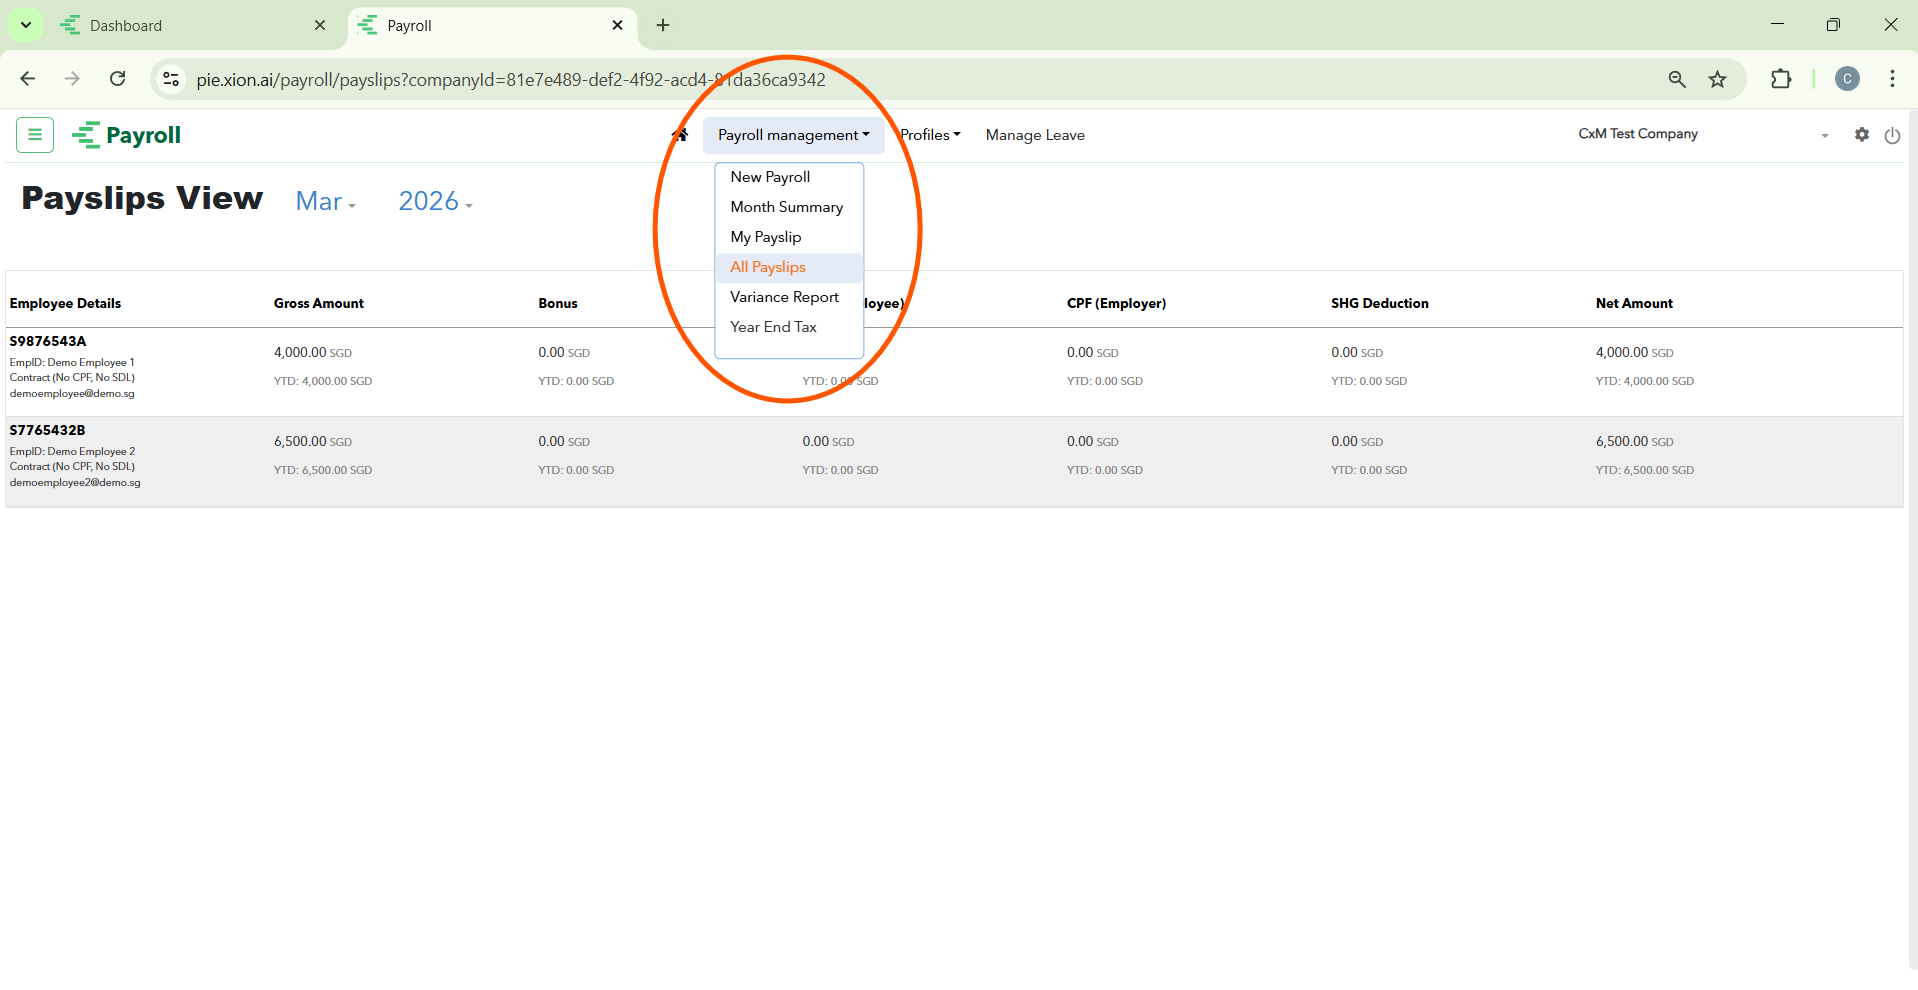
All Payslips View (Admin Audit)
How do I review all generated payslips for the month?
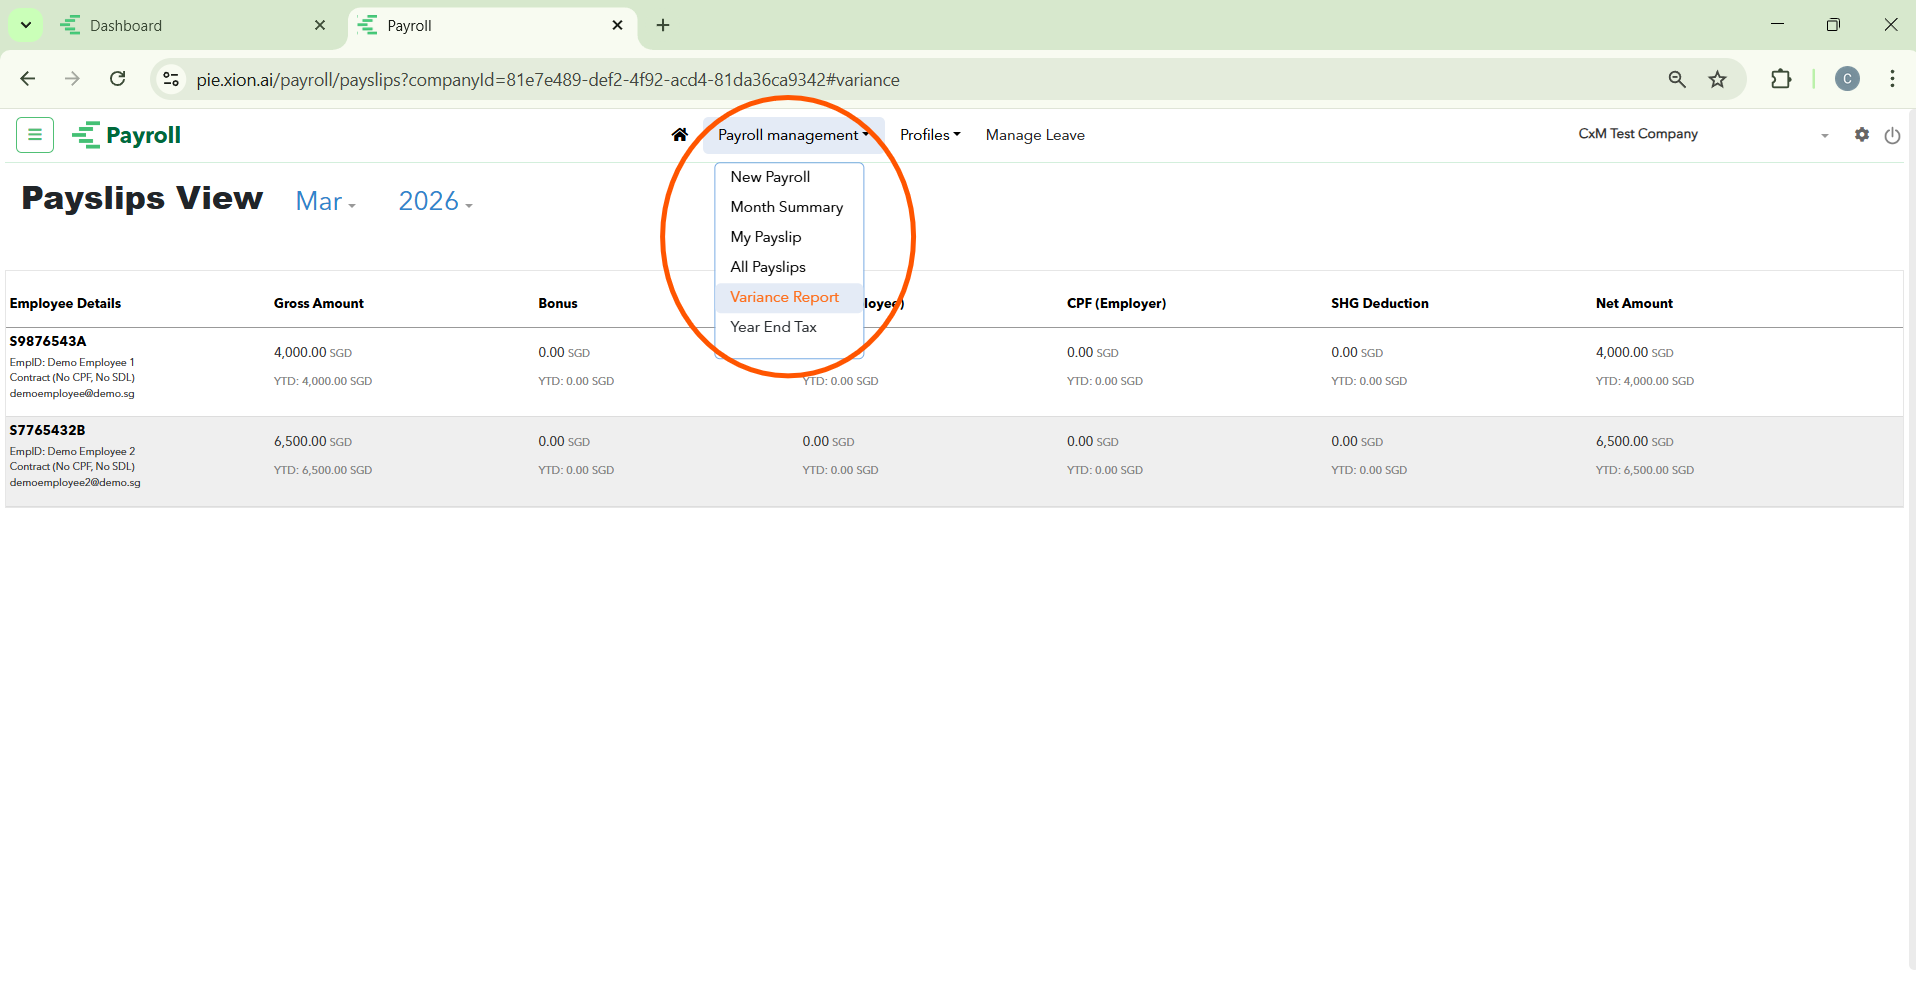
Access: Navigate to Payroll management > All Payslips.
Data Table: Displays Employee Details, Gross Amount, Bonus, Statutory Deductions (CPF/SHG), and Net Amount.
Purpose: Use this as the “source of truth” to cross-reference with bank files or accounting records.
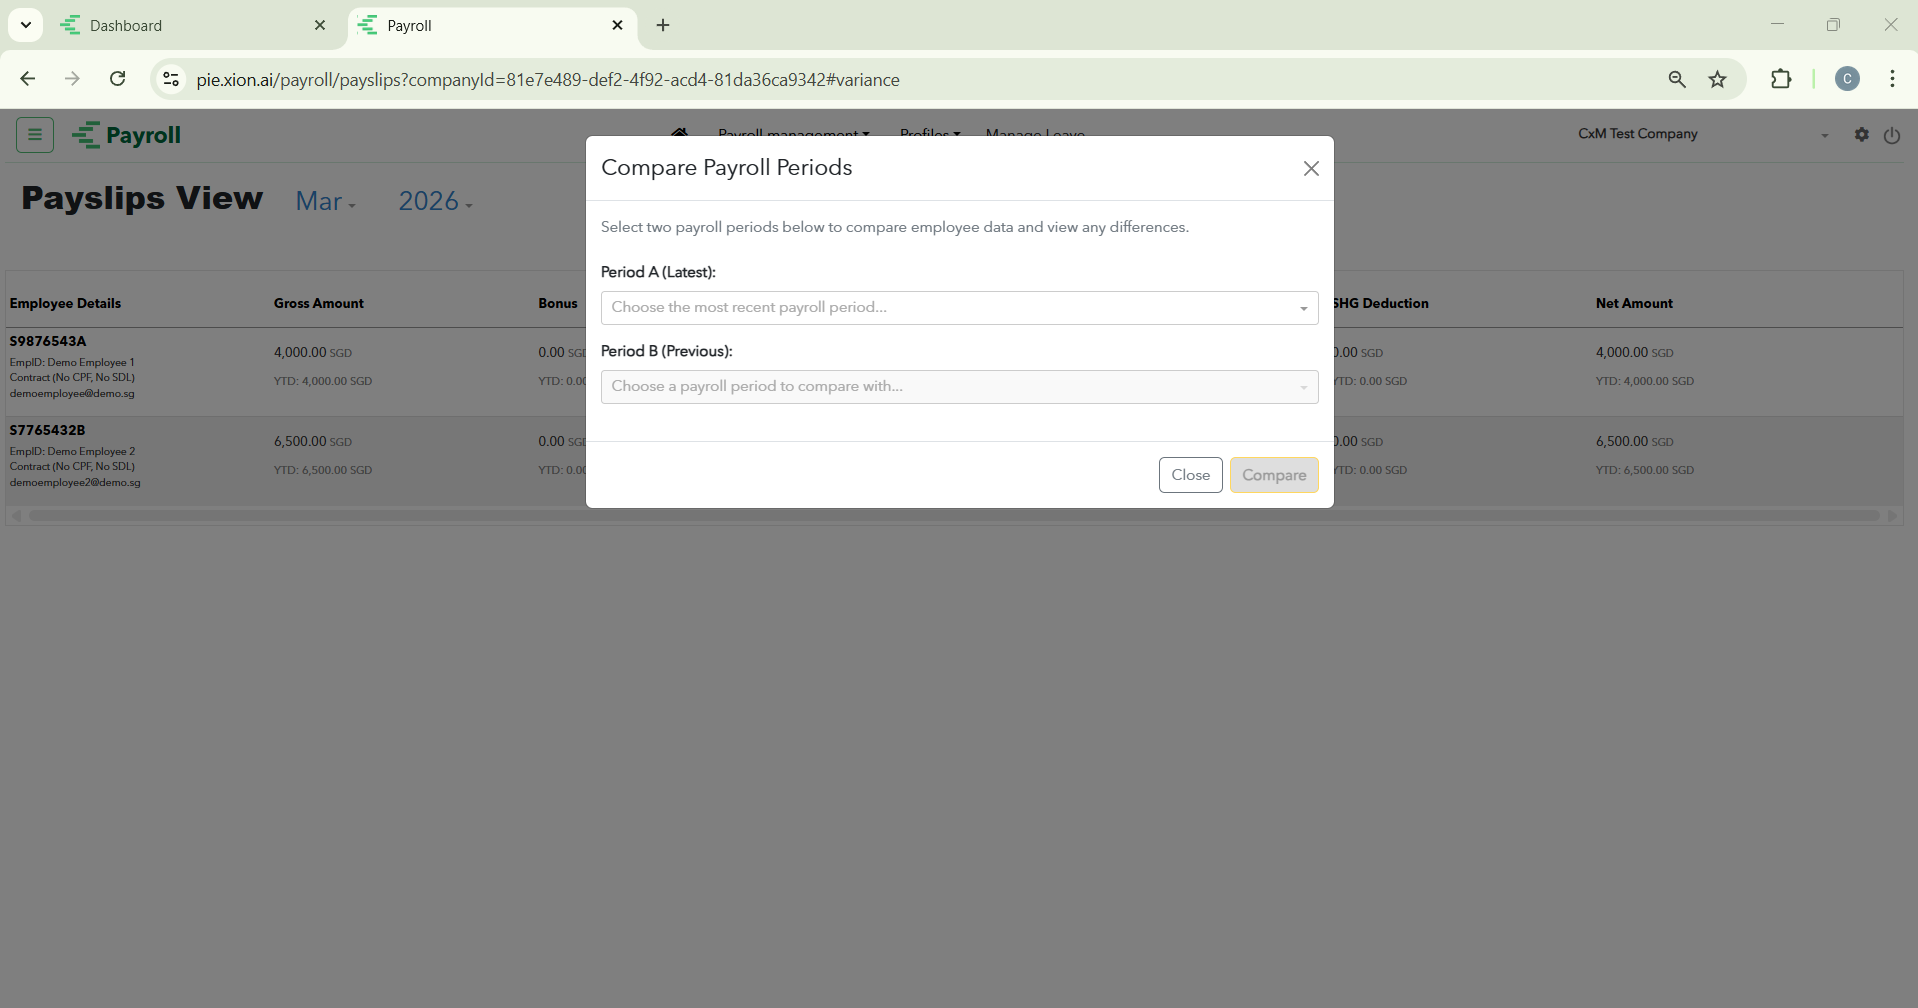
Variance Report (Period Comparison)
How do I compare payroll data between different months?
Navigation: Select Variance Report from the Payroll management menu.
The Interface: Select Period A (Latest) and Period B (Previous) in the “Compare Payroll Periods” modal.
Results: Analysis includes New Hires/Resignees, Salary Adjustments, and differences in One-off Payments.
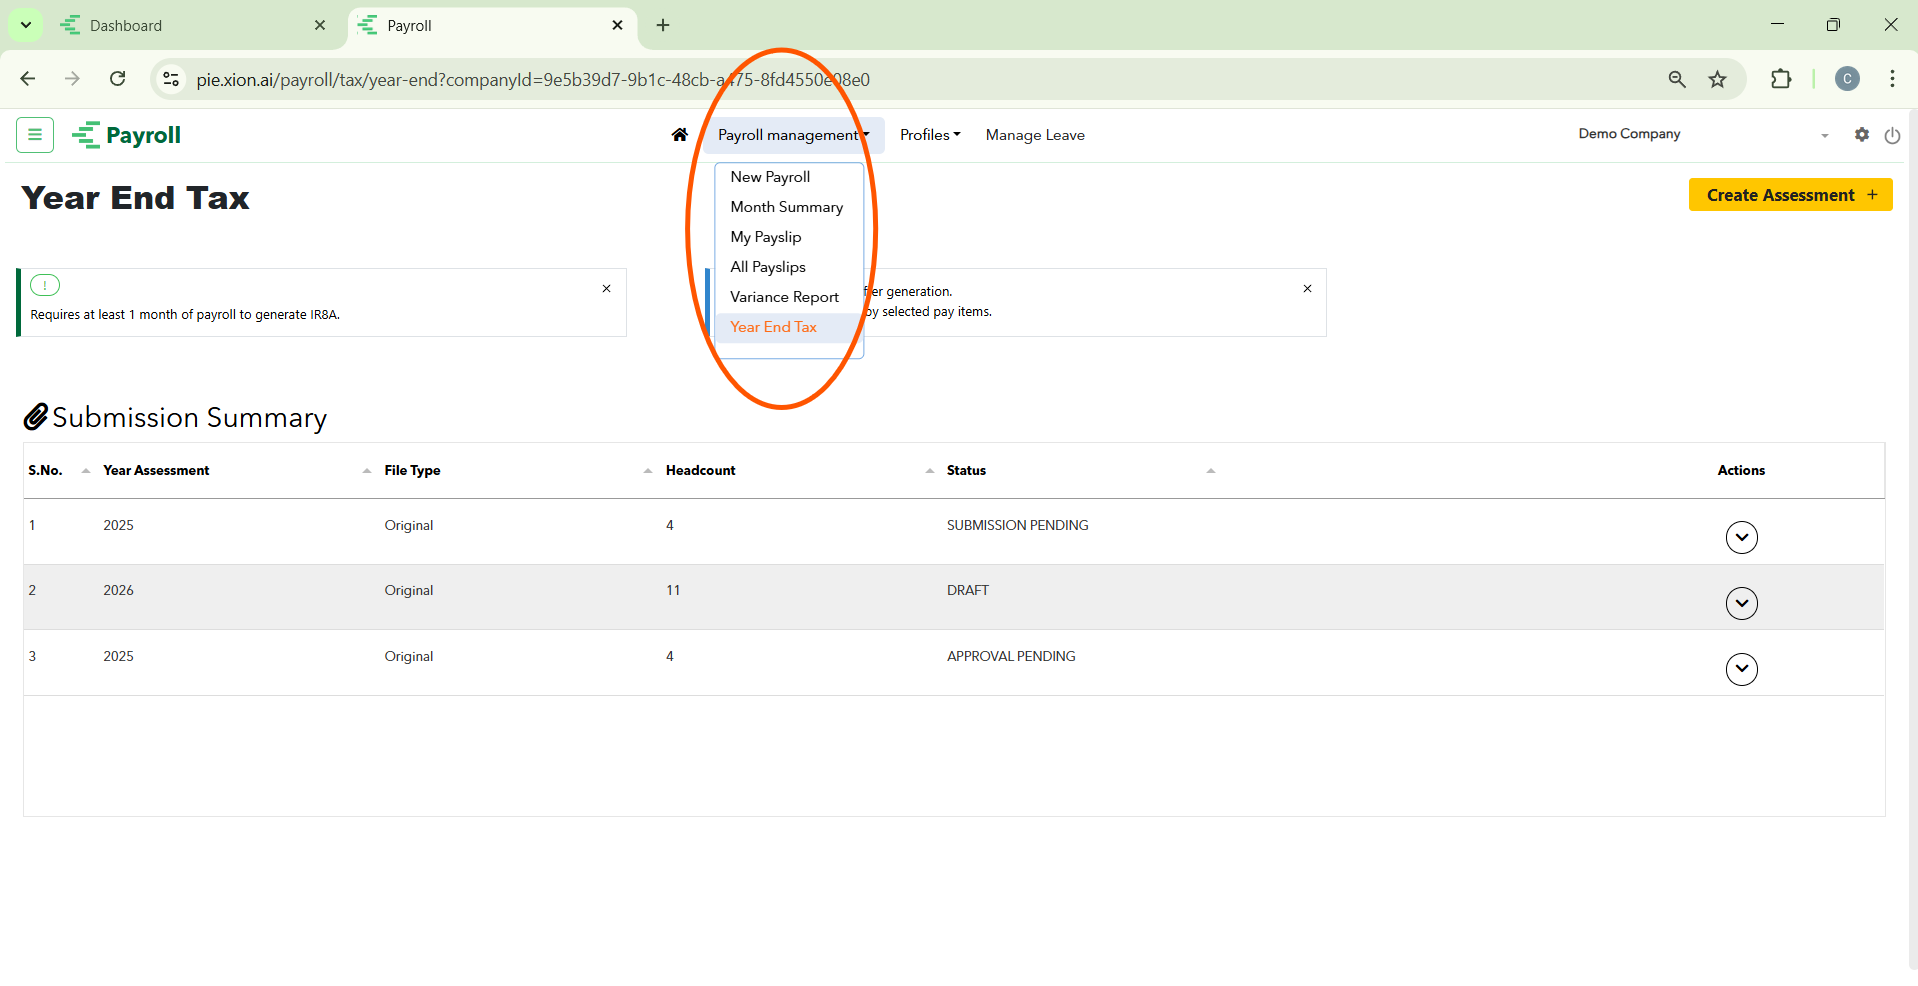
Year-End Tax
How do I manage annual tax filings?
Prepare and submit IR8A forms to IRAS.
Access: Select Year End Tax from the Payroll management menu.
Prerequisite: Requires at least 1 month of payroll to generate IR8A.
Creating Assessment: Click Create Assessment +. Select the Year Assessment (e.g., 2026) and File Type (Original or Amendment).
Workflow: Review data in DRAFT, move to APPROVAL PENDING, and finalise via SUBMISSION PENDING.