Counto Help & Support Center
Access guided demos and step-by-step walkthroughs across every Counto platform. Learn how to manage your ACRA compliance, IRAS tax, payroll, and daily operations.

Initiating a New Payroll
How do I start the monthly payroll cycle?
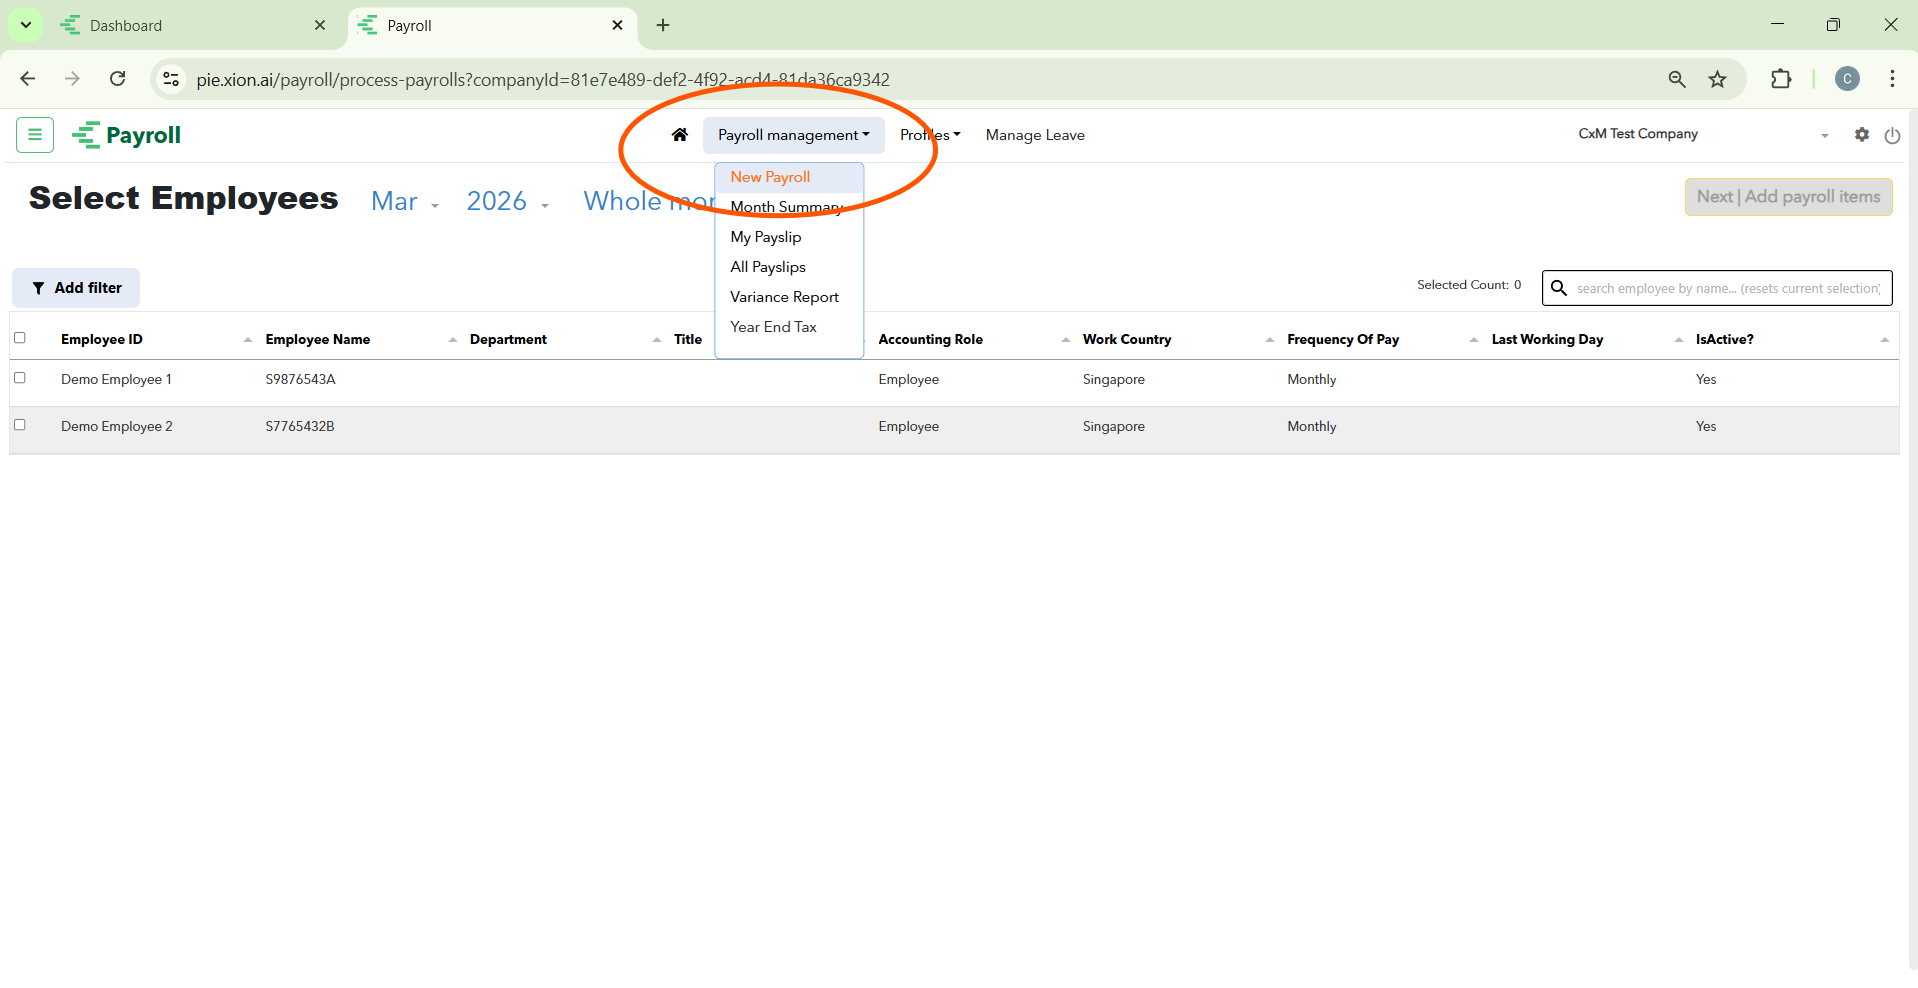
To begin a new run, navigate to Payroll management in the top menu and select New Payroll.
Step 1: Employee Selection & Filtering
How do I accurately build my payroll list?
The Select Employees interface is designed to help you quickly identify the correct personnel for the current pay cycle. Accuracy here ensures that no one is missed and that inactive staff are not inadvertently processed.
Setting the Pay Period
Before managing the list, verify the period settings at the top:
- Month & Year: Ensure the correct period (e.g., Mar 2026) is selected.
- Cycle Type: Confirm if you are processing the Whole month or a specific off-cycle run.
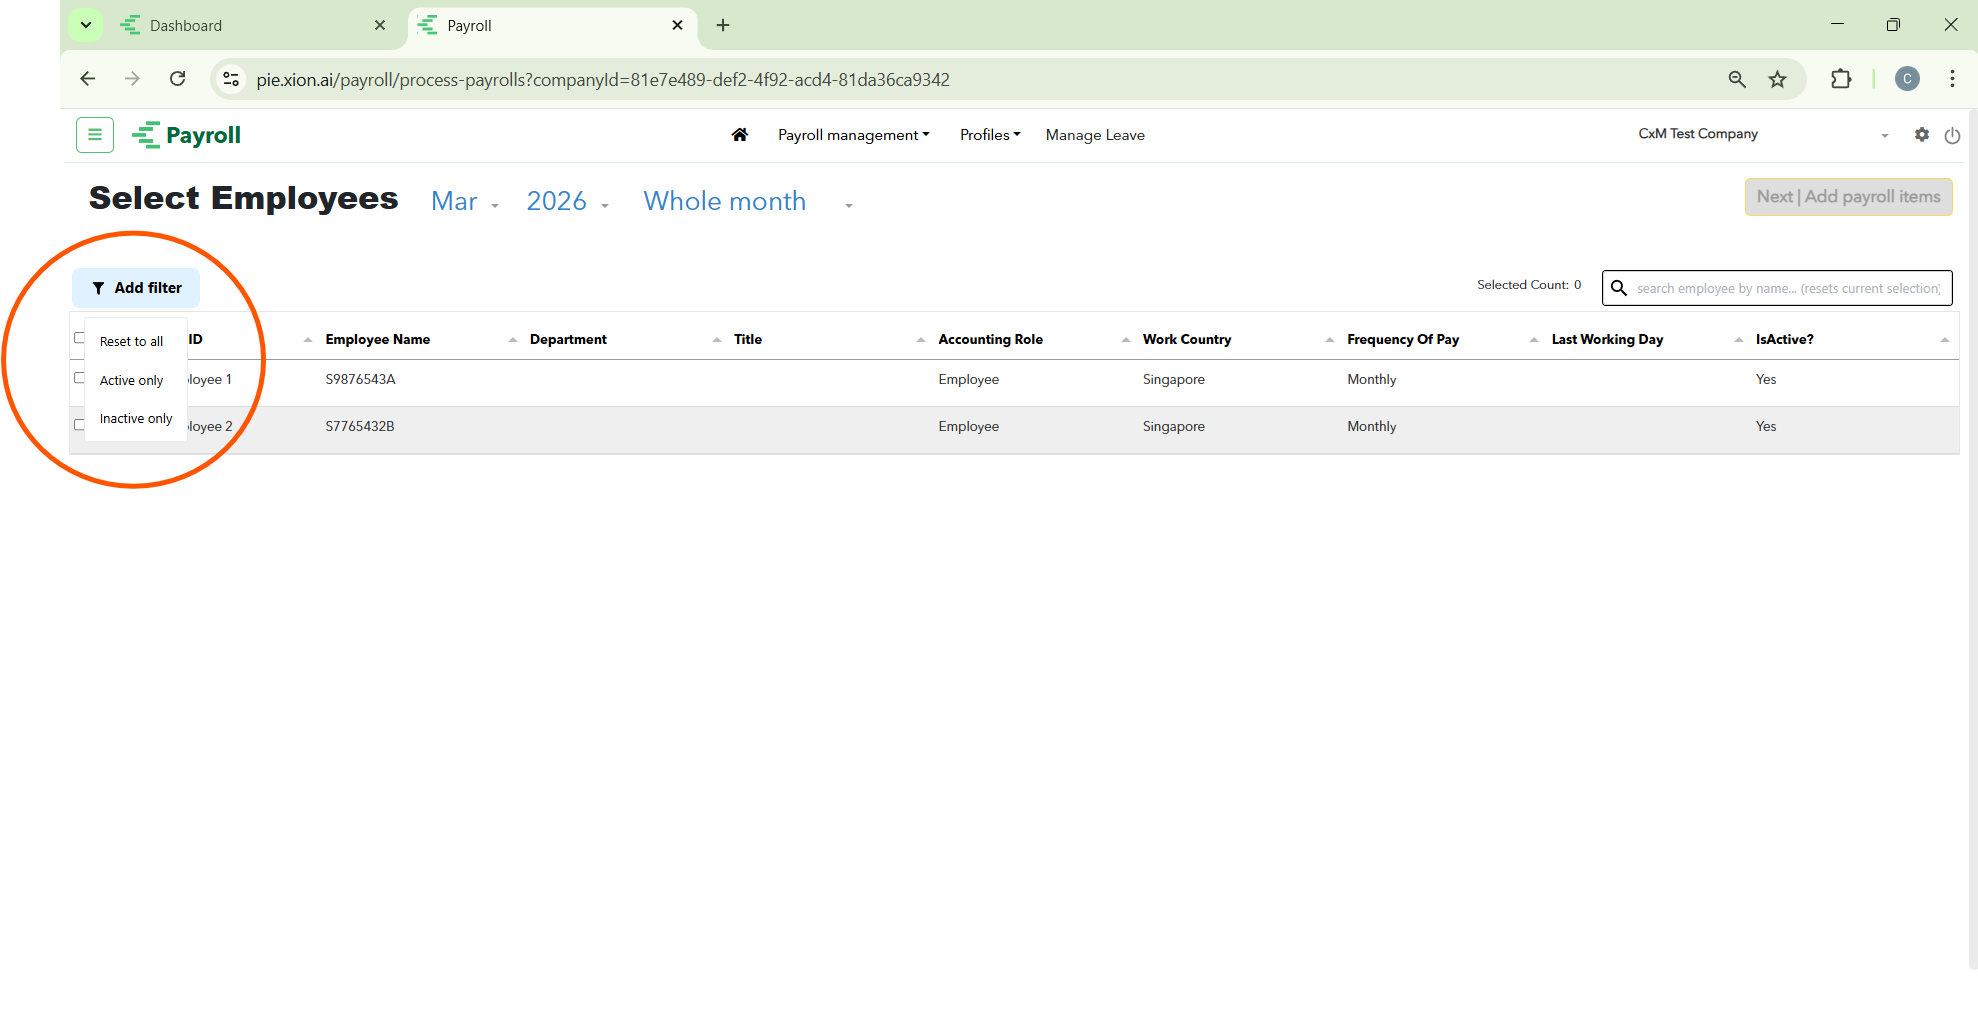
Using the “Add Filter” Tool
To streamline your selection, click the Add filter button on the left. This allows you to toggle the visibility of your workforce based on their current status:
- Reset to all: Clears all active filters to show every employee record in the system.
- Active only: Filters the list to show only currently employed staff. This is the recommended setting for standard monthly payroll.
- Inactive only: Displays former employees. This is useful for processing final “pro-rated” payments or encashment for resigned staff.
Searching & Sorting
- Live Search: Use the search bar on the right to find specific individuals by Employee Name or ID.
- Data Columns: Review key details like Work Country (e.g., Singapore), Frequency of Pay (Monthly), and Last Working Day to ensure the data is up to date before proceeding.
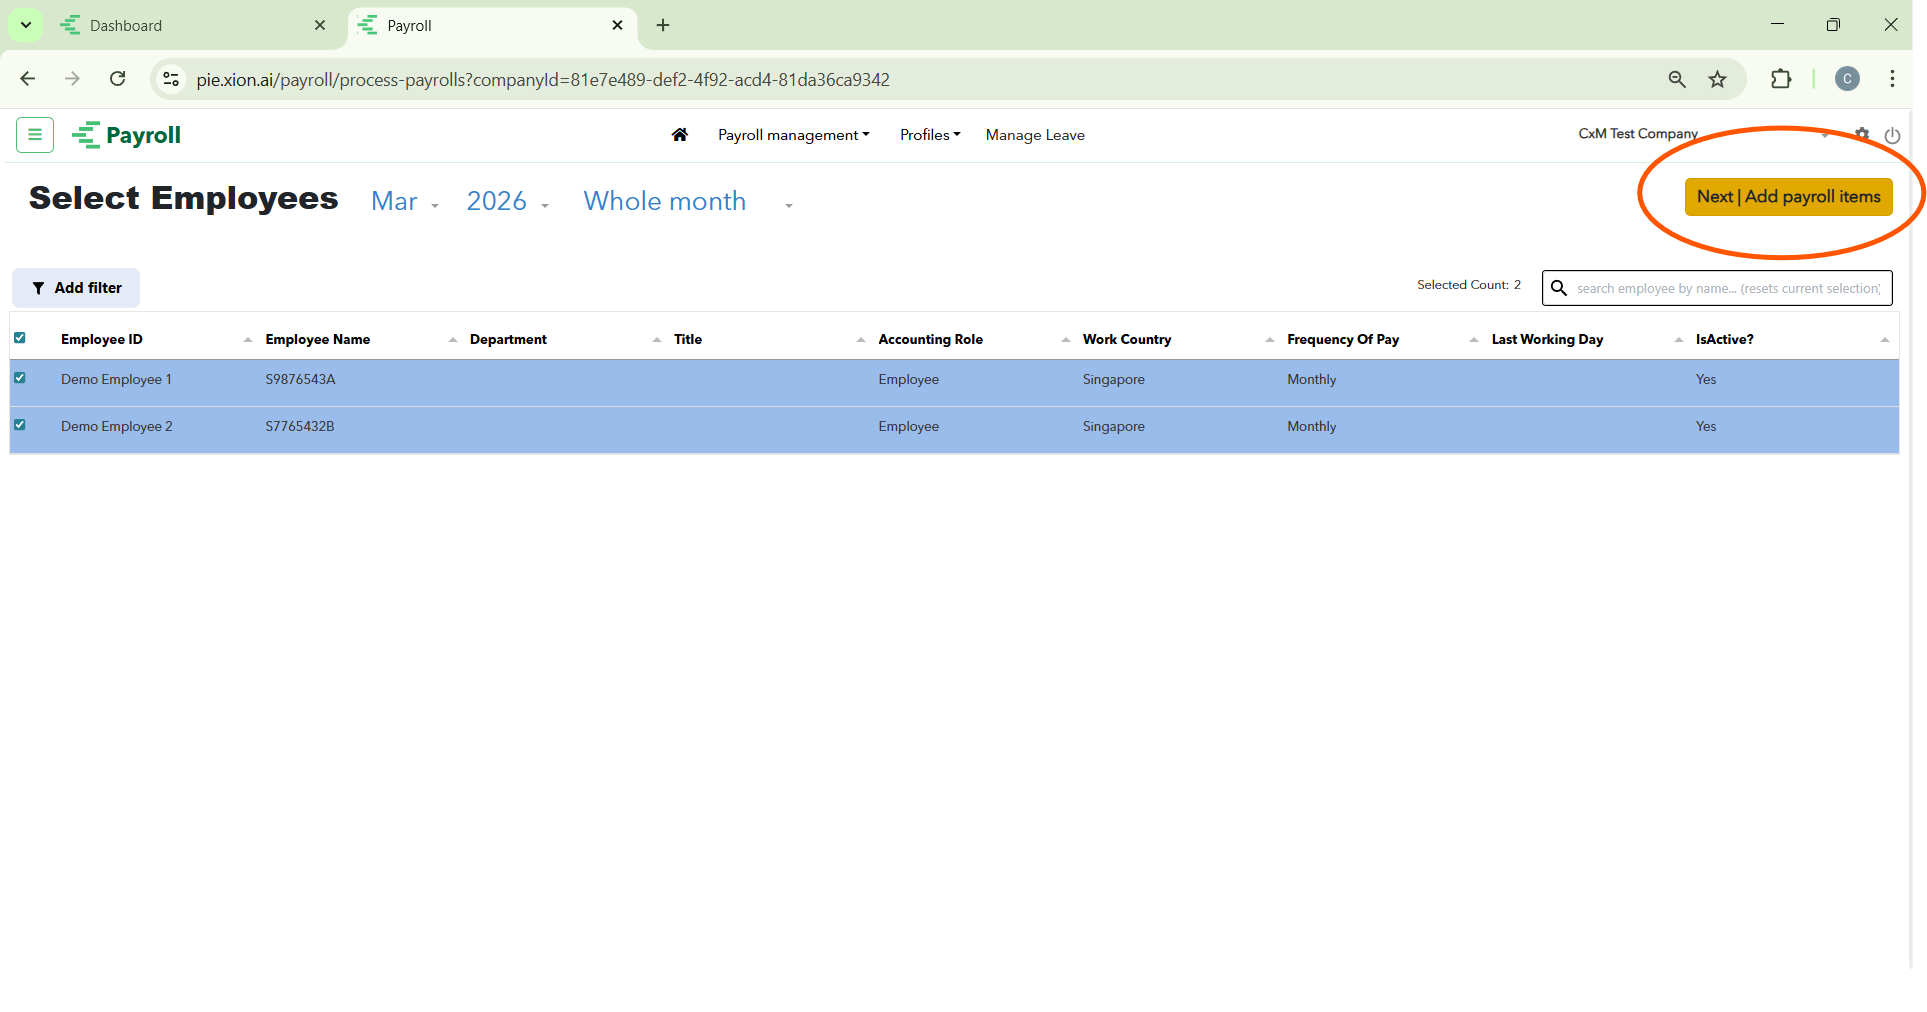
Finalising Selection
- Bulk Select: Use the master checkbox in the header to select all employees currently visible in your filtered list.
- Verification: Check the Selected Count indicator to confirm the total headcount for this run.
- Proceed: Click the yellow Next | Add payroll items button to move to the earnings and deductions stage.
Step 2: Adding Payroll Items
How do I manage earnings and deductions for the selected staff?
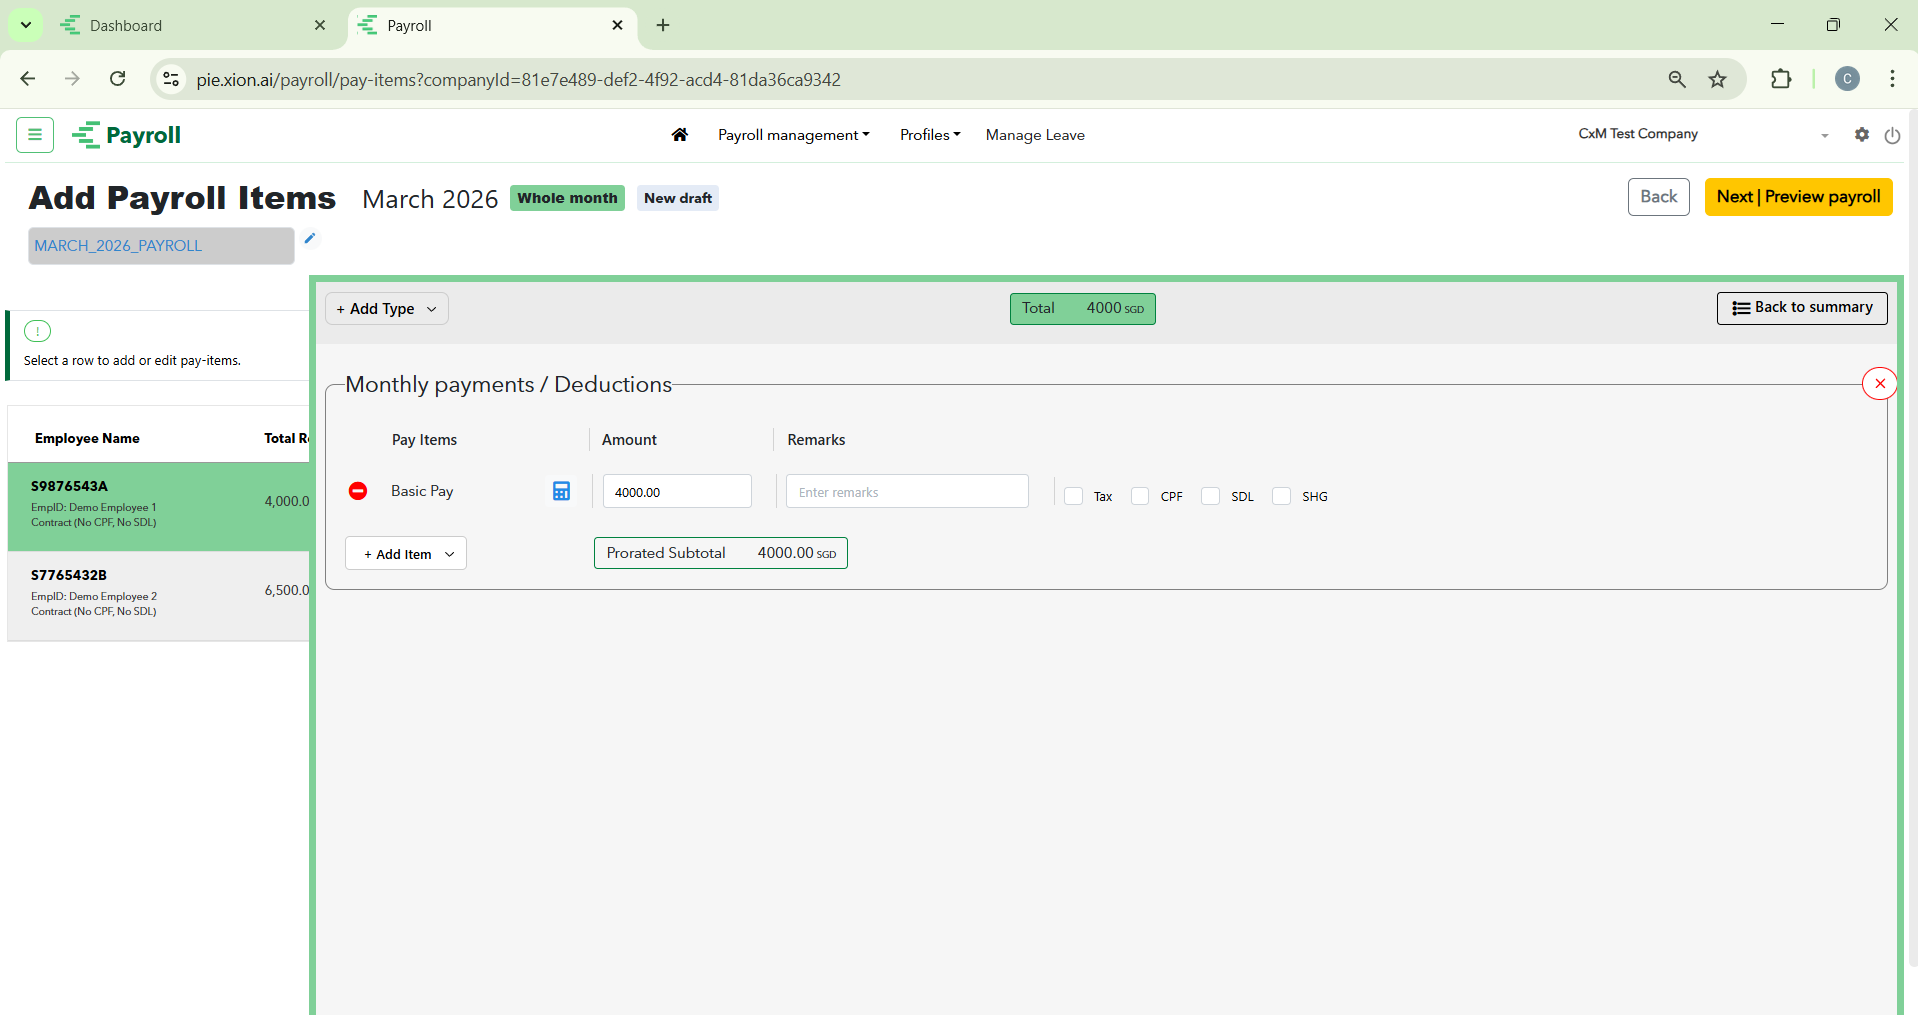
After selecting your employees, you will land on the Add Payroll Items screen. This is where the financial components of the payroll are compiled.
- Payroll Naming: The system generates a default name (e.g., MARCH_2026_PAYROLL), which you can edit using the blue pencil icon.
- Component Overview: The table provides a real-time summary for each employee, including:
- Total Recurring: Fixed salary components.
- Total Adhoc: One-time payments like bonuses or expense claims.
- Total Attendance: Deductions or additions based on time-tracking data.
- Leave Payments/Deductions: Automatically synced data from the Manage Leave module.
- Modifying Individual Items: Click on any specific row (employee name) to open a detailed view where you can add or edit specific pay-items for that individual.
- Navigating Back: If you need to change the headcount, use the Back button to return to the employee selection table.
- Moving to Preview: Once all items are verified, click the yellow Next | Preview payroll button to see the final calculations before submission.
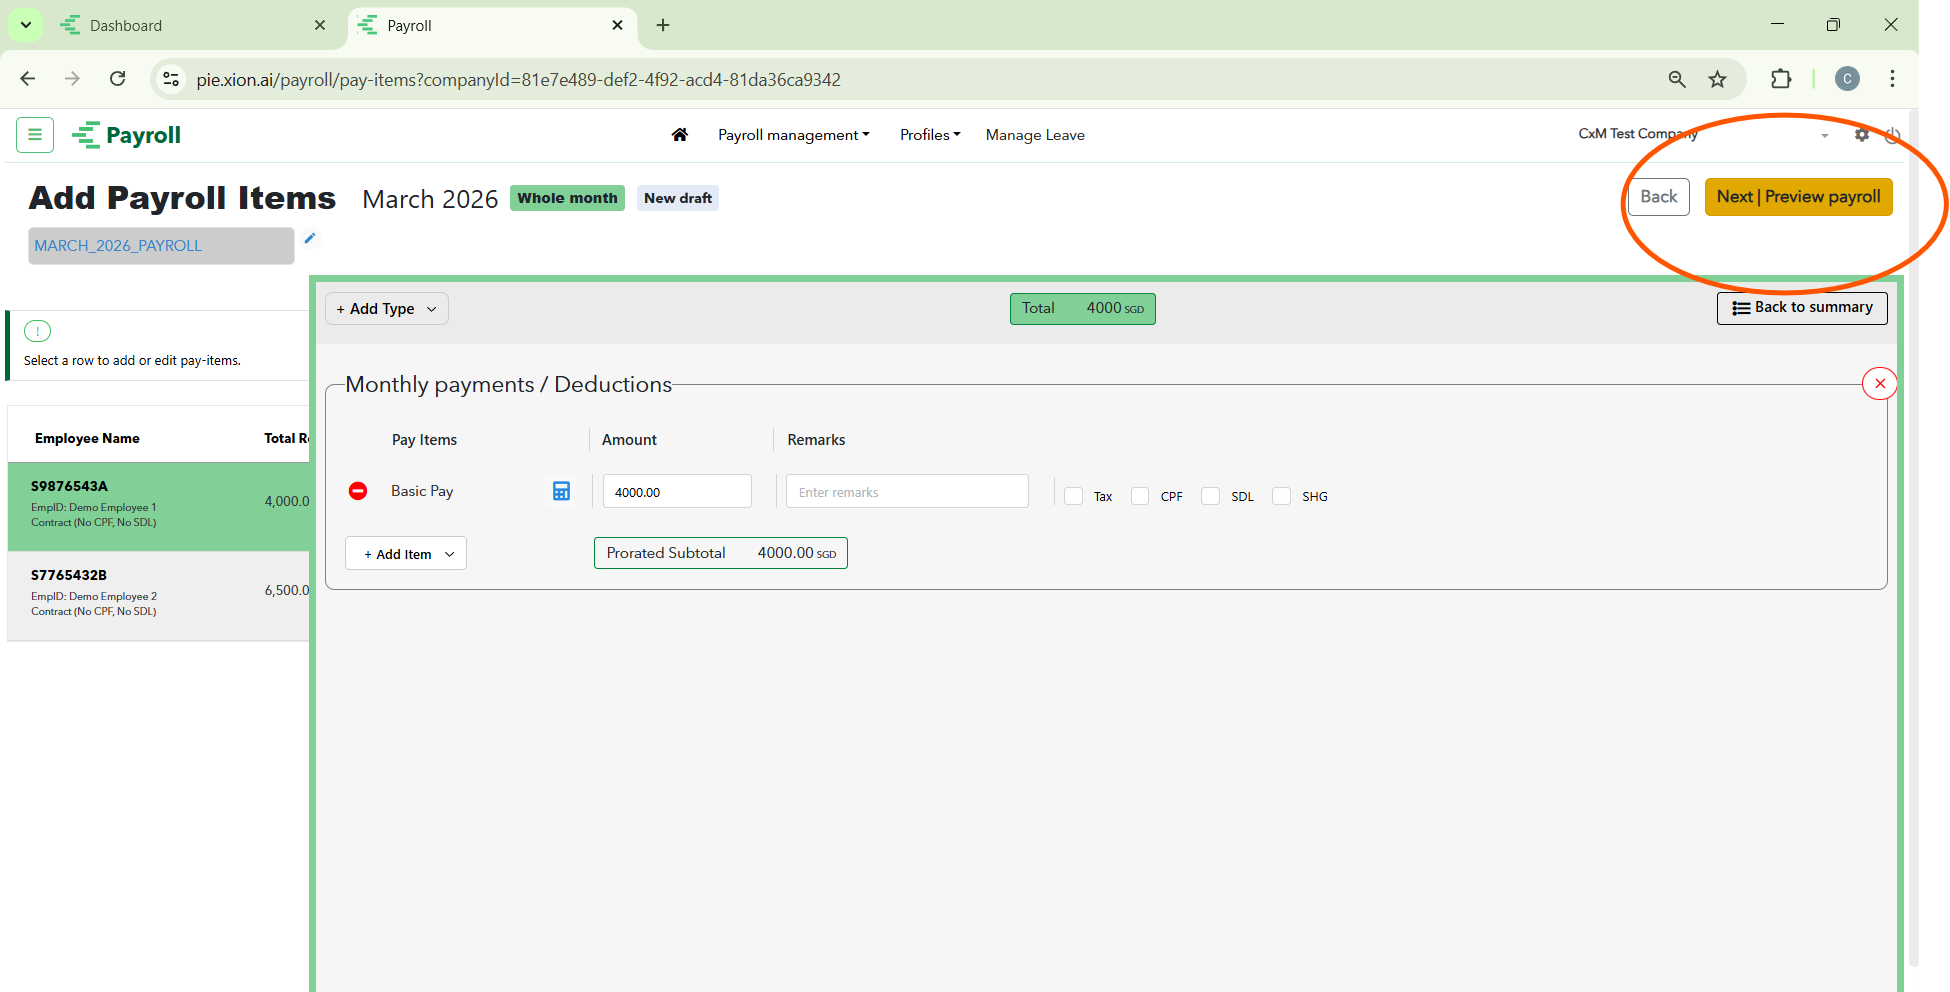
Detailed Employee Pay-Items
How do I manage specific additions and deductions?
Within the employee detail view, pay-items are grouped into four expandable sections. This allows for a clean and organised way to audit every cent before the final payroll is run.
Recurring Items (Fixed Monthly Pay)
These are the permanent components of an employee’s salary.
- Reviewing Fixed Pay: Items like Basic Salary or Fixed Allowances are listed here.
- Is Fixed? Badge: A green Yes badge confirms this item is pulled directly from the employee’s contract profile.
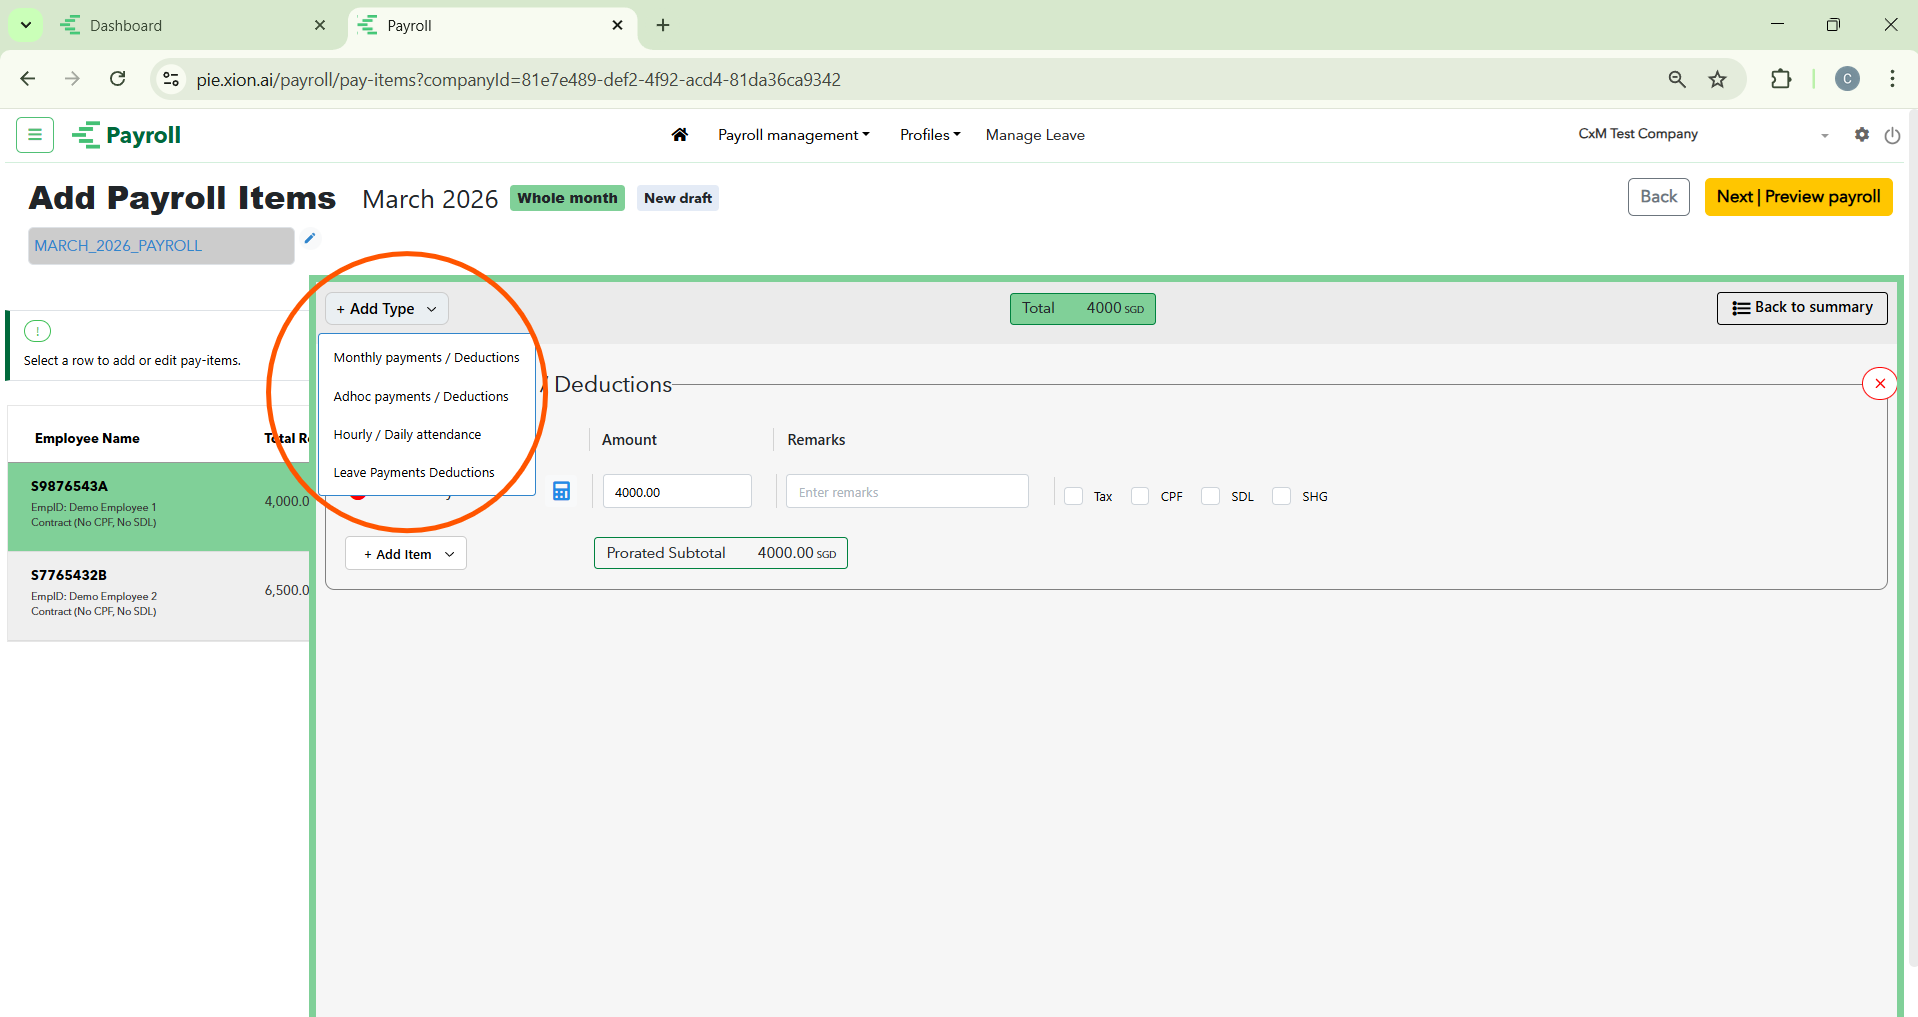
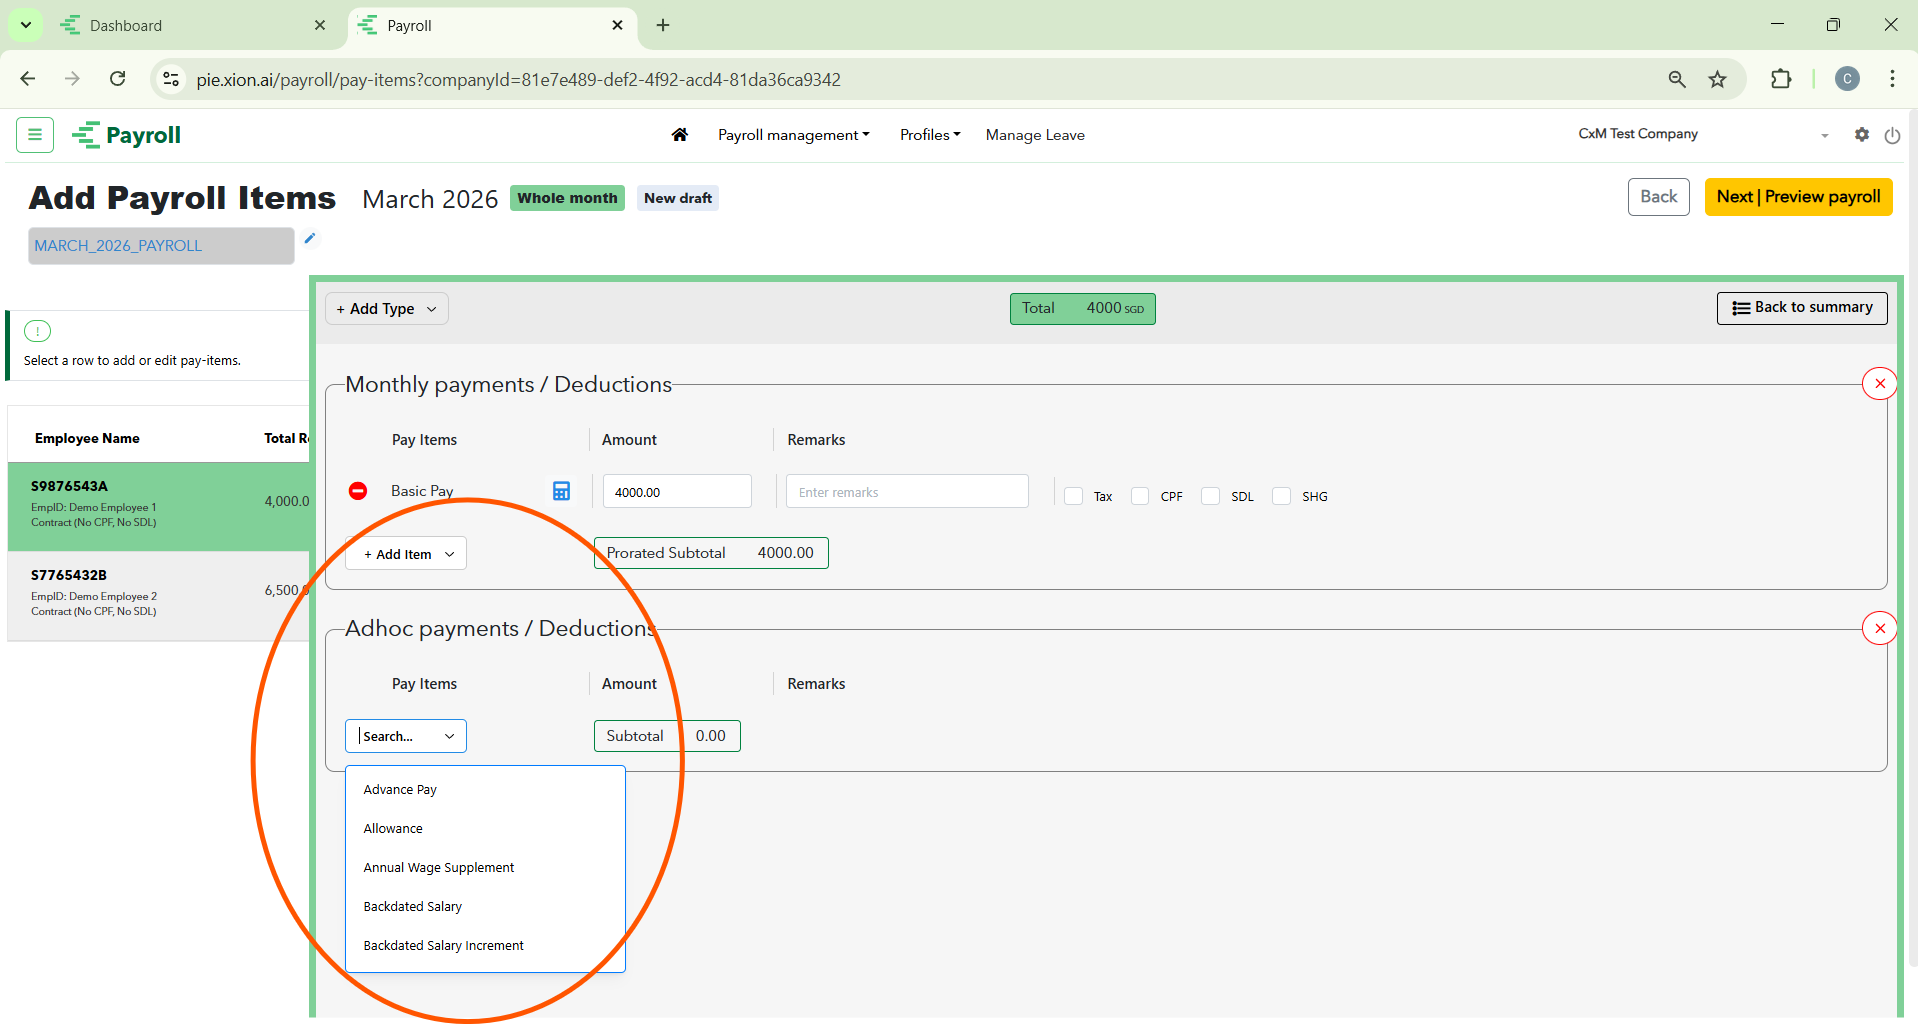
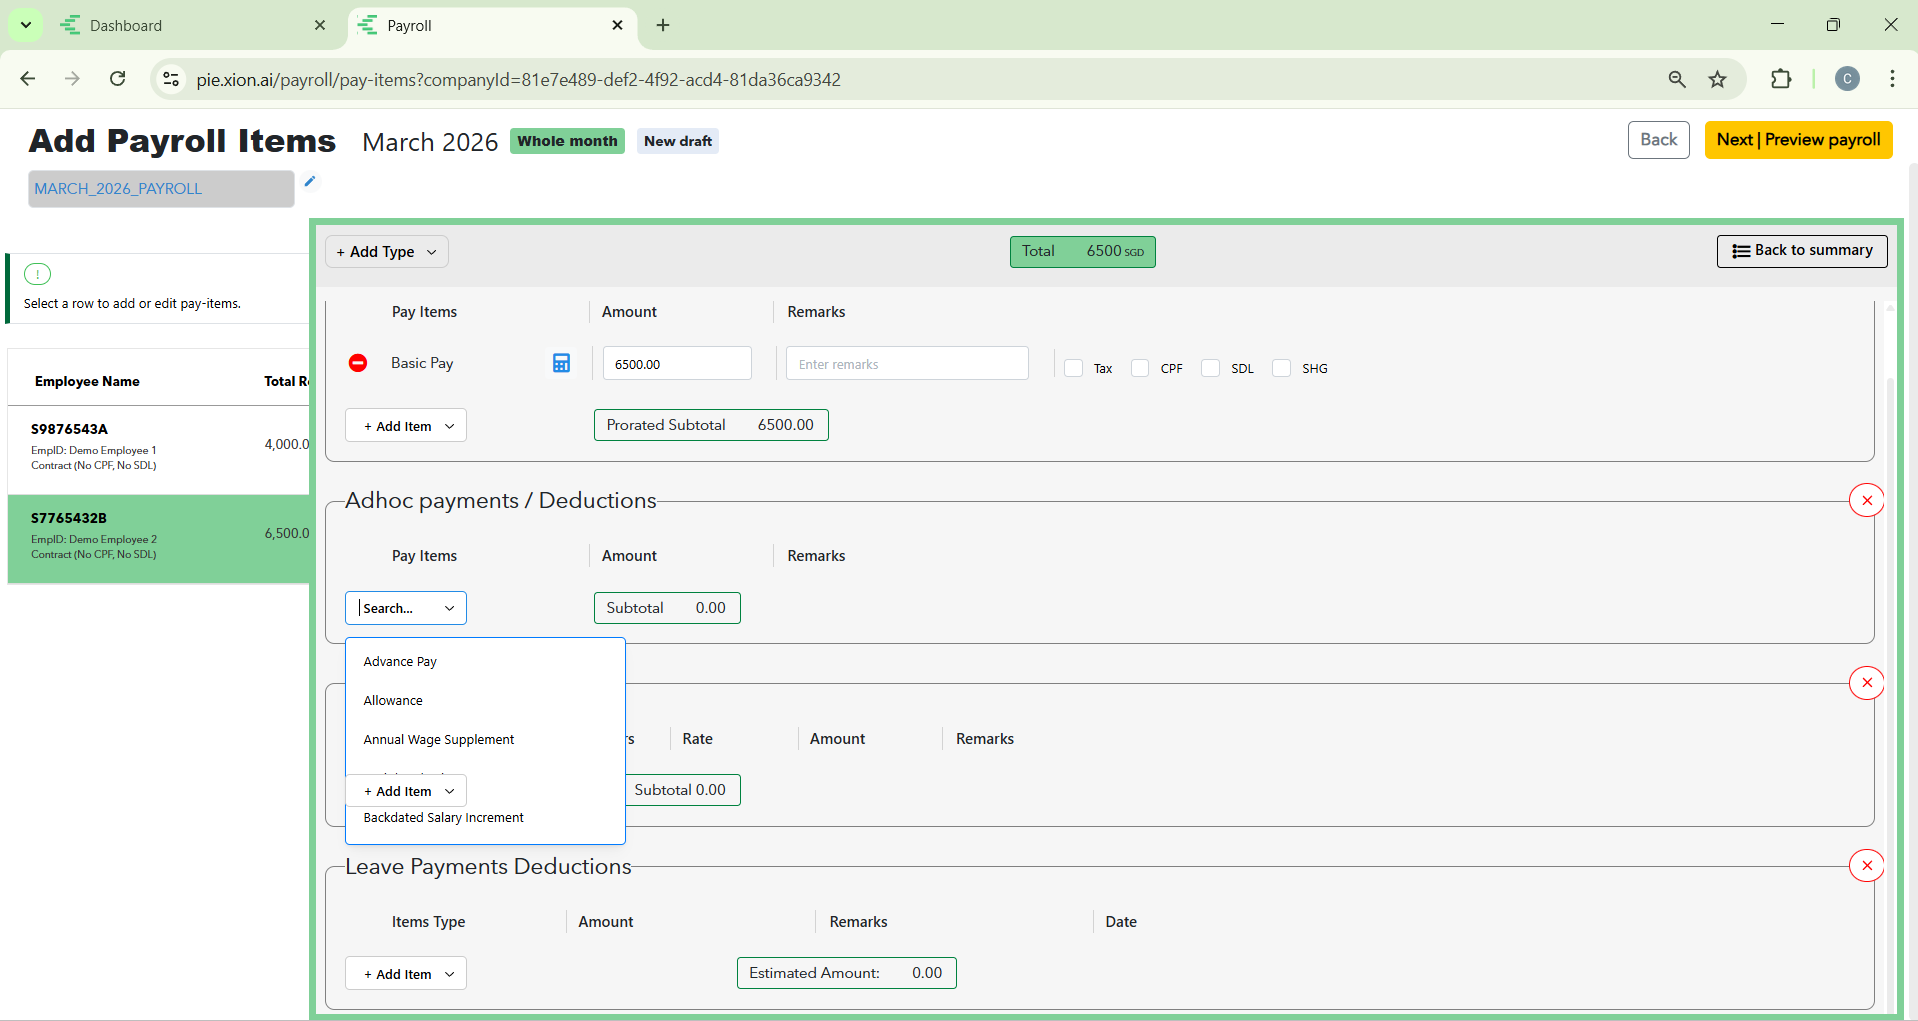
Adhoc Items (Variable Payments)
Use this section for one-off payments that change month-to-month.
- The “Add Item” Menu: Click + add item to open the selection menu.
- Selecting Categories: Choose from predefined types like Performance Bonus, Referral Fee, or Commission.
- Inputting Values: Once selected, simply enter the Amount for this specific month.
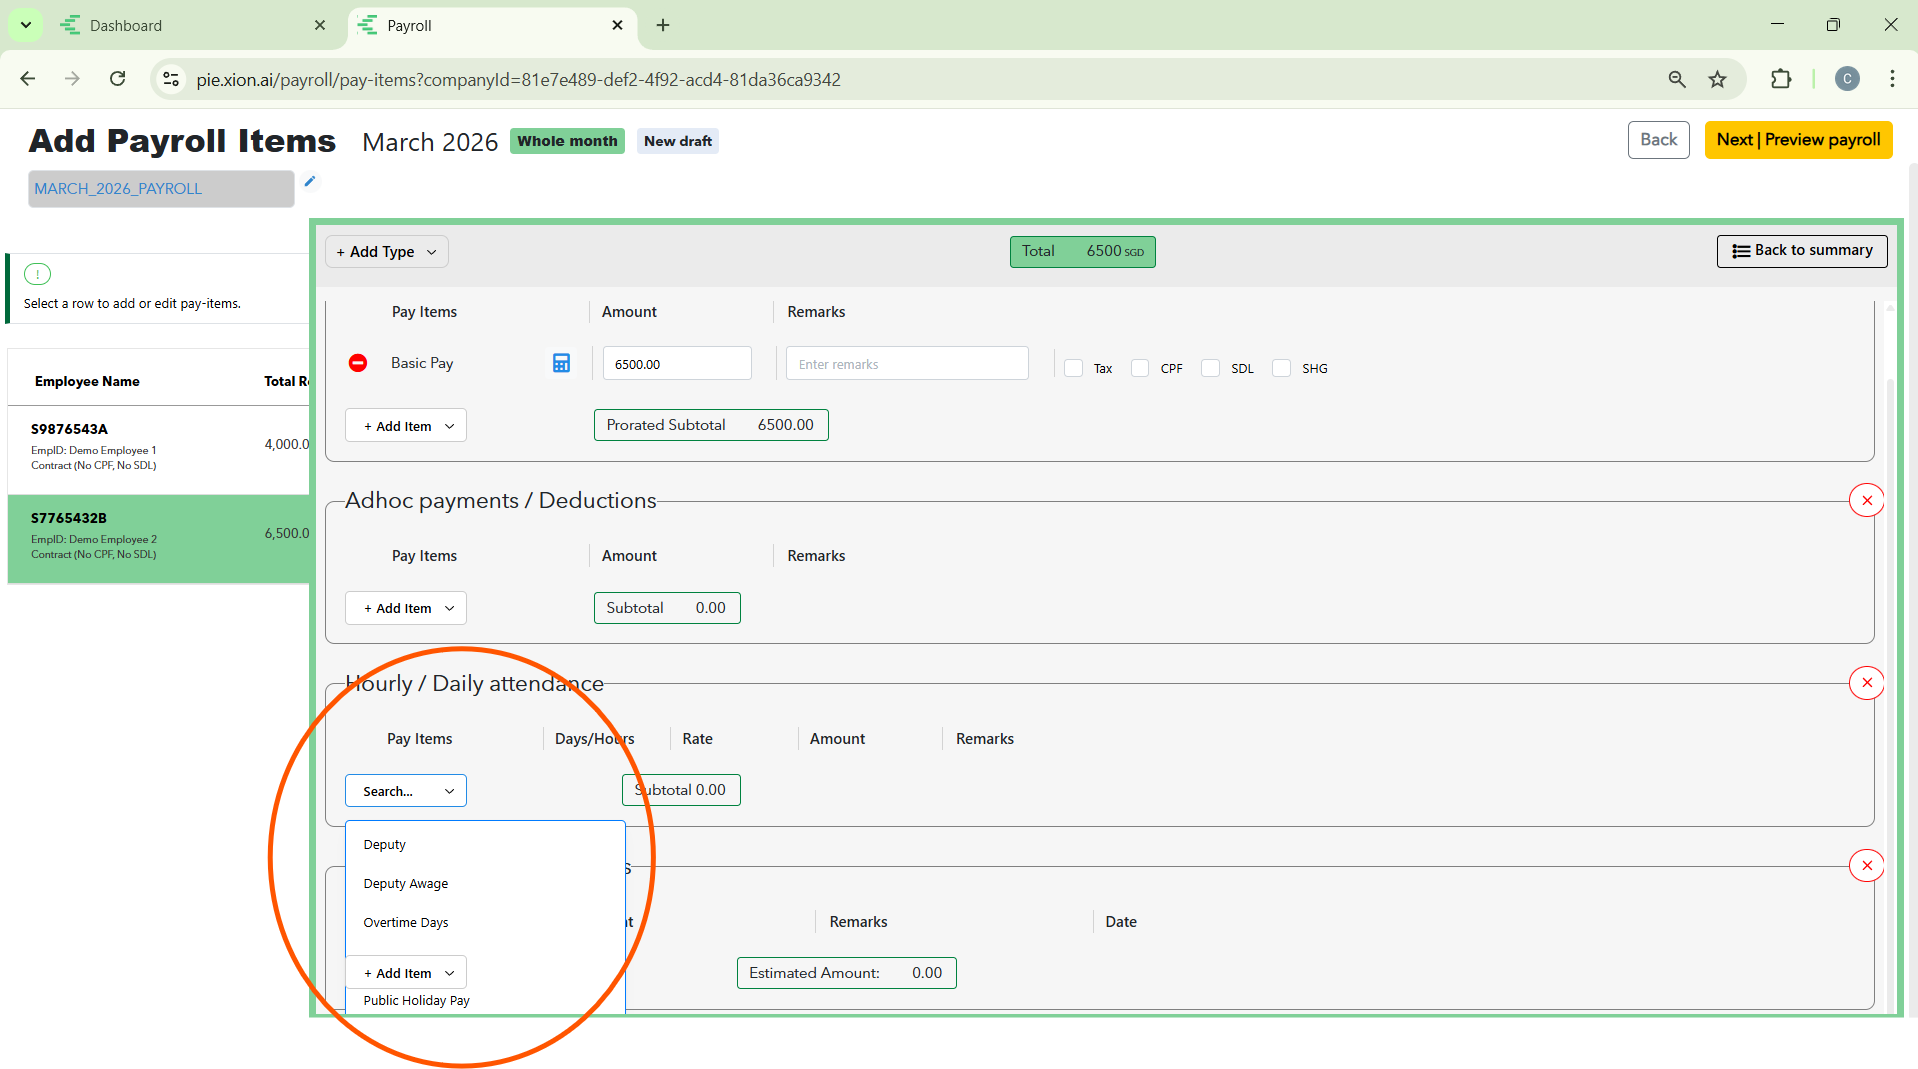
Attendance Items (Time-Based Pay)
This section handles adjustments based on physical presence or absence.
- Daily Rate Reference: The system displays the Daily Rate (e.g., $100.00) used for calculations.
- Absence Deductions: If an employee has missed work days, you can enter the No of Days, and the system will automatically calculate the Total Amount to be deducted.
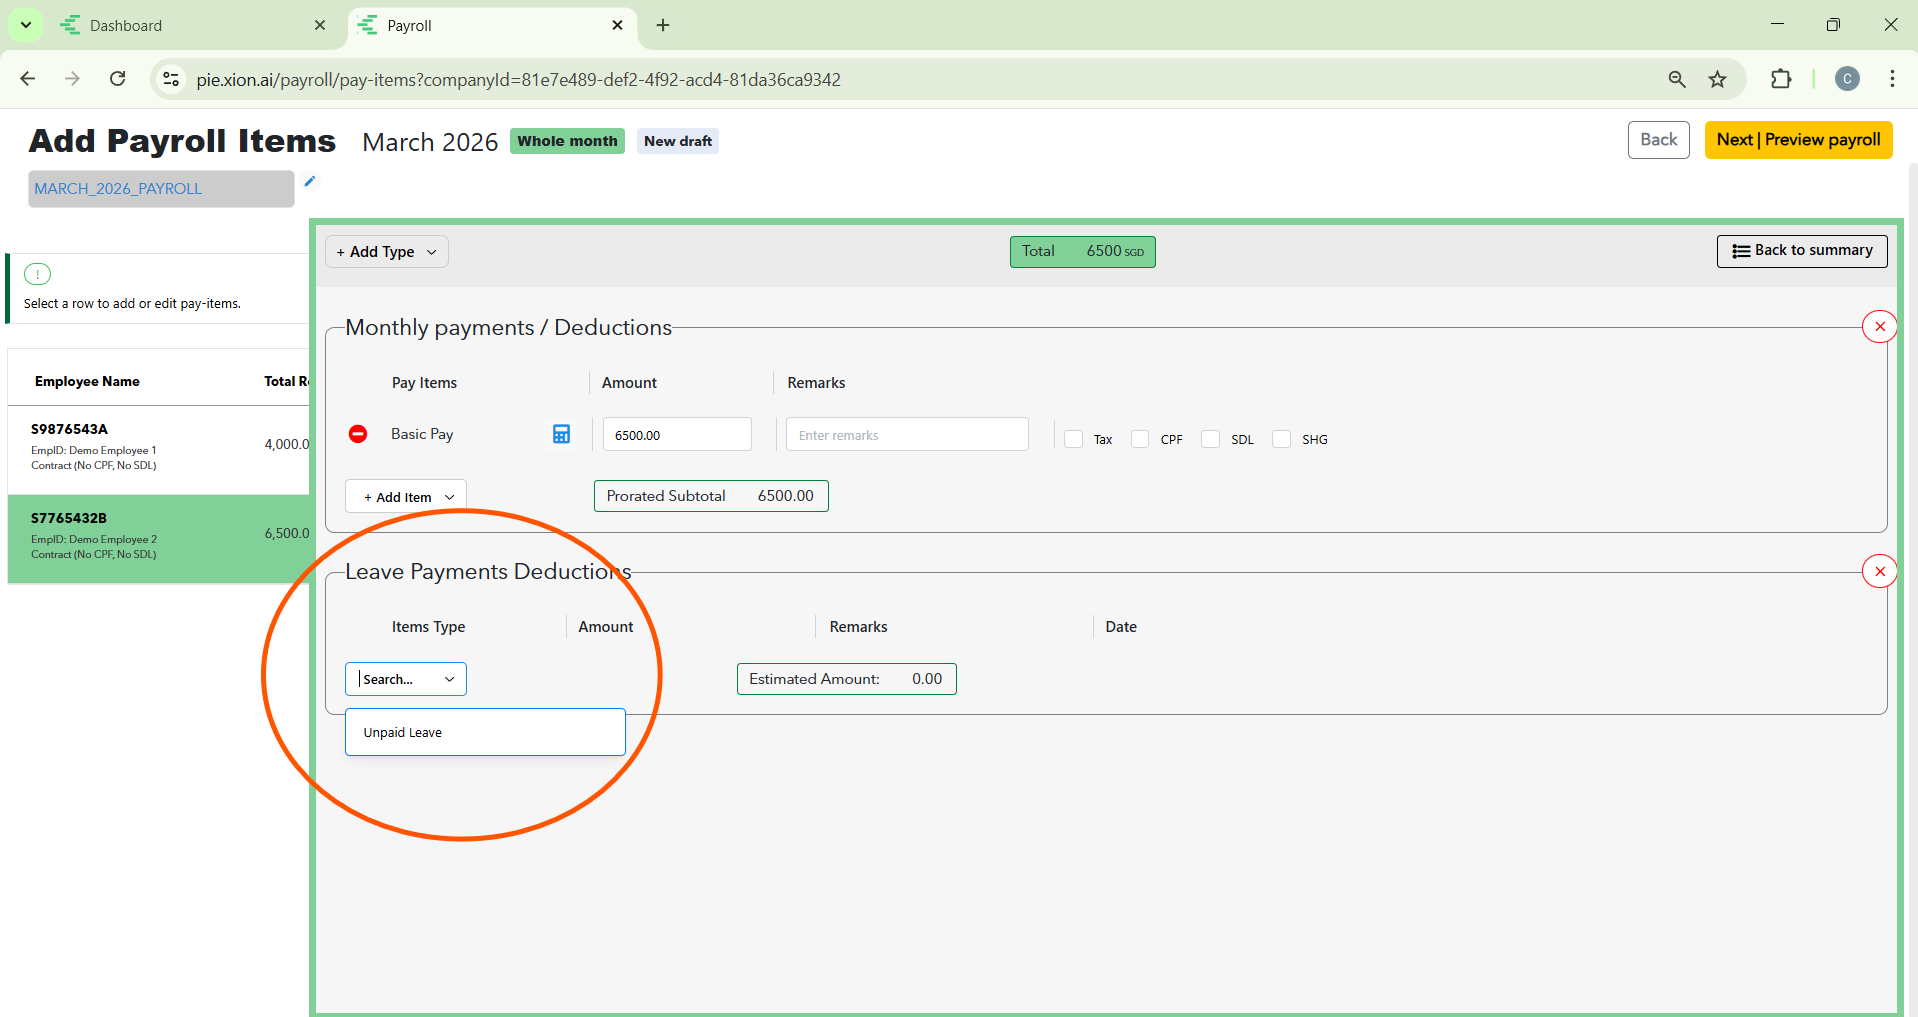
Leave Items (Synced Absence)
This is the automated link between the Manage Leave module and Payroll.
- Automated Entries: Items like Unpaid Leave (UPL) are synced here.
- Pro-rated Calculations: For example, if 0.5 days of UPL are recorded, the system calculates the exact deduction based on the employee’s daily rate.
5. Statutory Checkboxes (The “Big Four”)
At the top of every employee profile, verify the four critical toggles for Singapore compliance:
- Tax: Calculates income tax withholding.
- CPF: Applies mandatory pension fund contributions.
- SDL: Calculates the Skills Development Levy.
- SHG: Applies self-help group deductions (e.g., CDAC, SINDA).
6. Summary Sidebar (The Right-Hand Panel)
The sidebar provides a live financial snapshot of the individual’s payroll as you adjust the items above.
- Total Earnings: A real-time sum of all Recurring and Adhoc additions.
- Total Deductions: The combined total of all Unpaid Leave and Attendance-based cuts.
- Net Adjustment: The final “plus or minus” figure that will be applied to the employee’s basic salary for this specific cycle.
Moving to Preview: Once all items are verified, click the yellow Next | Preview payroll button to see the final calculations before submission.
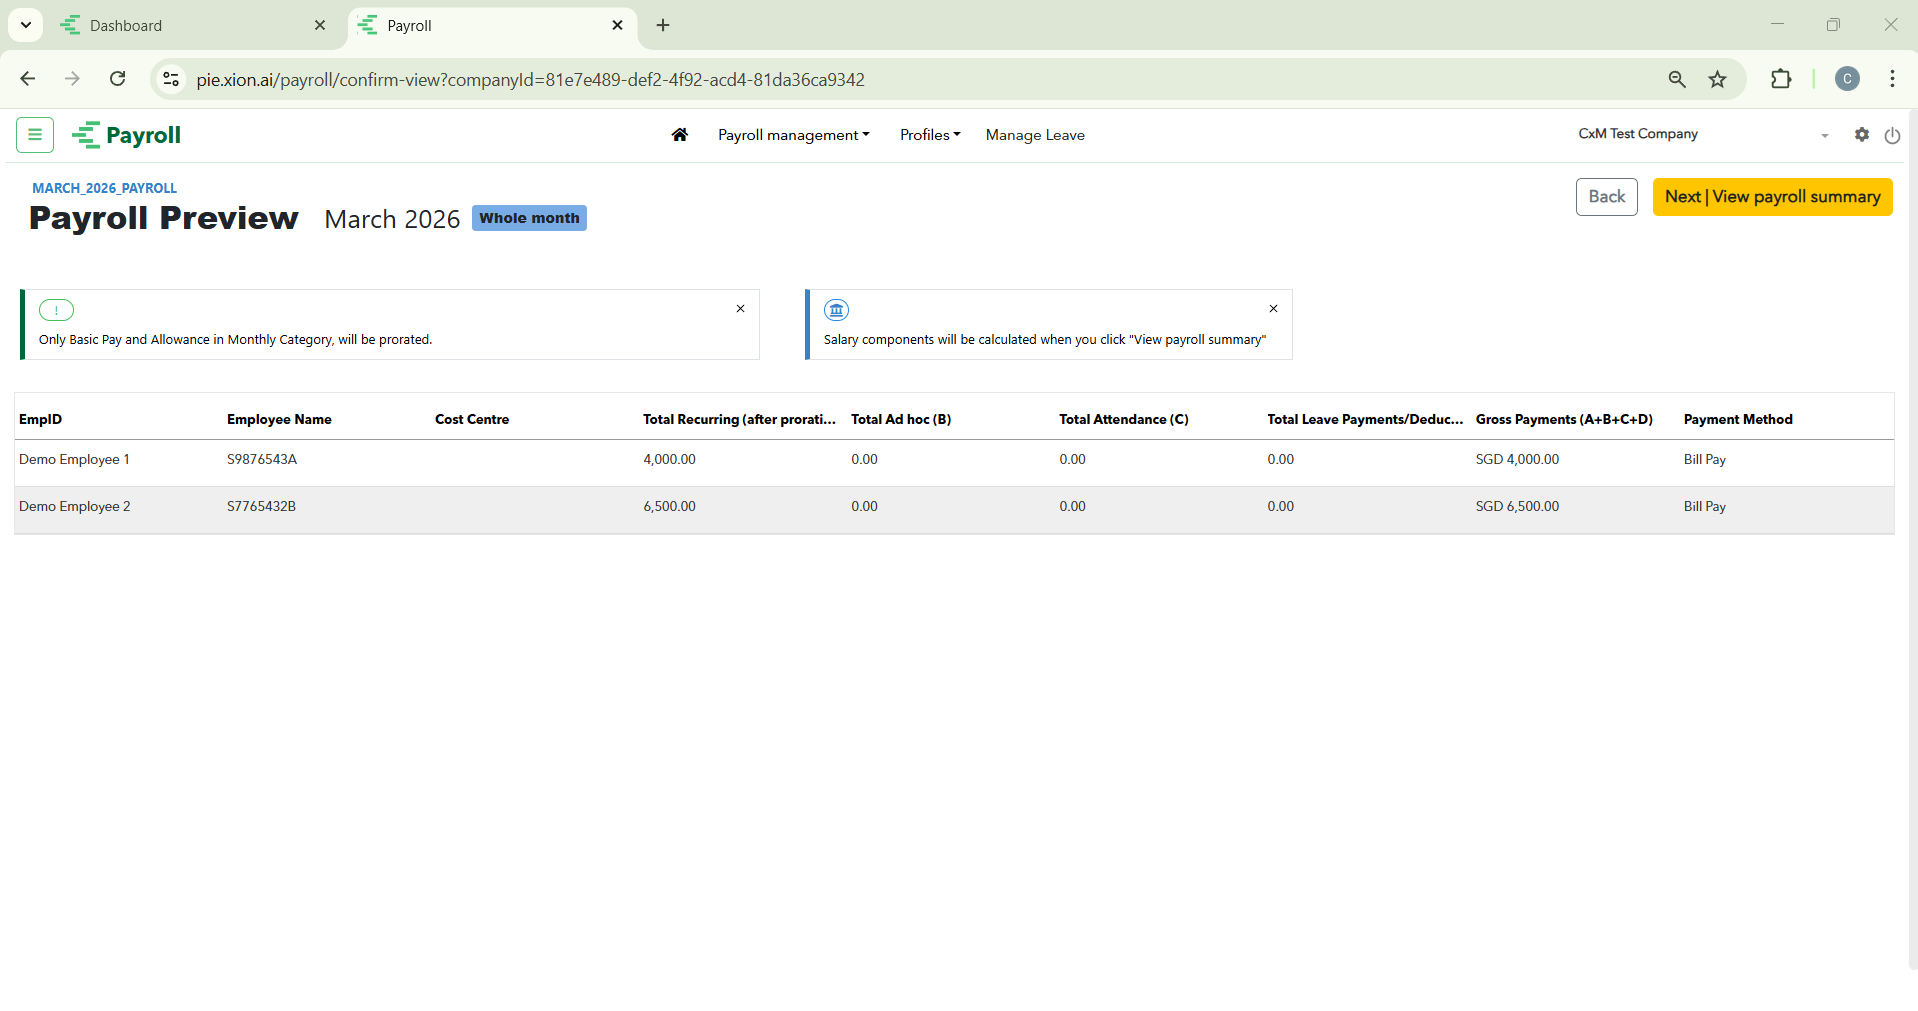
Step 3: Preview & Submission
How do I verify the total payroll before finalising?
The Preview Payroll screen is your final safeguard. It aggregates all individual calculations into a company-wide summary to ensure that the total disbursement is accurate and compliant.
1. Comprehensive Payroll Summary
At the top of the page, the system provides a high-level financial overview:
- Gross Pay: The total sum of all salaries and additions before deductions.
- Employee CPF: The total amount to be withheld from employees for their CPF contributions.
- Employer CPF: The total amount the company is obligated to pay toward employee CPF.
- Total Net Pay: The actual total amount that will be transferred to all employees’ bank accounts.
- Total CPF: The combined total (Employee + Employer) to be remitted to the CPF Board.
- Total SDL: The total Skills Development Levy amount calculated for the entire headcount.
2. Employee Breakdown Table
This table allows for a final line-by-line audit:
- Basic & Gross Pay: Verify the core salary figures.
- Statutory Columns: Review the specific CPF (Employee/Employer), Tax, SDL, and SHG (Self-Help Group) amounts.
- Net Pay: Confirm the final “take-home” amount for every individual.
- Disbursement Mode: Check the Bank Account details or payment method assigned.
3. Reviewing Variations & 4. Finalising
- In-Depth Check: If any figure looks unexpected, click Back to return to Step 2 and adjust individual pay-items.
- Accuracy Check: Ensure the Total CPF and Total Net Pay align with your monthly budget.
- Submit for Approval: Once confident, click the yellow Submit for approval button.
- Next Steps: The status will change to “In progress,” and the designated approver will be notified.
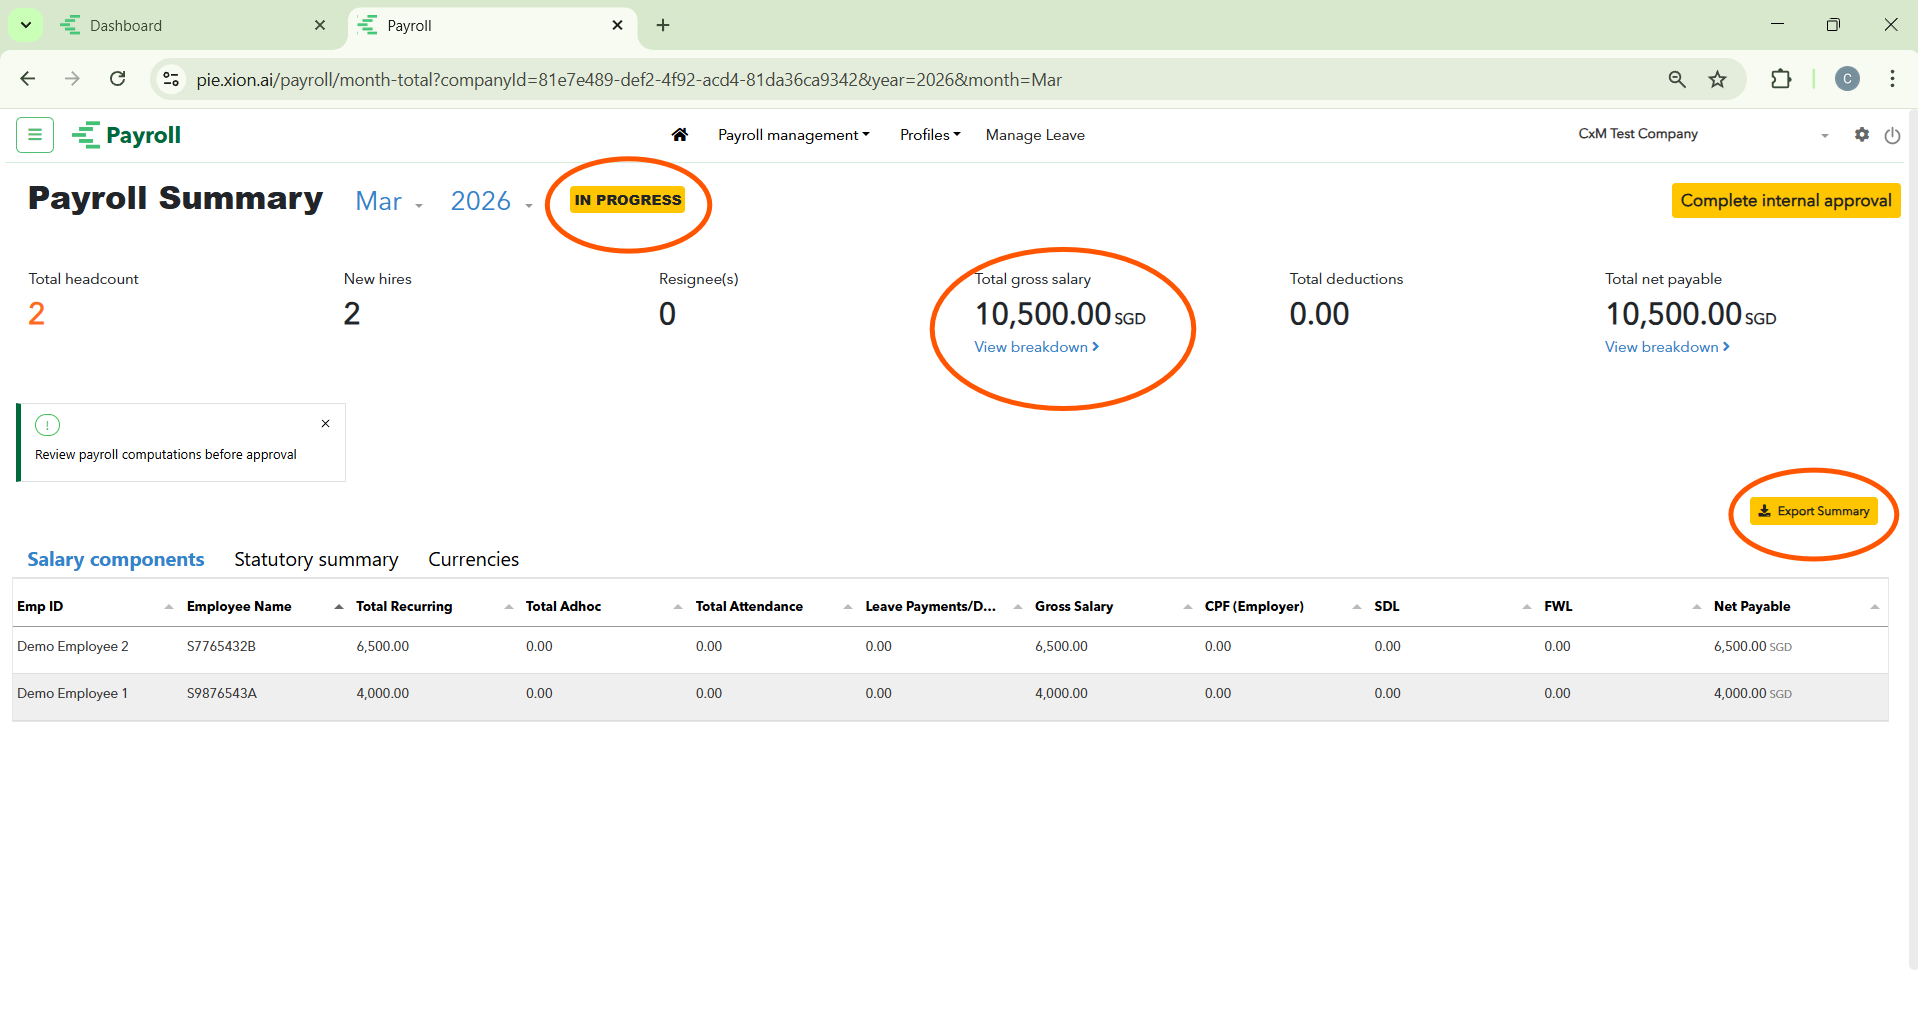
Managing the Payroll Queue
How do I track the status of my submitted payroll?
The main dashboard provides a birds-eye view of all current and historical payroll cycles.
- Payroll Cycle Overview: Each row displays the Payroll Name, Payment Month, and Headcount.
- Financial & Statutory Summaries: The dashboard displays a live breakdown of obligations including Total Gross, Total Net, Total Employer CPF, Salary components, Statutory summaries, and Currencies.
- Status Tracking: Monitor states like Pending Approval, Approved, and Draft/In-Progress.
- Action Centre: Use “Export summary csv” to download a comprehensive data file for your records.
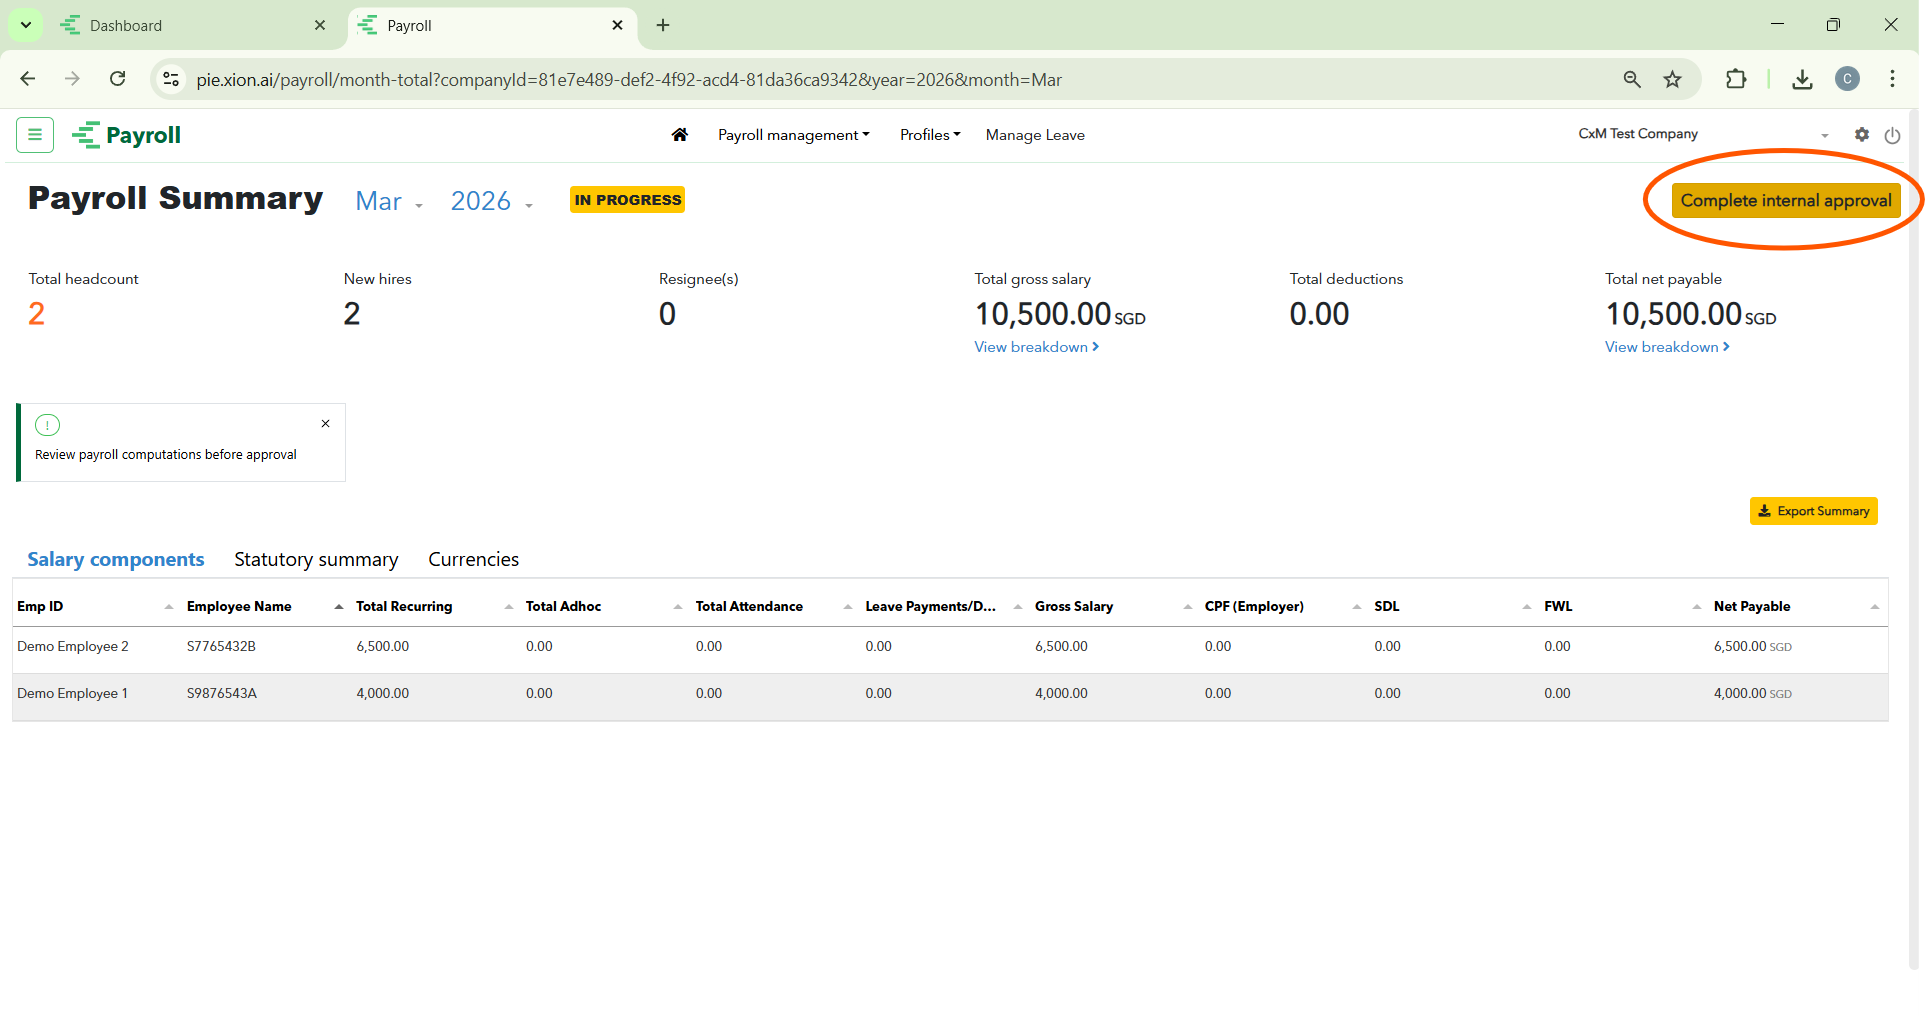
The Approval Workflow
How do I move from internal review to final authorisation?
The approval process is a two-tier workflow involving internal and client verification.
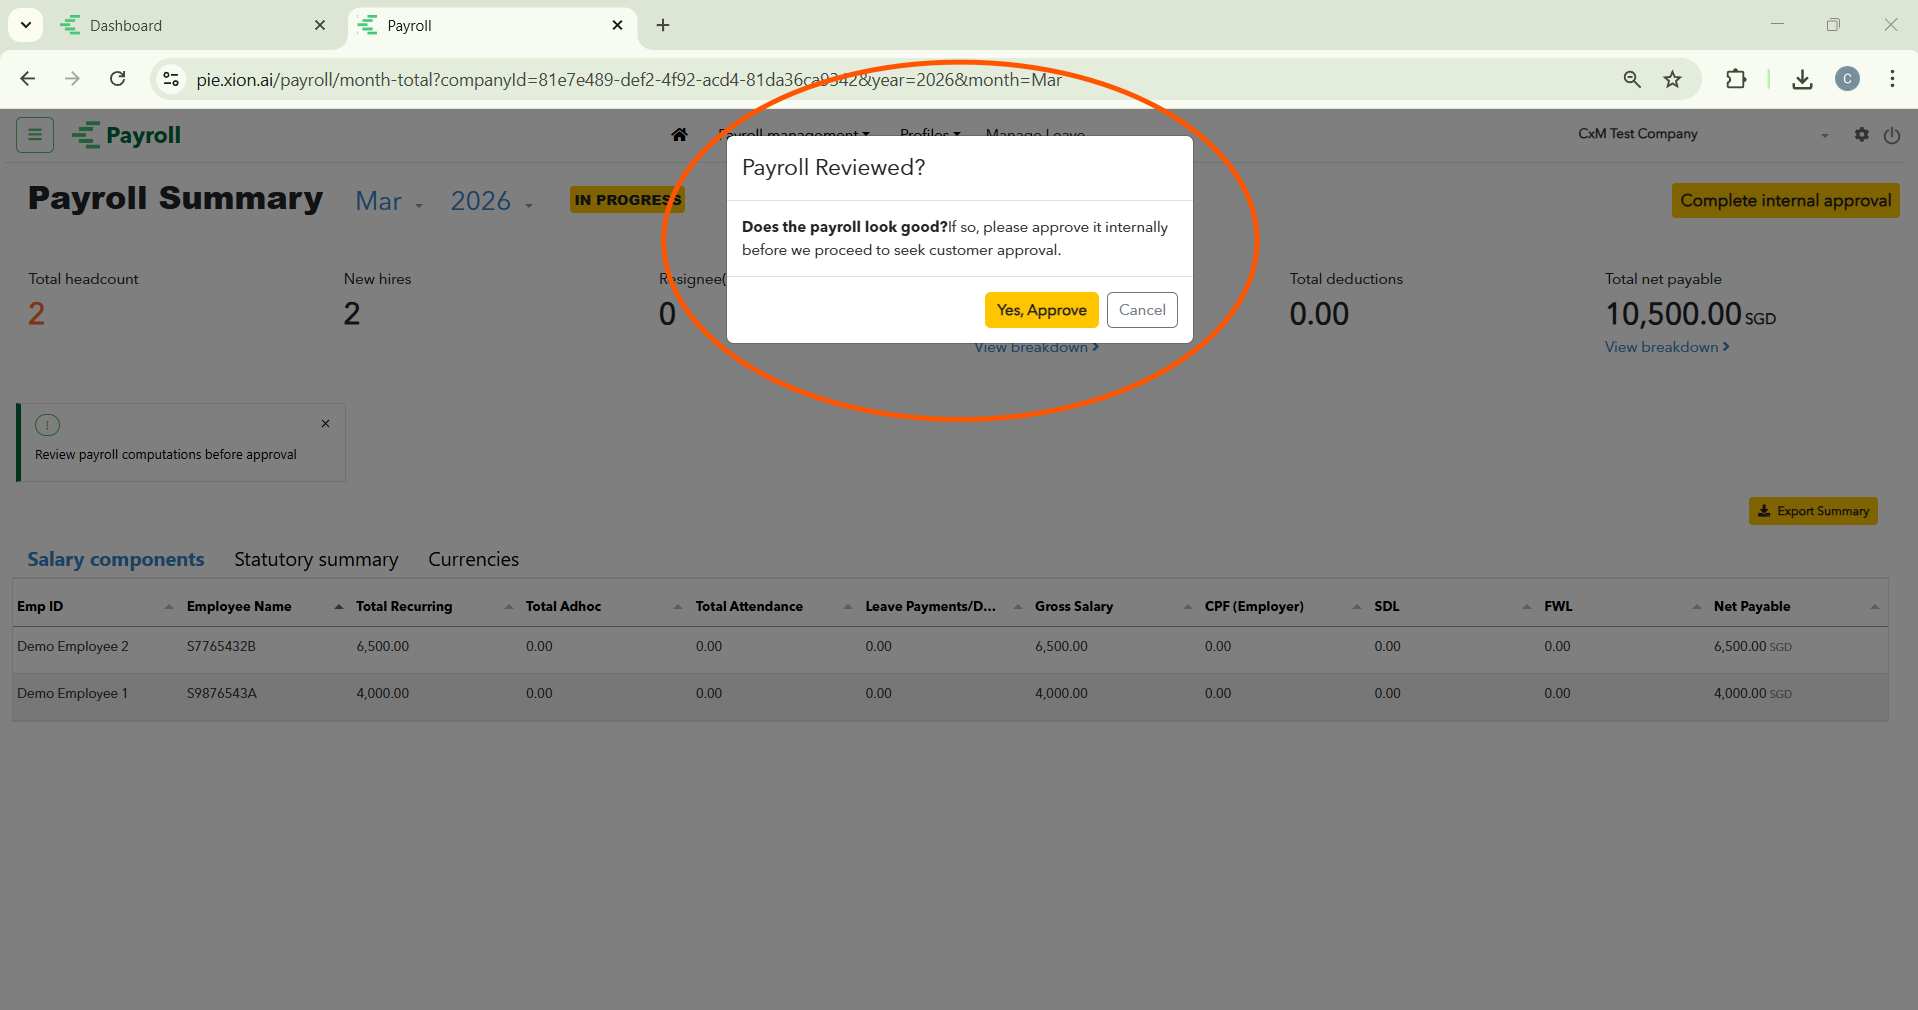
Step 1: Internal Confirmation
- The Payroll Summary: Verify key metrics like Total Headcount and Total Net Payable.
- Status Check: Under review, the cycle displays a yellow IN PROGRESS tag.
- Initiating Approval: Click Complete internal approval and confirm with the yellow Yes, Approve button.
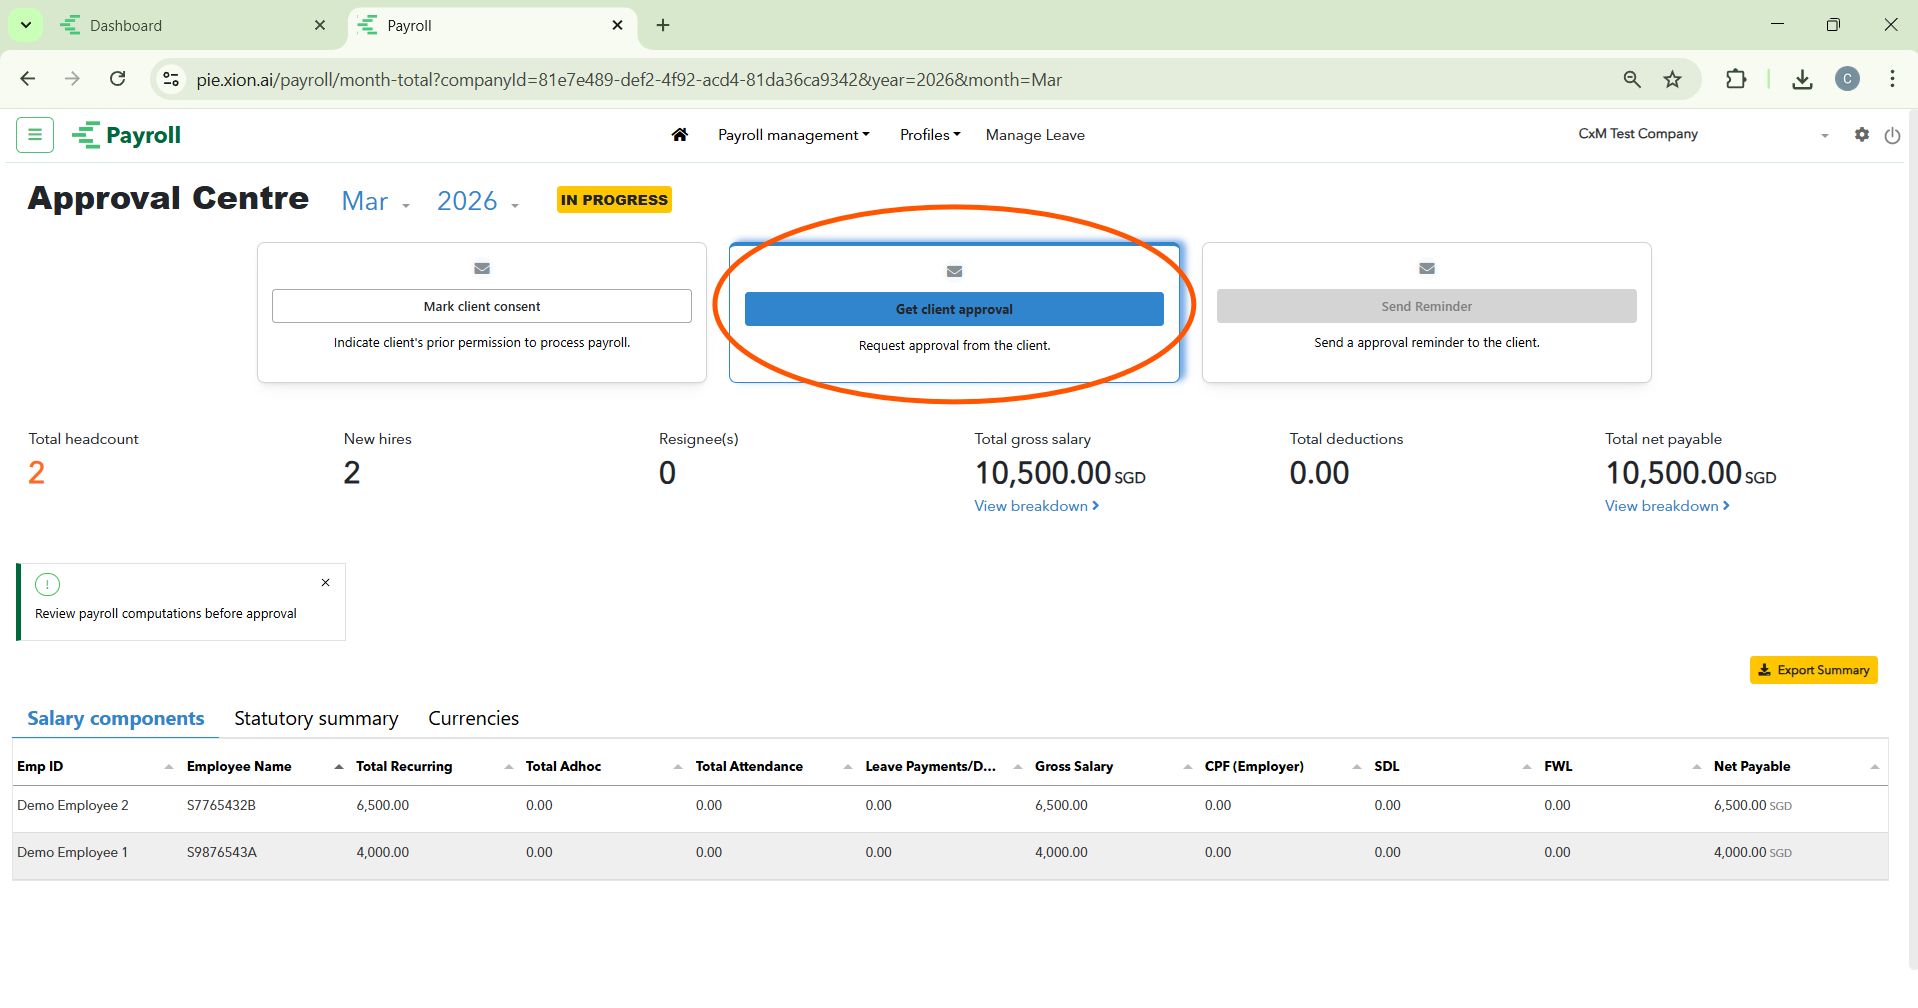
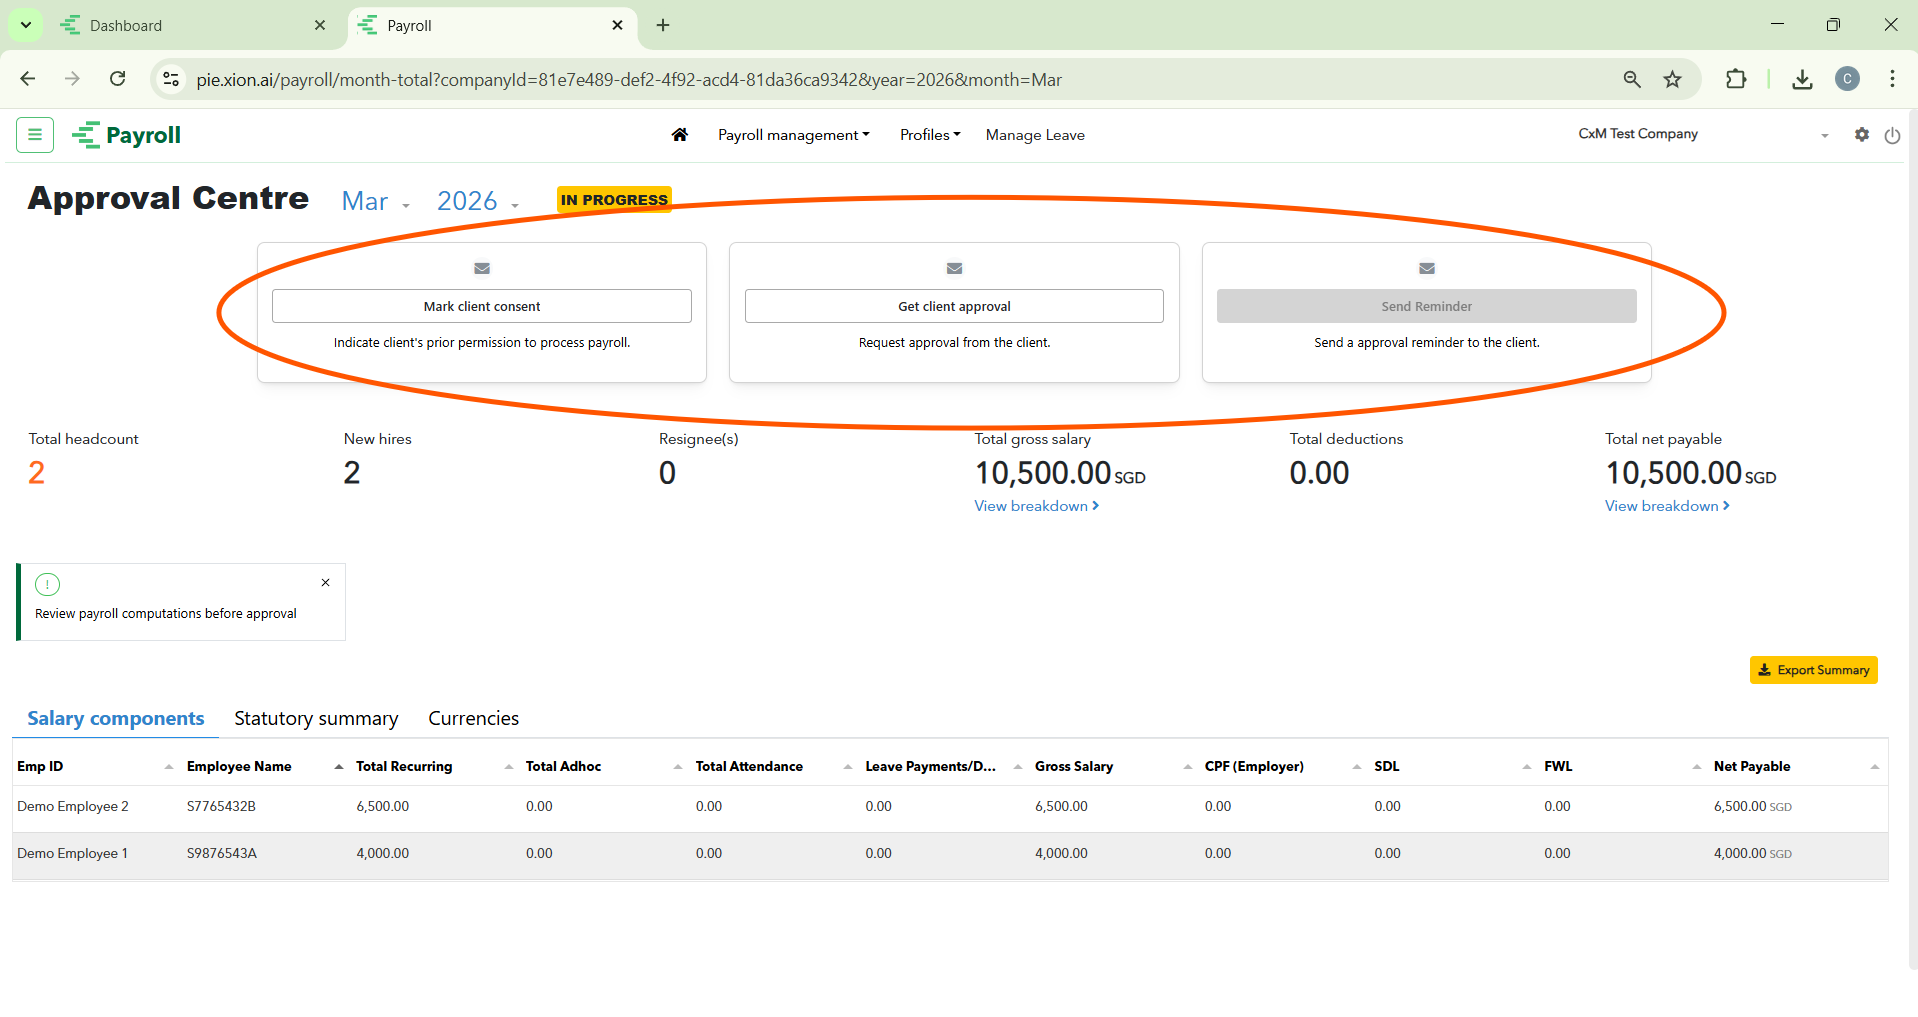
After internal confirmation, you move to the Approval Centre with three primary options:
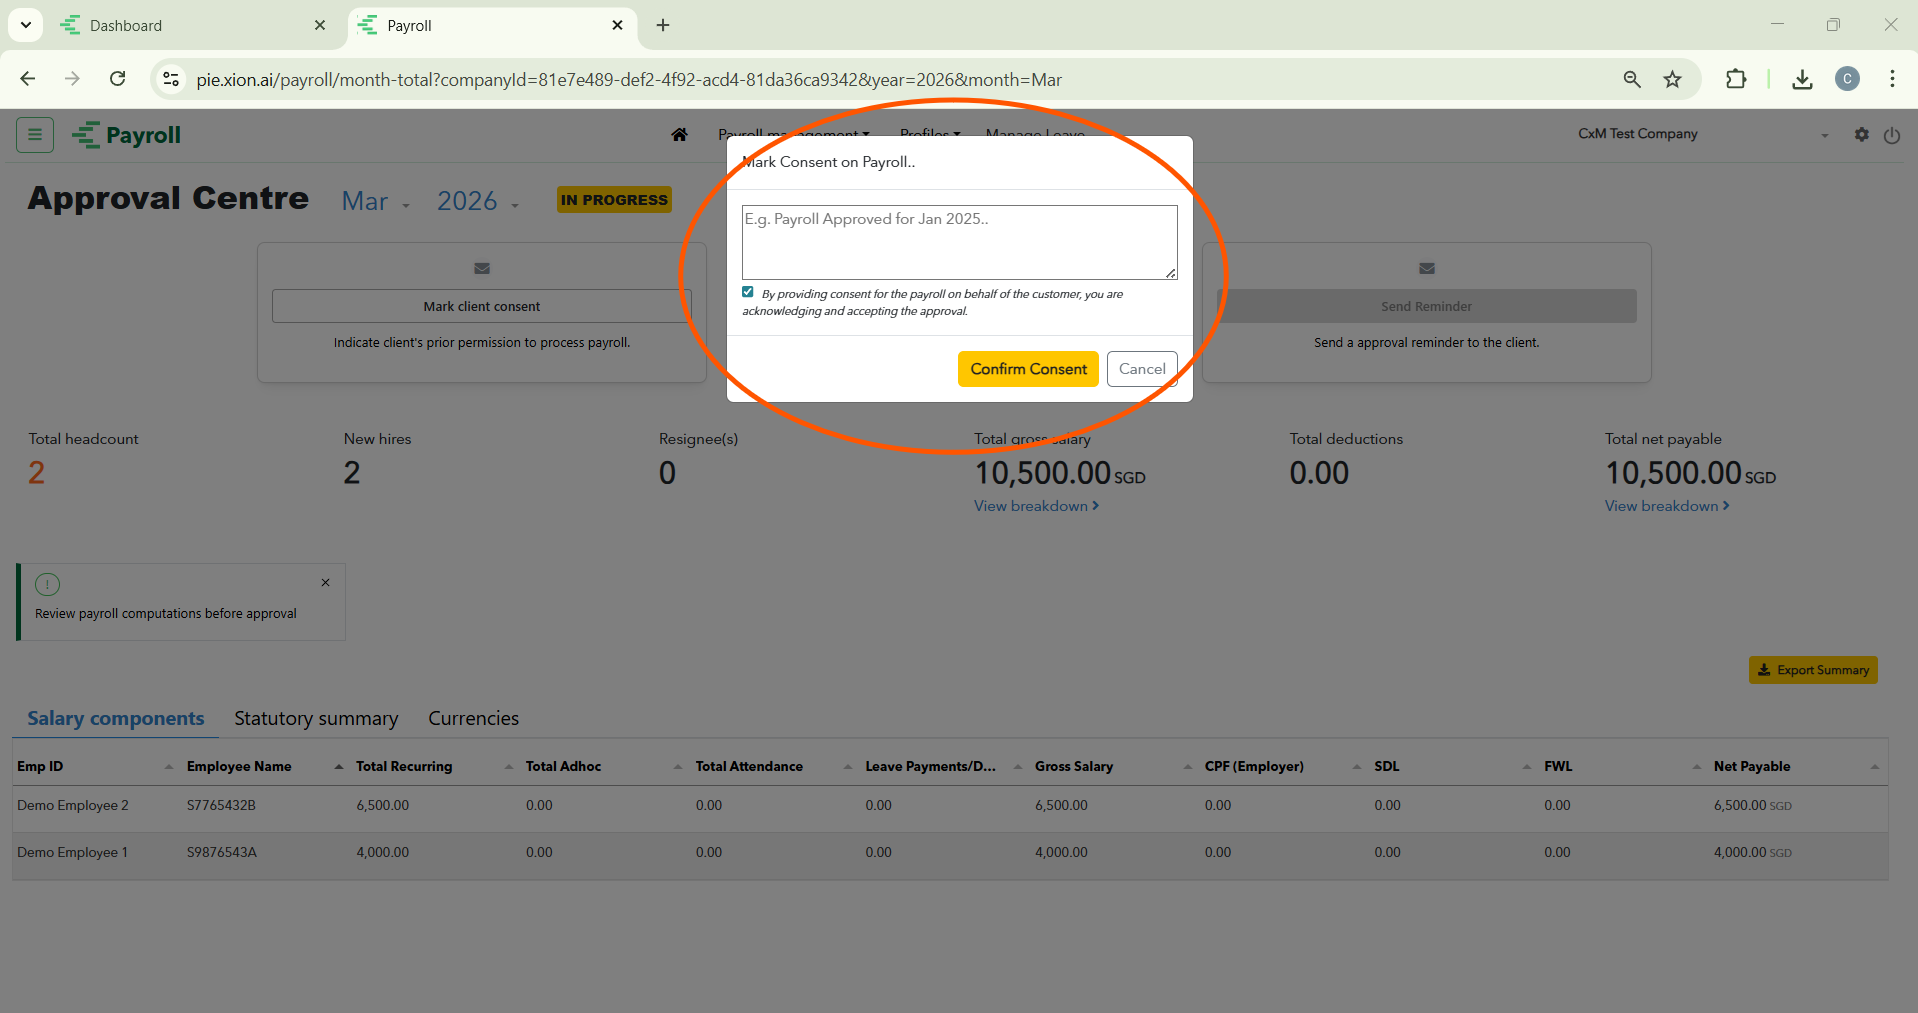
Marking Client Consent (Manual Route)
Used when you already have verbal or written permission from the customer.
- Initiating Manual Consent: Select the Mark client consent option.
- The Consent Dialogue: Add notes in the Remarks Box (e.g., “Approved via email”).
- Legal Acknowledgement: Tick the mandatory checkbox and click Confirm Consent.

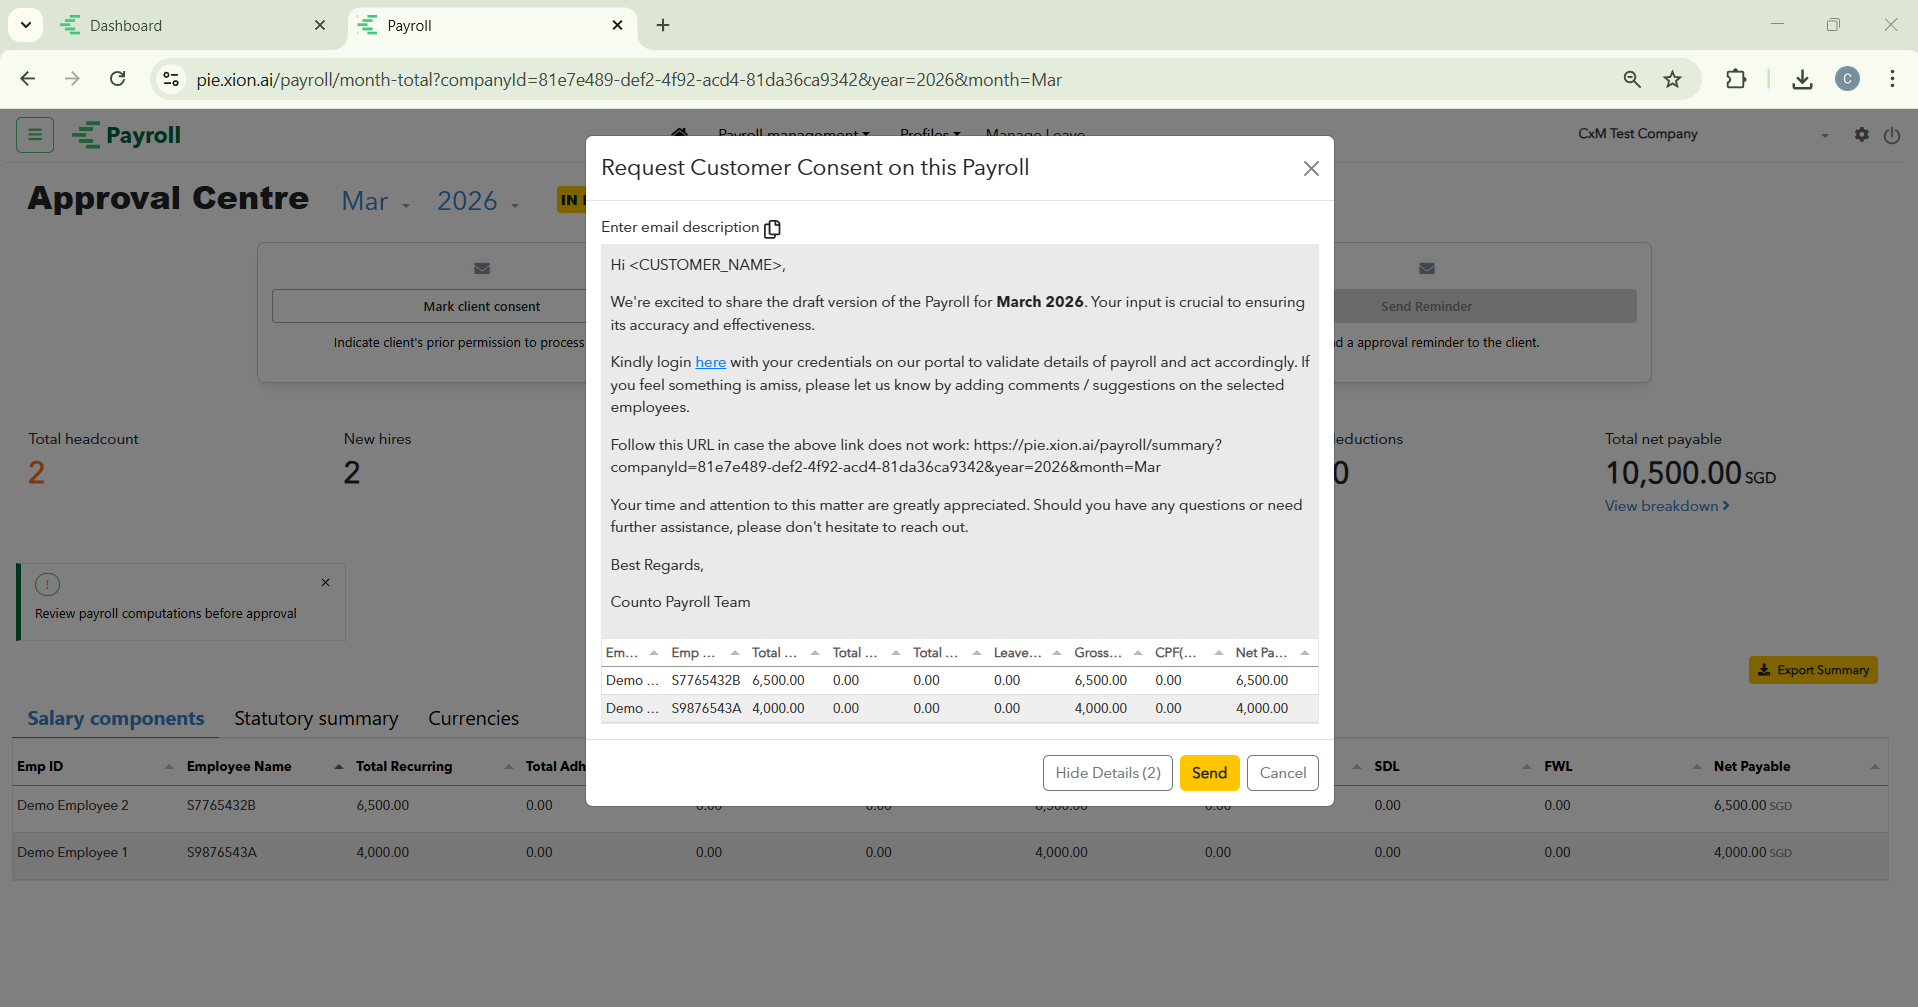
Requesting Digital Client Approval & Reminders
Triggers an automated notification for customer verification.
- Digital Request: Select “Get client approval” to send an email with actionable links and transparency details.
- Follow-Up: If pending, click the Send Reminder card to escalate the request and meet deadlines.